They call it mellow jello ……

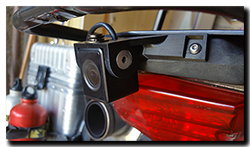
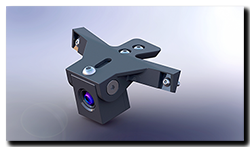
Aprilia Caponord ETV1000 Rally-Raid 3D printed INNOVV K1 camera mountNow that I’ve finished running the C5 camera on the rear, I figured it was finally time to get around to making a more permanent mount for the rear K1 camera, rather than the piece of scrap steel strip that has done the job so far. Although it felt quite rigid, the fact is the video image would suffer with a bit of ‘jello’ above 6,000rpm – an annoying vibration in the image that makes it look slightly wobbly!

Aprilia Caponord ETV1000 Rally-Raid INNOVV K1 rear camera 3D printed mountSo after a couple of test runs to make sure dimensions were ‘ish’, it was a 6 hour slog-athon until the Robox printer produced this little puppy. It uses the same two M5 bolts as the steel strip, along with two more M4 mounting points to add a little extra rigidity. The camera now mounts (like the front) using all three 1/4-20 UNC points. I’m happy to say the image is lovely and stable, no more wibbly-wobbly video when the throttle gets lovingly caressed!


INNOVV C5 – New remote head (snake) camera

Aprilia Caponord ETV1000 Rally-Raid INNOVV C5 camera system HD Wi-FiThe INNOVV website has just been updated with the details of the new C5 full-HD remote head camera system. I’ve been beta-testing a pre-production one for a few weeks now and have to say it’s a neat and waterproof system that has excellent image quality. Communication is via a smartphone app (Wi-Fi not Bluetooth) with outstanding ‘live-view’ ability.

It records in 1080@30fps and 720@30 & 60fps, has an internal battery for independent operation, park mode, an internal microphone and a socket for a remote microphone. The recording unit is small and lightweight and because it’s waterproof, can be mounted just about anywhere on a motorcycle.

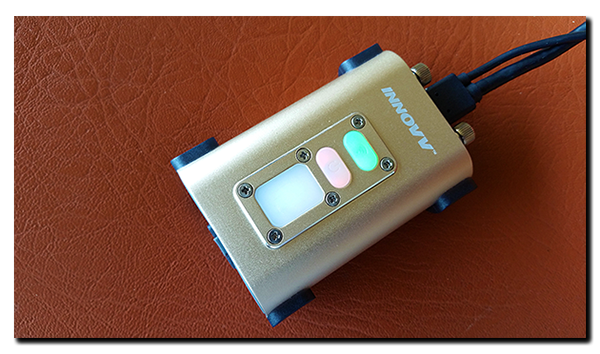
Anyway, enough for now ….. pop over to the INNOVV website for more information and later on, once I’m done beta testing I’ll post up a review. At the moment I’m especially keen to see how the C5 and K1 video quality compares – day or night – so the Capo’s getting plenty of use! Here is a picture of the recording unit ………… remember, this is  a PRE-production model, so the one for sale may look a little different, especially the final body colour.

Aprilia Caponord ETV1000 Rally-Raid INNOVV C5 remote head HD camera

Replacing the regulator – FH012 to FH008

Aprilia Caponord ETV1000 Rally-Raid Shindengen FH008 FH012 rectifier regulatorWhen it comes to electrics/electronics, we are all oh-so familiar with the fact that for the most part, things either work or don’t. But occasionally we get the mighty frustrating intermittent fault that dances between the two, then we also get the rare as hens teeth, slow failure. The one that takes an absolute age to travel from 100% working to finally broken, the kind of behaviour more befitting a mechanical part than electrical. Well that’s what I’ve just had!

Back in August of 2010 I fitted the Shindengen FH012 rectifier / regulator and I think it’s fair to say that it began its slow decline within a couple of years. The once steady 14.2V at 4,000rpm slowly ebbed away, a few millivolts here, a few millivolts there, year on year. By last autumn the charging circuit was giving me about 13.6V (idle) and 13.9V at motorway speeds.

After the incident with the stuck starter solenoid a couple of weeks ago, it seemed to shave off another 0.1-0.2V. On the return leg of our trip the Sparkbright battery monitor would dip from green (OK) to amber (not OK!) when the fan cut in …… such that I was turning the headlights off when we hit slow traffic in order to keep the thing charging.

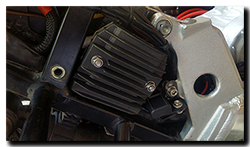
Each year I’d checked the alternator, wiring, connectors and battery and everything tested just fine …… so was it the regulator? Time would tell I figured! In January I bagged a brand new Shindengen FH008 but hadn’t got around (galloping laziness!) to trying it out. So before the main Aprilia Caponord ETV1000 Rally-Raid Shindengen FH012 rectifier regulatorpower/ground cables were replaced it seemed only fit and proper to test the new regulator, then decide what to do about sorting the charging system.
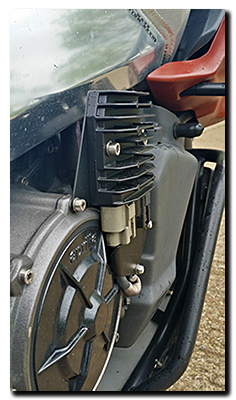
The quickest test was to simply crimp some spades on the FH008 leads and plug them directly into the Furukawa sockets on the charging loom and see what happened – 14.4V (idle) and 14.5V at 4,000rpm is what happened! Most definitely the regulator rather than the alternator or wiring then.

The old loom was removed and inspected – all still in excellent condition. Even so, new cables, connectors and sheathing were ordered from the original suppliers and in went the FH008, back in the original location. With the bike buttoned up and a healthy voltage at the battery, it just left a moment for my eye to linger on the right hand side of the bike. Somehow it looks odd, naked, empty without the old rec/reg in front of the clutch, I’ll get used to it I know, but for now I do miss it!

Measured voltage at battery:

Idle (lights / fan OFF)  – 14.4V  and at 4K – 14.5V

Idle (lights ON + fog lights ON) – 14.3V and at 4K – 14.4V

Idle (lights / fan ON) – 13.9V and at 4K – 14.2V

Idle(lights / fan / fog lights + everything else* ON) – 12.8V and at 4K – 13.6V

* GPS / Intercom / K1 Camera / Heated Grips (high) / Cruise Control / brake lights
 

3D printed speedo sensor case

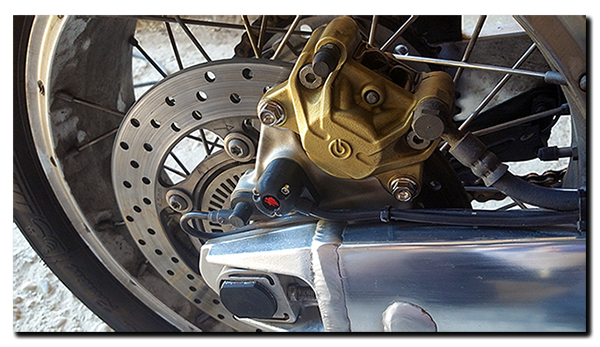
With all the other stuff going on recently, I almost forgot to mention that the run across the continent was a great make-or-break test for the 3D printed speedo sensor case! Works a treat and even if I say so myself, it looks way better than the original! 😀 

Aprilia Caponord ETV1000 Rally-Raid 3D printed speedo sensor case & Honeywell 1GP7005 sensor - replaces AP8124985Although it’s working brilliantly, I’ll modify the design of the cap to give a little extra room inside for wiring up …… and rotate the lion’s head so it’s horizontal,  ya can’t beat a bit of OCD!


Magnecor KV85 HT leads – Review

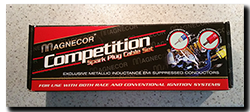
Aprilia Caponord ETV1000 Rally-Raid Magnecor KV85 2530 HT leadsThe modified HAAS coils have been on now for just over six months and 12,000 miles and everything is ticking along just fine. Even so, the Capo needs a few treats every now and again, so I thought a nice new set of HT leads might complement the new(ish!) coils. Besides, the old OEM HT leads have been on the bike for 14 years!

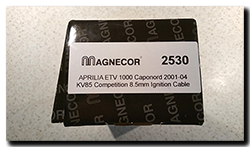
Aprilia Caponord ETV1000 Rally-Raid Magnecor KV85 2530 part number ignition cable HT leadSo a couple of weeks ago I placed an order with Race Spec Performance (UK) for a set of Magnecor KV85 (Part No: 2530) HT leads. These are made on an order-by-order basis and this means a bit of a wait if lots of orders are flooding in as the riding season gets underway. They make it very clear that the wait could be three to four weeks. I wasn’t in a rush, the wait would be fine. So I was pleasantly surprised when they rocked up on the doorstep in just over two weeks – excellent stuff!

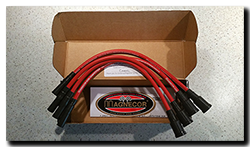
Aprilia Caponord ETV1000 Rally-Raid Magnecor KV85 2530 HT leads and sticker!Now these leads are designed to fit on the OEM Sagem/JCI coils but also fitted my modified HAAS coils with no issues at all. Well maybe one ……. the rubber boot is such a damn good fit it doesn’t allow the air out as the lead is pushed into place – so the trapped air just builds up pressure as the volume decreases. Then when you let go it oh-so gently pushes the lead back off again! The trick is to get it seated properly then slide something blunt up under the boot until hearing a ‘psstttt’ as the trapped air escapes …… NOW the lead is on securely!

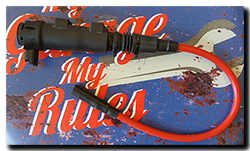
Aprilia Caponord ETV1000 Rally-Raid Magnecor KV85 2530 HT lead on HAAS modified coilOverall the caps are shorter than the OEM angled ones and even with 8.5mm diameter cables the fit and bend of the supple cables is perfect in all four mounting locations. Overall length is fine allowing cables to be routed comfortably without trying to lose excess cable or bend cables in an unreasonably tight radius. And of course, now the engine looks way more powerful with these bright red babies in place!

Would I buy them again? Yes. I’ll definitely pop a set on the other Raid, with one proviso – I’ll skip the international shipping as it’s a bit steep (£16 versus £4.99 shipped within the UK). Otherwise at £50.99 I’m happy enough given the quality of the product, excellent fit and 10 year limited warranty. So lets start clocking up the mileage and how well they last!


Running a relay race ……

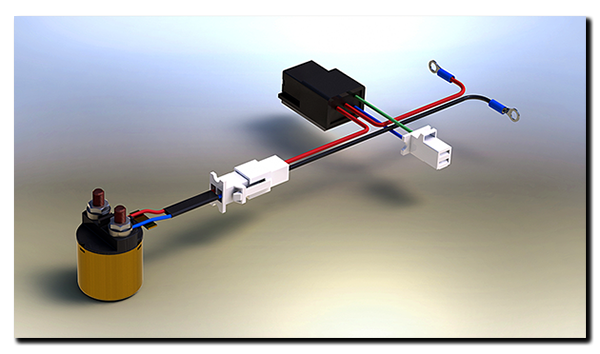
So what is this new-fangled modification to the starter circuit I alluded to in the last post? Well in a nutshell it’s a new loom (plug’n play) that goes between the starter solenoid and the main loom and also goes to the battery. Why?

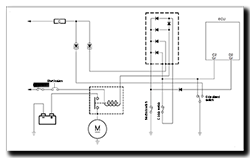
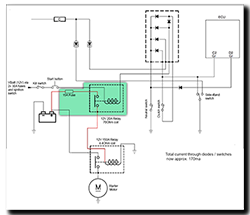
Aprilia Caponord ETV1000 Rally-Raid starter safety circuitAs mentioned previously, the starter solenoid draws about 2.9A when energised and that power goes from the battery via 2x 30A fuses, through the ignition switch on the headstock, then up to the fuse box in the cockpit and back to the starter solenoid. From here it goes via the diode block down to the engine (neutral switch) or side-stand switch (and back up into the loom) and all the way back to the handlebars (clutch switch) before finally making its way back to the battery via the main earth (Ground) cable – phew!!!! That’s a lot of cable and switches, never mind the diodes. OK the fact is, this circuit has worked trouble-free for 14 years, why mess with it? Because my gut instinct is that restricted power to the solenoid over time makes for low-speed actuation and eventually, burnt contacts …. that’s my theory anyway!

Aprilia Caponord ETV1000 Rally-Raid starter safety circuit - modifiedI figured an easy way to make sure the solenoid gets lashings of fresh volts/amps is to make the circuit between battery and starter solenoid shorter and simpler – so in goes a small loom with another relay, a 20A unit exactly the same as used for the headlights. This relay is now activated by the starter circuit and its contacts switch fused-battery power direct to/from the starter solenoid – short and sweet!

This relay has a coil resistance of 70Ω and so only draws 170ma @ 12V so no problem with starter buttons or switches getting a little resistive over time as (for example) a mere 0.5Ω difference when set against the 70Ω coil is only 0.7% difference compared against the 4.4Ω of the starter solenoid coil where a 0.5Ω difference equates to over 11% difference. Bottom line – the whole circuit has an easier time!

Aprilia Caponord ETV1000 Rally-Raid new loom and relay in starter circuit

The wiring is soldered direct to the relay spade connections and then slides into a 3D printed case and the case/contacts are encapsulated to keep the whole thing neat and tidy. Now the relay sits on top of the ECU held in place by a double-sided adhesive pad and the connectors tuck away neatly behind the battery.

If somewhere down the line it all turns belly-up, I only need to unplug the two connectors and reconnect the solenoid back to the main loom and it’s business as usual. So I figure I’ve got nothing to lose by giving it a whirl …… I’ll find out soon enough if it’s a thumbs-up or thumbs-down job!

John Walker (UK) – Power / Ground cable kit

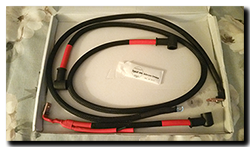
Aprilia Caponord ETV1000 Rally-Raid John Walker power ground earth cable kitOk, so with the old starter solenoid removed and a little starter-circuit modification simmering in the old mental stewing-pot, it was time to remove the OEM solenoid-starter cable, along with the Earth(Ground) cable and the battery-solenoid-30A-fuses cable and fit the new upgraded items from John Walker (UK).

Removing the ground and starter cable required the removal of the crash bars and side panels along with lowering the sump guard (remove front bolts and pivot on rear) to allow extra room to lower the oil tank and move the oil cooler – both to illicit a little more room to remove nuts/bolts more easily with the tools at hand. With the respective ends disconnected it was just a matter of a few tie-wraps to be removed and the old cables slid out of the frame. The battery-starter cable requires a bit more work (care?) as the two wires to the 30A fuses need to be cut. These will be spliced with the new ones on John’s loom, so I carefully pulled the black sleeving back as far as possible, matched the old/new looms together then cut the cables at what seemed the sensible place!

Now with all three cables clear of the bike I could lay them out and compare them to John’s replacements. Not only am I impressed by the workmanship of the new cables, but also that they are approximately 15mm longer than the old ones – not over the top and certainly not too short, just nice – a little extra flexibility when fitting. One thing I really like about John’s cables is the extra mounting point on the Positive and Negative lugs – very useful indeed.


After lunch, in they went with no drama at all. I spliced the 30A cables together with crimp/solder joints that are then sheathed with heatshrink. John doesn’t provide the splices, but he does supply the heatshrink! With that done, the old black sleeve can be wiggled back up into place and the whole thing then looks very ‘OME’! Running the cables down the frame is easy enough as they’re quite flexible – surprising as they’re almost (if not more!) than twice the diameter of the old cables …… this does make things a little tight getting the cables in place either side of the battery, but a bit of patience and a wiggle here and there gets them seated comfortably.

Before tie-wrapping everything and refitting panels and guards it just left the little matter of trying it out! So ignition on …. no pop, bang or fire (good start!) then thumb the starter button and ………….wow! What a difference, the engine spins like a hyperactive puppy spotting its tail for the first time  – fantastic!  Putting the multimeter on the battery (fully charged), then cranking the motor over showed a minimum voltage (momentary as the starter takes the in-rush current) of about 10.8V. That’s way better than it used to be. Steady cranking voltage rises back up to about 11.8V…….. and as mentioned cranking speed is very impressive now!

With that done, it was time to button the rest of the bike back together and try it all out on the road. What a difference a week makes eh? From ‘Dear dog please start, please start …. oh and starter please disengage, pppplease disengage’ to ‘Oi you, call that a starter? …… Listen in awe my wayward friend because THIS is a starter!’

In the end did I really need them? Well truthfully, no the originals are fine, no corrosion and the insulation is intact, but at the time of ordering I really didn’t know one way or the other. Yes I could have made my own, but sometimes like having a meal served to you rather than cooking yourself, it’s nice to buy in the finished item ready to fit. Besides, I just wanted upgraded replacements not some fancy parts made from gold wire finer than badger bum-fluff with diamond encrusted unobtanium connections! In the end I’m glad I did buy them ….. the starting is much more energetic now and that’s worth its weight in gold right there!

So if you are in any doubt at all about your wiring, then drop John a line and I’m sure you  will also be as pleased as I am with the results. Price including postage in the UK (May 2017) is £70.00GBP