New sprocket and battery

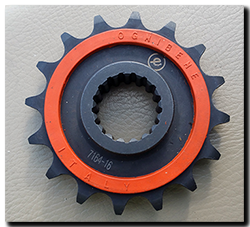
Aprilia Caponord ETV1000 Rally-Raid Ognibene 'silent' front sprocket 7164-16It was heaving with rain and the Capo’s air-temp readout on the dashboard struggled to make 3°C as I rolled off the Dover ferry at just past midnight, welcome back to wintery England! The worn front sprocket I hadn’t replaced before starting the journey was now noticeably noisier with an extra 1,350 miles on it even though I’d ramped up the Scottoiler to keep everything well lubricated in the face of such shitty weather. Overall a good run up, marred only by the small rip in the riders saddle caused by the zip on my Halvarssons trousers when throwing my leg over the bike …… I’m sure this damn bike is getting taller with age! As I left Dover, I flicked the heated grips on and hit the M20 thinking that this is about as bad as it gets – then the sleet and hail started!
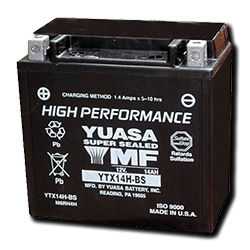
Aprilia Caponord ETV1000 Rally-Raid Yuasa YTX14H-BS battery14 days later, as I rolled back up the ramp onto the same boat, it was all quite different – a warm, bright morning with the promise of a nice day ahead and the Capo running sweetly with a new Ognibene 7164-16 sprocket. I’d also treated it to a replacement Yuasa YTX14H-BS battery* as the old one was beginning to show warning signs – slightly lower standing voltage and low voltage while cranking. I’d arrived at Dover a bit early and didn’t realise they’d put me on an earlier sailing (fine in principle) but it was one of the boats I hate, with a long curved (wet) ramp up onto the car deck….. never nice on a heavily loaded Capo.

One of the perks of a bike is that folks just wander over for a chat, be it a fuel station in Switzerland or a bike park in Broad Street, Oxford and 99% of the time the experience is enriching …… but as I rode off that damn ferry I could have happily kicked the two wheels from under the overbearing, opinionated plonker who’d happily eaten up 5 minutes of my life telling me everything that was wrong with my bike and how wonderful his was – then he promptly rode off in the ‘trucks only’ lane!

The return leg was as trouble-free as the first, with the Capo rolling into the barn with 97,145 miles on the odometer. Only a near miss with a kamikaze gull which almost took out the windscreen being memorable – that and Swiss road works!

The replacement Ognibene sprocket certainly lives up to its ‘silent’ name. It was noticeably quieter even just spinning the back wheel while on the main-stand; let’s see how much life I get out of it compared to the usual Renthal sprocket I use (avg. 15K miles). It looks well made and the tooth profile is very similar to the Renthal, but only time will tell. Purchased in the UK from: biketorqueracing.co.uk for £27 inc VAT & P&P.

*Special thanks to Jim at Abbey Motorcycle Instructors for getting the YTX14H-BS battery at short notice – you’re a star fella!  😀 

Roll camera …….

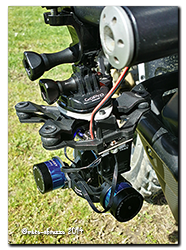
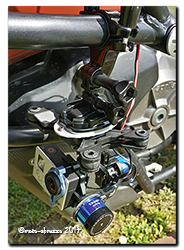
gimbalAprilia Caponord ETV1000 Rally-Raid Tarot 2D gimbal mounted to left-hand crash bar

Pronunciation: /ˈdʒɪmb(ə)l

Noun:    A device for keeping an instrument such as a compass or chronometer horizontal in a moving vessel or aircraft, typically consisting of rings pivoted at right angles.

Origin:   Late 16th century (used in the plural denoting connecting parts in machinery): variant of earlier gimmal, itself a variant of late Middle English gemel ‘twin, hinge, finger ring which can be divided into two rings’, from Old French gemel ‘twin’, from Latin gemellus, diminutive of geminus.

Aprilia Caponord ETV1000 Rally-Raid Tarot 2D gimbal & GoPro Hero 3+ BlackAh …. don’t ya just love a bit of ed-u-cation! Yes folks, the word of today is ‘gimbal’ and after a bit of thought yesterday morning, I got mine out and played with it. 😀

So what does this gimbal-thingy do then? Well, in a nutshell, it holds a GoPro camera perfectly steady in pitch and roll while the mounting point is moving around. These things are intended for use on drones, those multi-rotor helicopters that you see flying around, but one look and the old grey matter kicked in …… wouldn’t that be fun on a bike!

And that brings me to yesterday morning, a half-hour blitz in the barn had a mounting plate made and another half-hour had the whole thing fitted, wired up and tested on the left hand crash-bar – which isn’t too bad given that the gimbal has sat in its box since delivery two months ago.

At lunch time the start-up routine was well under way …… pat down the pockets ‘testicles, spectacles, wallet’n watch’check, key-on and wait for the dash to finish its self-test – check, fire up the motor and before the gloves go on – camera to record! And this m’dear Smurfletts is an edited video of ‘Tarot Gimbal Test 1’ – I like the sound the front disks make at the end of the video!

Now the keen eyed among you will notice that in bends – especially constant radius bends – the camera begins to roll in the same direction, and this had me stumped for a while. I thought it might just be settings in software, but not being sure I decided to sleep on it.

In the end I think it’s to do with the fact that ‘verticle’ changes when the bike is in equilibrium in a turn (the whole ‘leaning’ thing) and this tricks the sensor into believing that ‘up’ and ‘down’ have moved – so the camera begins to tilt into the turn. Anyway I hope you enjoyed watching some or all of the video as much as I did filming it!

Reading the current situation

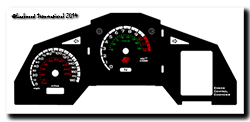
©Lockwood International 2014 - UK Futura inlay with voltmeter, L&R indicators and sidestand lightWith the new inlay nearly complete and sufficient testing of the modified dashboard to prove its reliability in day-to-day use, it’s now time to move on and complete the next stage of miniaturising the circuit board. The big grey box and wiring loom holding the Arduino Uno stays for the time being, but now it will house the smaller circuit board and Arduino Nano. Once thoroughly tested, the box and loom will disappear as the board finally gets mounted inside the case.

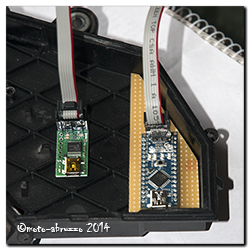
Aduino Nano and Pololu 1300 programmerThis time around the microcontroller will be programmed differently to speed up the start time and free up more memory space. For that I’m using a Pololu 1300 programming device ….. Something I’ve never done before, let’s hope I don’t fry it! If all goes well, that then leaves me an Arduino Uno spare and it would be rude not to find another Caponord related little job for it! So here’s the next project…..

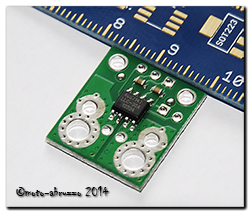
I’ll be installing the Uno and three of these naughty little puppies along with and LCD screen into the redundant grey case. Self-powered, it will measure current flow through the 30A rec/reg fuse and the two main 30A fuses simultaneously. The screen will Pololu ACS714then display measured and calculated data as well as storing the data onto an SD card mounted into the display. So it’ll be a data-logger as well!

The idea is to have the three ACS714 devices, wiring loom and a single multi-pole connector under the saddle. The unit will then simply plug into the connector and merrily measure away. A decent battery and memory card should make data logging for 2hrs + pretty straight forward. So watch this space ………


Shorai Power – Pt2

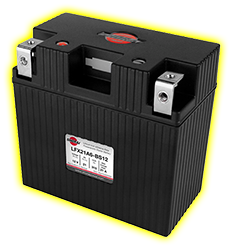
Shorai-LFX21A6-BS12Just a quick post to update on Shorai batteries. As you may remember, I tried a Shorai LFX18A1-BS12 in the Capo and had mixed results. Mixed enough to swap back to a standard battery anyway! In my case, the battery became unpredictable below 12-14c, above that the bike started every time, below that …….. well let’s just say it could take a while!

Anyway, it appears that Shorai have changed the battery specified for the Caponord/Futura to the higher capacity LFX21A6-BS12. They are available via EBay(UK) at about £135+ with postage bringing it to an eye watering sum in the region of £190 … then I’m sure Customs & Excise will want a slice as well!

Shorai-table

After last time, I think I’ll give it a pass. The chunky high-capacity lead-acid YTX14 is doing a sterling job for less than half the price, but if it’s your idea of under-saddle bling then go and fill your boots by all means. 😀

My very own total Eclipse…..

When I got back from the UK just after Christmas I set about installing the new Eclipse-8 battery monitor on the Capo. You may remember from a previous post that I fitted a 5mm LED battery monitor from Sparkbright a few month ago and loved it (previous post here). In December Andrew very kindly sent me an Eclipse-8 as a sample so I could evaluate it – thanks again Andrew!

Aprilia Caponord ETV1000 Rally-Raid - Sparkbright multi-state auto dimmng battery monitor

What’s the difference between them? Well firstly, it’s only available as an 8mm or 10mm unit, no 5mm version as yet. Secondly – and this is the kicker – it’s also auto-dimming, changing it’s brightness depending on the prevailing light conditions, without using a separate photo-sensor to do it. Here’s a Sparkbright video of it in action.


So does it work? Short answer – yes, VERY well! I installed it in the same place I’d had the 5mm unit, just drilling the hole a little bigger to accommodate it. The Eclipse-8 has the circuit board attached directly to the LED, so only two wires and no circuit board in the loom to find a home for. The board is very compact and once the LED is inserted into the mounting clip, it is hardly visible. The length of wire supplied was ample to attach to the battery and earth points I chose in the bikes wiring.

The Caponord was bolted back together and fired up, the LED quickly changing from orange to green as the rec/reg did its thing and the voltage rose in the loom. In the strong daylight of the barn the LED glowed brightly, but put a hand over it and it very quickly dropped its output in response. All well and good, but would it be effective when put to use in the real world?

Well I’ve covered about 700 miles through January and early February in all weathers and lighting conditions and the Eclipse-8 has certainly lived up to my expectations. For example, here along the Adriatic, the A14 Autostrada weaves its way along the cost through numerous dimly lit tunnels. Jumping from bright sunlight to twilight and back gives the unit a good workout and each and every time it switches very rapidly – I’m guessing in a few milliseconds, but certainly fast. At night-time the unit operates primarily at it lowest output and is never distracting, sometimes increasing in  brightness as I pass under a sequence of street lamps just to let me know it’s still doing its thing!

So are there any downsides? Yes, but not as a result of anything done by Sparkbright. 8mm LED clips it seems are only available in convex and not concave style. Great for increasing the angle of visibility ( not important from the saddle) but also increasing the susceptibility of the LED to being ‘washed-out’ by direct sunlight and becoming difficult to see. As it is, there is a simple partial fix. Drop the LED further down the clip and glue it in place. I dropped the LED so its top was flush with the clip – a couple of millimetres I guess and this has made a world of difference. Now only the most direct sunlight affects readability and I can live with that!

Bottom line, the Eclipse-8 is a simple all-weather battery monitor for day/night use on a motorcycle – no more, no less. And it is doing the job perfectly.

Contact details  E-mail: [email protected]    or  Tel: 0141 557 5277

Other than my initial purchase of the 5mm unit and sample Eclipse-8 supplied by Sparkbright, I have no affiliation to them. I’m simply offering my own review of products I believe to be useful and cost effective. It’s my unbiased opinion, if you buy one and don’t like it – tough. Don’t come running to me! Is that a disclaimer?

Low voltage battery warning LED

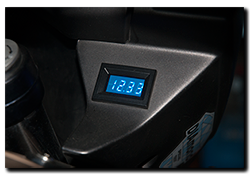
Aprilia Caponord ETV1000 Rally-Raid - voltmeter in right hand fairingI’ve already got a voltmeter in the right hand fairing and although I wouldn’t be without it, I have to say it suffers from a  couple of drawbacks.
  • Poor readability in very bright daylight (Blue LED display)
  • Low down in the fairing, so requires eyes to be diverted from the road ahead.
  • I also have to lean forward a little to see over the hand-guard/brake master cylinder.

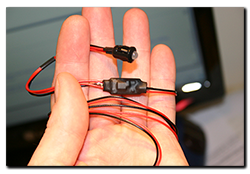
Aprilia Caponord ETV1000 Rally-Raid - Sparkbright battery monitorSo I decided I wanted something more in my eye-line, something that simply displays as a go/no-go indicator, something simple; and it looks like SparkBright have just the solution. A neat encapsulated circuit feeding a Tri-state LED that will display a different colour depending on the system voltage. Now my peripheral vision should quickly spot a change in the Caponord system and give me ample time to take action. Here’s a table that explains the various states of the LED at different voltages.

 The package can be supplied with LED sizes of 5mm/8mm or a whopping 10mm. I chose the 5mm as it will match the one I already have in place for the Autoswitch AS7 (fog lights).  Before ordering I had a couple of questions and sent off a quick email – bear in mind this was a Sunday morning. Before I could even read through the Sunday funnies, Andrew Ferguson owner and guiding light behind SparkBright had replied – now that’s dedication! the bottom line – It does what I want and it’s waterproof, ideal for motorcycle use then!

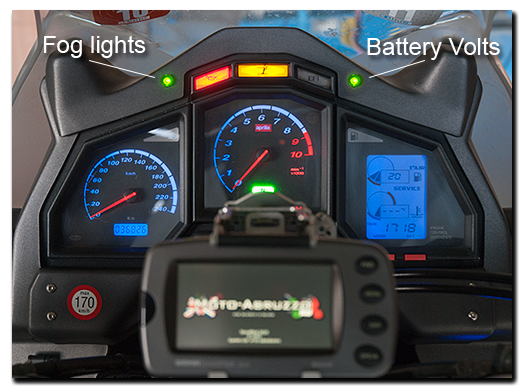
Anyway, long story short, Andrew agreed to make a change to the mounting clip for the LED (at no extra cost – see gallery below for clip differences) and also told me of an exciting new development just around the corner for this product; auto-dimming built right into the LED for the 8mm and 10mm options. Sadly it won’t be available on the 5mm version for some time to come. However, this bit of technology is something the Capo is aching for on the Autoswitch Red/Green LED (fog lights) I already have fitted. By day it’s fantastic, but by night it’s just a little too bright.

Aprilia Caponord ETV1000 Rally-Raid - dashboard with AS7 Autoswitch LED and Sparkbright battery monitor

LED symmetry. Hopefully !!

So I’ll wait for Andrew to send this unit and if it does what I need of it, I’ll no doubt upgrade to the 8mm auto-dimming version and retro-fit this one to my tractor ….. about time I dragged it screaming into the 21st century. And maybe if I ask nicely, he may be able to help me upgrade the Autoswitch LED as well!

You can contact Andrew direct at [email protected] or bookmark www.sparkbright.co.uk (website should be up and running by the last week of October). You’ll also find them on Ebay, just search for “12v battery warning light”. The cost? £11.80 including P&P (UK) as of 21st October 2012.

  I’ll finish by saying I have no affiliation or involvement with Andrew other than as a customer – I just like the product!

Bye bye Shorai

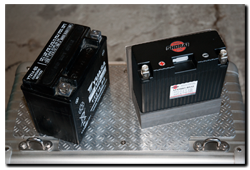
Aprilia Caponord ETV1000 Rally-Raid - Shorai and Yuasa batteriesLet me start by saying that the Shorai is NOT a bad battery, it’s just not the right battery it seems for a large capacity V-twin. Yesterday, after persisting with it for several months, I finally admitted defeat – one last baulked start tipped me over the edge. I wanted, no, yearned for the comfort of the old and heavy lead-acid battery and its reliable starts-every-time performance.

So is it a faulty battery then?

The simple answer is no, but it is a battery that seems to be very temperature sensitive. With ambient temperatures over 15c I had no problems, but now with the temperatures waving between 3 and 15c it’s a different story. Stalled starter, slow starts and engine stalling several times before it runs reliably – all after a 5 minute wait while endeavoring to ‘wake’ the battery by burning off some current with the lights on (Shorai recommendation).

The battery was only ever charged on the bike or with the Shorai BMS-01 charger and over the last week or so I conducted a few tests on it. In a nutshell, this is a 6AHr battery that performs like an 18AHr – when warm. In truth it seems to perform more and more like the 6AHr battery it is as the temperature drops, the bottom line is that its internal resistance is very variable and removes any advantage the battery has at low temperatures.

Frankly it’s all too fiddly and unreliable. Of course I can only comment on one battery on one large CC Aprilia, it may be far more successful running  smaller or 3/4 cylinder motors. My guess is that this battery will find its niche in the enduro/track-day sector and not necessarily be suitable in its current form for four-season street riders.

I’m really disappointed this didn’t work out but pleased that Jim at AMI has taken everything I’ve said on board and is even now in constant communication with Shorai to try to improve the product. Let’s hope a Mk3 version is just around the corner.

Shorai batteries now in the UK

It’s a lovely warm afternoon and I’m stood holding a little lightweight box with two terminals …. It’s a fake, a toy, it has to be. This simply cannot be a real battery!

Some sleazebag once tried flogging me a wooden camcorder in bubble wrap at a French fuel station, luckily I rumbled him. I’m starting to have a sinking feeling, maybe I’ve been stitched up like a kipper this time. No way is this a battery, no siree Bob!

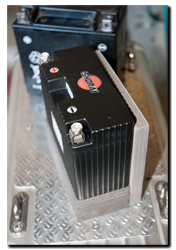
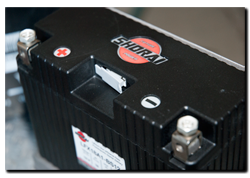
The thing is though, the Shorai LFX18A1-BS12* is indeed real, and yes, it does only weigh 0.96Kg against the portly 4.6Kg that the YTX14 tips the scales at. It can weigh as little as a budgies fart and pack more punch than a high power version of the standard battery because of the lithium-Iron technology it uses, frankly it’s way over my head but if it works, I’m all for it. Here’s the bullet points the technology is supposed to offer:-

  • Fraction of the weight of traditional batteries
  • Faster cranking for better starting
  • Faster charging
  • No lead or explosive gasses
  • Twice the service life

 What’s in the box? Firstly, a neat carbon composite battery with a measured floating voltage of 13.36v – that’s about 90% charged, exactly what the website says it should be. The box also contains an instruction leaflet, stickers (ooo!!) and lots of adhesive backed foam strips to pad out the little darling to fit your battery bay nice and snug like. It only took a few minutes to match up the foam to pad out the Shorai to YTX14 dimensions, then ease it into the battery bay and begin reconnecting the cables. One nice touch is that all the terminal nuts have a piece of foam pre-attached to hold them in place and hence, make bolting the wires in much easier … a simple thing, but much appreciated!

So the proof of the pudding, the first start. Nothing much to say really …. It started up nice and strong like it had always been there, absolutely amazing! It settled down to a normal 14.2v charge at idle and I left it for about 10 minutes and then turned the bike off. I went back the next morning and measured the floating voltage – 14.04v …… about 95% charged! So even in the few minutes I ran the bike, it had taken charge and dropped nothing overnight. This is looking promising!

The YTX14 that came out is about 3 years old and a quality make, but has started to show signs of distress over the past few weeks. So I think it fair to consider it life-expired and so use its cost/life as the yardstick with which to measure the Shorai unit.

This then is day 1, I’ll write periodically over the coming months about its performance, especially on balance with the YTX14 it has replaced. Hopefully in the next few weeks I should be getting the Shorai SHO-BMS01 charger to use directly into the batteries own port and then I’ll see how it fairs in ‘storage mode’ for the winter period.

The Caponord (all years) can take either the standard fitment LFX14A1-BS12 or the higher powered LFX18A1-BS12, they are both the same case size.

UPDATE 2014

Shorai have now replaced the original battery model for the Caponord/Futura with the LFX21A6-BS12.