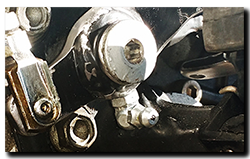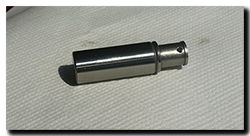
Cam chain tensioner – part 2

Aprilia Caponord ETV1000 Rally Raid cam chain tensioner AP0236252Sorting the rear tensioner yesterday took all of 20 minutes, but I knew that the front was going to be a different kettle of fish altogether because of the coolant pipes. No worries, I thought – a good excuse to change out the coolant as well.

So in I went and oh what fun it was! Off with the crash bars, side panels and sump guard, move the coolant bottle and release the radiator bottom hose and drain the system – so far, so good. Remove the airbox and release the clamps holding the throttle bodies in the inlet rubbers ….. hmmmm – looks like they’ve got a few deep cracks I’m thinking.
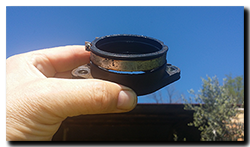
Aprilia Caponord ETV1000 Rally Raid inlet manifold rubber AP0267150Take off the rest of the hoses, cables and electrical connectors, now a gentle pull and twist to release the throttle bodies and ……………… oops! I think the cracks in that rubber were a tad deeper than first thought and a touch beyond repairing with a splash of rubberised goo. Luckily I’ve a spare pair to hand from the l’Aquila stash. However, this momentry inconvenience isn’t the task of the day ….. so onward once more. Hoses, cables anything and everything moved so I could at last get to the two clamps holding the ‘Y’ hose in place  – then finally the goal was in sight, the pot at the end of the rainbow …. the front cam chain tensioner!
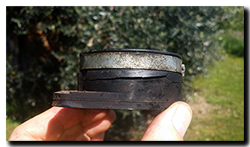
Aprilia Capononrd ETV1000 Rally Raid inlet manifold rubber AP0267150With a heave, a grunt and too many fingers trying to get into too small a space I managed to retrieve the tensioner from its hide-away, gave it a squeeze and ……… it was fine, solid as a rock! Never mind, a flush to clean out any debris and a refill with clean oil never hurt.

Then it was rebuild time. The tensioner’s in place and the cap torqued down to 30Nm with a swanky new copper washer. The super-shiny inlet rubbers torque down at 19Nm and the rest of course is then a reversal of strip-down – with the intention of NOT ending up with any washers, screws or clips left over! And so with the sun ready to slip behind the mountains it was test-time. Glad to say she fired up first hit of the button and sounded so much smoother, funny how you get used to little noises and ‘character’ over time – now she’s idling smooth as can be, a tweak on the throttle body sync screw had the manometer within a couple of mills AND it stayed that way when the motor was reved, something it didn’t do last week. So I’m guessing the cracked inlet rubbers were an issue after all! 😳 So that’s it for today, other than updating the Capo’s history spreadsheet ….. the Capo has now done a pinch over 74,400 miles and other than a couple of valve shims and plugs, it’s the only work the motor has ever needed.

Next stop – tyres, chain and sprockets. 😯

All things being equal

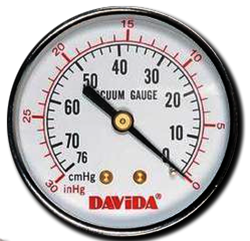
gaugeIt’s been a while since the Capo was serviced and one job has still remained outstanding – in fact it has been ‘outstandingly’ outstanding for the past few services since I lost my old Davida vacuum gauge set! Yes, the perplexing throttle-body synchronisation*. Truth be told, the Capo has been running just fine for ages, but it never hurts to check it once in a blue moon!

I wasn’t about to lay out a fair-sized wad of cash for another (excellent) Davida set or buy a Carbtune II again in a hurry, so I thought it was about time to go the Poundland route and build my own manometer for a few pennies and with a bit of scrap kicking around the barn. The nice thing is that there’s a mountain of info on the internet about how to do this yourself, just pick what suits your needs best and modify for your own bike.

So what do you need? Well just a sturdy board, door or wall on which to mount the kit, a length of 6mmID clear tube, a suitable liquid and a way to connect it to the bike. That’s the nut’s and bolts of it, but a simple addition will make the setup ‘user friendly’ as you’ll see later. Although the tube is straight forward, the liquid is a bit more controversial …. Some say coloured water, some 2 stroke oil, some EP90 gearbox oil …… you get the idea! I chose some good old Scottoil Blue. Why? Because it was on hand, because it is basically ATF and has a fairly low viscosity, because IF it gets ingested by the motor it won’t cause any damage and because it turns out (purely by chance!) to work REALLY well!

*Workshop manual page 4-18-00

Now for a bit of physics ……

OU-1970's-styleFirst off, what kind of vacuum are we looking at from the Capo motor? From measurements, it looks to be somewhere in the range of 22-24cmHg (based on an erratic Carbtune II) per cylinder measured against atmospheric pressure …. Now that’s not much for a mercury manometer – barely the length of a sheet of A4 paper. A nice compact manometer then, except that unfortunately mercury is almost impossible to get hold of because it’s deemed way too dangerous for us potato-heads to use safely. So what does this mean in terms of manometer height if we use liquids of a lower density? Well…..
Mercury 22-24cm (Ideal!)
Water 299 – 326cm (free-ish and known density but hard to see at a distance)
Light oil 345 – 376cm (coloured – easy to read, density varies on type of oil)

20150413_manometerSo here’s our first problem …… measuring each cylinder individually will require a water manometer at least 3.5m tall and an oil one even taller, clearly not exactly practical or compact! The solution? Well the Capo comes to the rescue …..

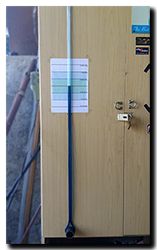
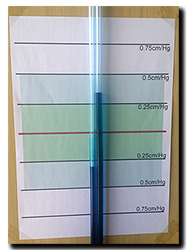
Being a twin, the Capo simply needs a differential setup – that is, measure both cylinders against each other, not against atmospheric pressure. In theory they should cancel each other out if perfectly balanced and so the manometer would read zero. Any imbalance will have the liquid slightly higher in one tube and lower in the other …… so by measuring differential pressure we don’t need a manometer anywhere near as tall, but remember, even small differences in pressure will make big changes in liquid level, so the manometer still needs to be quite tall. In the end I built mine on an old wardrobe door – a total height of  155cm, with about 60cc of Scottoil filling about 40% of this. With hindsight, it’s about twice as tall as it needs to be, but hey you live and learn!

Putting it to use …..

20150413_monoWith the Capo nicely warmed up after a little ride, the tank lifted and the manometer plugged into the Capo’s vacuum ports, she was fired up again. The oil level in the tubes drifted apart and settled at approx. 9.5cm (equivalent to approx. 0.6cmHg), a gentle nudge of the screw for the front cylinder on the throttle body saw the level drop to just below 2-2.5cm (approx. 0.15cmHg) – comfortably within the 0.5cmHg accuracy quoted by Synchromate and oodles better than the 2cmHg per division of the Davida gauges. So that’s a £2 rig versus the commercial £70/£170 rigs ……..

….. and one other thing, this was without ANY damping (valve/jet/cotton wool etc.) in the line because the Scottoil works perfectly well as its own damper. It pulses gently by no more than about 2-3mm in the tube but is viscous enough to respond reasonably quickly to changes in vacuum. Oh and that addition I mentioned …… simply two small sealed containers greater than the volume of oil in the manometer, one placed in each line. Now if either vacuum line should come adrift the container on that line acts as a trap to capture the oil before it can get swallowed up by the motor!

Arduino motorcycle vacuum gaugeSo ultimately it’s cheap, self calibrating with excellent resolution around the balance point ….. but not exactly portable! And so in typical MA fashion, the mind wanders off to thoughts of a compact electronic version. Powered by the bike, self calibrating – kind of like this one!

Auel Wax Fix soft ….. bye bye bug splat!

Take that Spongebob!In the flush of youth I was the same as most fledgling bikers I guess, spending endless hours cleaning my bike with mates over a cold beer and loud music  ….. of course all that changed when riding a bike became a job five or six days a week. Washing the bike turned into a chore, something to be endured not enjoyed through endless ice-cold winter weeks, honed into a slick process to illicit the most benefit from the least input.
A working bike, one you put food on the table with ….. has to be as reliable and resistant to the degradation by the elements as is possible. To that end I’ve lived by the mantra of checking a bike over daily ….. battery, bearings, chain, electrics, suspension, steering, tyres  etc …. there are numerous mnemonics kicking around to work with. Washing the bike was just as much a way of helping do those checks as it was presenting a clean bike to the world at large and sailing under the radar of bored Metropolitan Police officers, whose sole existence appeared to center around the idea that any dirty motorbike was undoubtably an illegal one.

Yes it’s fair to say that cleaning a bike for me has long since lost any interest, it is simply a means to an end …. jetwash the main muck (avoid bearings and seals), hose pipe and Aprilia Caponord ETV1000 Rally-Raid & Auel Wax Fix softbucket of sudsy-wudsy car shampoo and rinse off. Air line some bits and chamois the others ….. then coat liberally with ACF50, either sprayed directly or wiped on with a soft clean cloth. Total time, less than 30 mins or I’m slacking. This method has stood me in good stead for many a year – and let’s face it, snake-oil cleaners come and go, just like gimmicky brushes or wonder sponges.

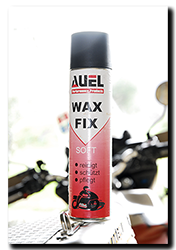
That of course was until Manuel from Motrag stuck his oar in! He’s tried for ages to convince me about this amazing product he uses – in fact he says he hasn’t actually washed his bike since Moses was a little boy. Instead he uses ‘Auel Wax Fix Soft’ – wipe on, wipe off ( no silly Karate Kid impersonations please)….. and when he recently sent some dashboards for repair, he snuck a can in the box to try out. Hmmmmmm.

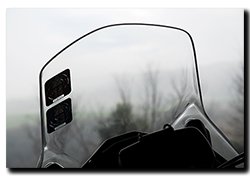
So yesterday, I took a notion into my old numb-skull to give it a go on the Capo windscreen. Spray on, wait 30 seconds, wipe off ….and …………….. JEEZ! This stuff actually works!!!

Residual bug splat going back years just wiped away – over 95% of it. The other 5% just took a second spray/wipe. So out came the hex-key, off with the windscreen and I did the inside as well, no smears, no waxy (forget the misleading name on the can) residue, noAprilia Caponord ETV1000 Rally-Raid windscreen apparent static build up either. Just one unbelievably clean windscreen, so much so, that I can see the stone chip damage that once hid among all manner of splattered bug guts. Afterwards I tried it on mirrors, hand guards and panniers …. anywhere buggy-bits accumulate. excellent results every time.

Manuel tells me he’s been using this stuff since 1996 and I can see why. No, it won’t re-write how I clean my bike, but I think an extra 5 minutes tagged on using Wax Fix isn’t going to break the time-bank either. The downside seems to be getting hold of it ….. Ebay has a couple of suppliers (approx €10-€13 a can) – not cheap, but Manuel says a can does go a long way when you get used to using it. Hopefully he’ll be able to supply it through Motrag in the future.

Meanwhile all these smooth and polished surfaces must be worth an extra 5mph! 😀

TuneECU (Android) update to V2.2

TuneECU Andriod app V2.2 - Aprilia Caponord ETV1000 Rally-Raid Sagem ECUStop the Bus (or your Caponord) and grab yer smartphones again, TuneECU has just been updated to V2.2 ………… worthy of mentioning? Oh Yes! Alaine has addressed the poor connection (cable) AND the screen freezing if you swiped it when logging issue. Now TuneECU connects to the Capo quick as you like, just as it used to. I tried it numerous times and never once had a problem – fantastic! All-in-all a positive step forward …..
Back in 1921 …………

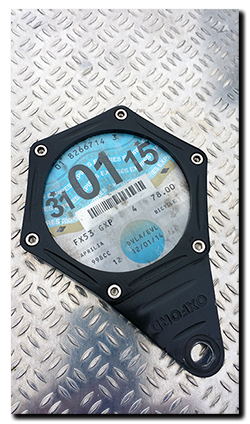
Aprilia Caponord ETV1000 Rally-Raid tax disk holder removed after abolition of paper disks on 01/10/2014 by HM Government (UK).While the weather’s been holding up, I decided to wheel the Capo out and give it a wash. As I soaped, sponged and lathered my way down the left hand side something caught my eye and a hollow feeling opened up in the pit of my stomach ……. something broken or rusty? No, worse – the bloody (road) tax needed renewing!
In October 2014 after 93 years or so the tax disk was resigned to history, unlike the annual payment! So I went online, did the deed – and felt like Dick Turpin had just shoved a pair of musket barrels up my nostrils and fleeced every pocket for cash – now we don’t even get a humble little disk to display anymore, just an email acknowledgement that we’ve been rolled by yours truly, HM Government.

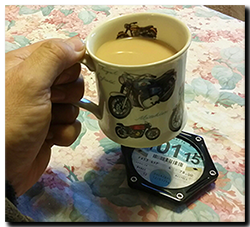
So now what do I do with the 6-bolt Über-aerodynamic MotoGP/NASA inspired titanium tax disk holder eh!! 👿 OK, it’s an aluminium carbuncle really, and they’ll be coming to a car-boot sale near you soon enough (by the thousands!). Well I’ve decided to cut the ‘ear’ bit off and use it in the workshop as a coaster for a tea mug! 😀

making a tax disk holder into a coaster

TuneECU (Android) update to V2.1

TuneECU Andriod app V2.1 - Aprilia Caponord ETV1000 Rally-Raid Sagem ECUTuneECU app for the Android was updated again  last week to V2.1 – Google store says bug fixes and adding the Ducati 848/1098 & 1198 are the reason. Time then to give it a whirl on the old Capo and see if the experience has improved from last time. So with the sun shining brightly and making the barn a nice cosey sun trap to work in, and the road devoid of the sound of machinery and promised workmen, I rummaged around for the cables charged the phone and set about pulling the seats off.

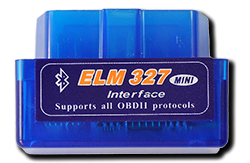
Bluetooth (ELM327 V1.5)

elm327Connection was the same as before and data is still slow to update – tacho and TPS seem quick enough but the side-stand takes a whopping 5 seconds to change state. Still no side-stand or Fan status indicator like the PC version. The datalog facility worked, but seems to have a bug, more on this later.
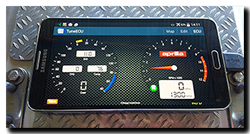
Cable (Samsung Note 3)

Connection is now very poor, taking 2, 3 or 4 attempts to get it to connect. Each time I get a flashing red indicator, sometimes going orange then back to red followed by a dialog box telling me to recycle the ignition. The connection worked fine with version 1 and 2 so something has definitely happened in the latest release. Oh and the Samsung was tried with two cables and both cables tried with old faithful – the Asus EEPC901 and they worked just fine with the PC version. Once connected however, the data seems to be displayed quicker than Bluetooth and the connection was stable even when starting the engine.

Datalog

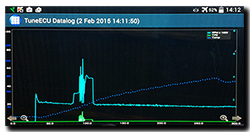
TuneECU app datalog via cable not Bluetooth on Samsung Galaxy Note 3 from Aprilia Caponord ETV1000 Rally-RaidGetting this to work took a bit of time, simply because it turns out I have to touch the ‘REC’ icon in the bottom left hand corner of the Diagnostics screen for something like 4 or 5 seconds for it to toggle to orange and begin recording. Once recording I can’t change screens, but if I swipe left or right as though trying to get to ‘Adjustments’ or ‘Map’ then data on the screen freezes and you wonder what the hell is going on …… but the data is still being logged in the background. Swipe in the opposite direction, as though going back to ‘Diagnostics’ and the screen starts working again.

Disconnect from the ECU and ‘Datalog’ now appears at the bottom of the ‘ECU’ drop down menu, click and select the log file to open and a new window opens with the data displayed as a graph. TPS, RPM and Engine Temp are logged, but apparently no way of selecting other data to log other than TuneECU app datalog data file diasplay on Samsung Galaxy Note 3 from an Aprilia Caponord ETV1000 Rally-Raidthese three. The TPS and RPM are a nice distinct line with good contrast to the background, however the Engine Temp is dark blue dots on black background …….. difficult to read clearly in bright light. The data is stored in CSV format so it’s easy to bring the files into your PC and use something like Microsoft Excel to display it. Incidentally the screenshot of a data file on the TuneECU (Google) page shows additional information – Speed / MAP (Manifold Air Pressure) and what looks like gear position …… so there is certainly scope to allow more (bike model specific) information to be logged and displayed.

Conclusion

I so want to like this software. Building in the datalogger is great but in the light of the connection issues and slow performance when in operation, I’m reluctant to use it at the moment preferring to stick to the old PC version and my TuneBoy based datalogger. Of course this is only one persons view with a specific combination of bike/phone, but if others are experiencing the same or similar problems, then maybe addressing these issues to make a solid and robust platform before adding any more new bikes or functionality would be the way forward …… just my six cents worth. Let’s see what V3 brings.

The Fissure King

Civitaquana, Abruzzo - Cda di Ginestre road (strada) subsidance & landslideWhat good is a motorbike or a car for that matter, if you don’t have a road to run along?

About 10 days ago Jan and I went to do the weekly shopping and I must admit I was already starting to get a little nervous about movement within the road – In one particular place the Range Rover was beginning to bottom out bodywork even when on its highest suspension settings and the traction control was starting to make itself useful when hauling us up the slope.

The next evening after walking the dogs and eyeing the recent movement and ever bigger crack in the adjacent field, I felt very uneasy …..

….. with the dogs tucked up for the night I grabbed the keys and decided to move the car beyond the bad section. In the end it took 3 attempts to clear it, but the good old Rangey did brilliantly with the traction control working overtime as it clawed its way over. That was it then – no going back. Life would be different for the forseeable future for sure.

That was over a week ago ….. since then the land has moved something like 2m down and 3m sideways with more cracks and fissures appearing across its width, soon the road will have separated completely with a section about 30m long moving inevitably down into the valley below.

The reality of our predicament is sinking in …. moving anything, shopping, gas cylinders, rubbish bags etc has to be carefully thought through. Each item has to be carried by hand over ankle-breaking terrain up (or down depending on which way you’re going!) a 200m stretch of steep road that is changing every 24hrs.

The fact is, this road doesn’t belong to us, it belongs to the Comune (Council) and as such they have responsibility over it. It’s not like this problem is new either, in fact we were promised it would be repaired and resurfaced throughout 2014, it wasn’t and now the problem is a magnitude worse. Unfortunately all I can say is we’re disheartened by the lack of response to our emails and phone calls for assistance over the past week.

So until something spectacular happens it gives me time to dream up new and novel ways to free the Capo from its incarceration …… zip wire over the valley, kids balloons tied together (I’ve seen ‘UP’) or turn it into an X-2 Skycycle and fly the bugger out!

Anyway until then, chin up ….. and do what Brits do best in a crisis

KEEP CALM AND DRINK MORE TEA!


ACIM VII 2015 update

ACIM VII 2015 Aprilia Caponord International Meeting - Nafplio (Greece)A quick ACIM VII 2015 update – In my original post I said it will be held at Argos (Greece). Well Trikkas (Iania) kindly pointed out my mistake – it is actually being held in Nafplio Argolida about 12Km south from Argos. Yes folks bring yer buckets and spades ….. we’re going to be by the seaside!! 😀

Stuff …. 6 months and 12 months on

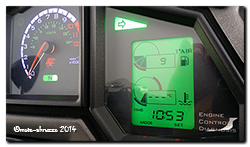
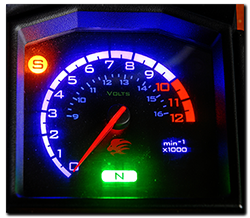
Aprilia Caponord ETV1000 Rally-Raid dashboard - new right-hand indicator repeater!A couple of anniversaries this week ….. firstly the dashboard. Yes a full 12 months since it was finished and put back into the Capo for the last time, resplendent with its new inlay to complement the electronic changes. The auto-dimming back lighting and split indicator repeaters have been absolute winners – I couldn’t go back to a standard board again without missing them. Moving the side-stand and low-fuel lights toAprilia Caponord ETV1000 & Rally-Raid Voltmeter and re-located side-stand light on dashboard accommodate the twin indicator repeaters has had no impact, positive or negative. The voltmeter has been a different kettle of fish …. generally unused as the Sparkbight battery monitor handles voltage feedback when riding around – however it has proved a real benefit during start-up when the dashboard goes through its self-test phase. Now it’s become second nature to eye-ball the tacho needle to see what the battery voltage is pre-start. >12.6v and I know I should get a good kick from the battery!
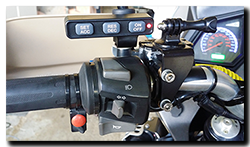
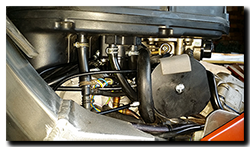
Aprilia Caponord ETV1000 & Rally-Raid MCCruise controlThe second anniversary, although shorter at 6 months and a tad over 11K miles, is the MCCruise cruise control. After a rushed install (not clever) I knew I had a heavier throttle than pre-installation ….. this was purely down to throttle cable routing and nothing to do with the cruise control itself. It simply didn’t like being re-routed behind the radiator, so I gave up and relocated the CIU (cable interface unit) to a new location by the throttle bodies. Now everything works fine – a light throttle and a happy cruise control. It’s been 100% Aprilia Caponord ETV1000 & Rally-Raid New MCCruise CIU locationreliable and functional. As a demonstration of its finesse I ran the bike in 1st gear at 25mph and let the cruise control take over the (100 horsepower!) throttle – all I can say is WOW! I would never have believed that the system could have the sensitivity to operate the throttle with such precision, but it did – up hill, down dale – never an ounce of jerkiness. Ok I admit no one wants to ride around in 1st gear …. but as an experiment, it proved to me that MCCruise have indeed developed an absolutely fantastic piece of kit.
A pivotal moment

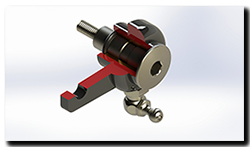
Aprilia Caponord ETV1000 & Rally-Raid rear brake lever pivot and grease nipple CAD graphicSometime last year I decided that 2015 was going to be the year that a whole bunch of parts were going to get cleaned up and recoated – engine/sump protection bars (especially the mounting brackets), headlamp guard and passenger foot peg hangers for a start.

The accessory parts seem to be made substantially cheaper than the bike parts themselves – stamped, pressed, bent and welded with a flash of cheap paint to top it off. All well and good for a couple of years, but the elements soon work their magic and the stuff begins to look jaded and rusty. No, if you want it to look good and last, you’ve got to pick up where the Aprilia contractor left off ….. Debur, remove weld spatter and radius any and all sharp edges you can find, THEN get a quality finish applied. That’s the plan anyway!

Aprilia Caponord ETV1000 & Rally-Raid rear brake pedal and grease nippleSo to kick off I took the spare rear brake lever and began to radius the sharp edges and smooth the lumpy stamped (or laser cut) edge … I have to say it was looking (and feeling) rather nice when I downed tools and wandered indoors for a brew.

It was while standing there aimlessly waiting for the kettle to boil that I thought about adding a grease nipple to the pivot – Aprilia have done a good job in making the bolt grooved to hold a reservoir of grease AND fitting two ‘O’-rings (OR114 – 1.78mm section / 11.11mm ID) to keep the grease in …… but a grease nipple would make packing the grease in and replacing it soooooo much easier!

In the end it only took 30 minutes ….. grinding a flat on the underside, drilling and tapping a 6mm hole and screwing in a 90° fitting. What do you think?