That’ll teach me!

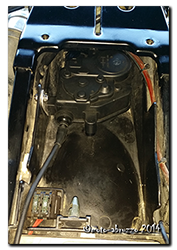
Cruise servo in place at the back of the tool trayHi all ….. a quick post about the cruise control and a word of caution!

I finally got the cruise control servo unit mounted into the tool-tray of the Capo today. A relatively straight forward job, requiring only a minor rework of one of the mounting lugs, a new bracket fabricating and a couple of holes drilled in the under-tray.

The old throttle cable was removed from the unit and a new 6mm Teflon lined sheath fitted ready to run forward to the throttle bodies. It fits a treat down the side of the two 30A fuses and there’s already a cut-out in the undertray for it to run through, talk about made for the job! I’ll refit the old in-line adjuster and look at routing it along the engine/throttle bodies next week. So far so good!!! 😀

And so everything had gone beautifully, with a final firm slap the rear seat was locked in place …………. Only to realise that the key would no longer release it! Yes the dreaded can’t-remove-the-rear-seat syndrome. My fault entirely, as I should have checked the cable-outer was secure at the latch when I put the luggage rack/deck back in place. So here for your info is how to sort out what seems a very daunting situation to be in. Others may have a different technique, but this one worked for me.

Firstly stop twisting the key harder and harder, while bashing the seat in a vein hope it will pop off ….. it won’t ….. The noise you can hear when you turn the key is simply the cable outer and spring moving – NOT the latch.

Secondly, remove the rear deck bolts (x4). Of course you may have to remove a topbox and associated mounting plate first – no one said it was going to be easy! Now grip the deck just above the rear light and lift, at the same time slide something like a ½” drive 12” extension into the gap to hold the deck up. You’ll need to get the extension right the way in, enough to expose the latch mechanism. With the mechanism visible, slide a flat bar or long screwdriver in and gently push on the tab where the cable end is visible – from the rear of the bike, push to the left. And you should hear a satisfying click as the seat pops up. Reseat the cable-outer, reassemble the bike and sink a cold beer, you’ve earned it!

What a muppet …. anyway, I hope you’ve learned a little something from my foolishness and don’t make the same mistake!

……. now to connect the servo unit to the throttles.
Finger on the pulse

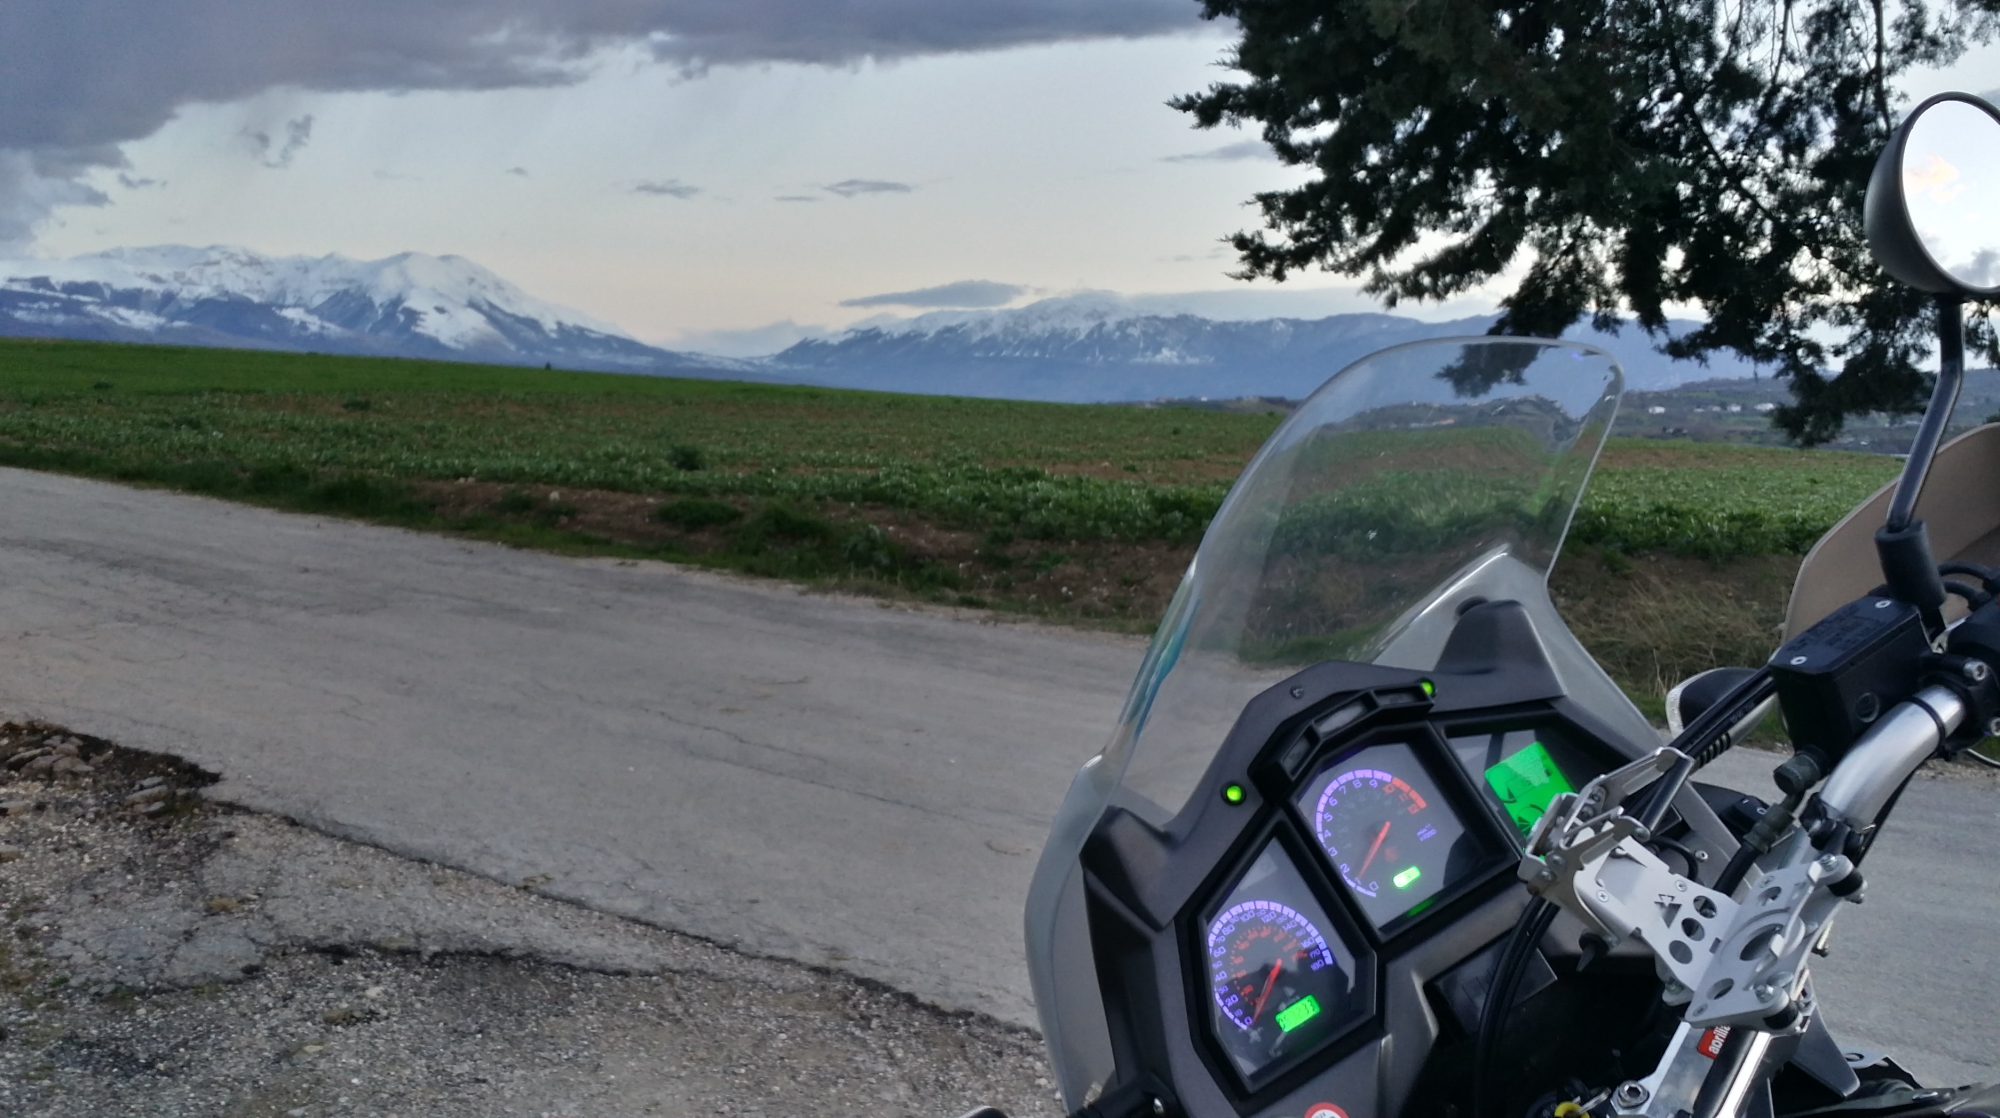
Aprilia Caponord ETV1000 Rally-Raid. Speedometer pulse from the rear-wheel sensorWhile the wrist is healing nicely on light-duties and (thankfully) out of the heavy and restrictive cast, I’ve had a chance to play with the idea of an active cruise control for the Capo. An active system will adjust the throttle automatically to maintain a given speed even as the road rises and falls unlike a passive system which is nothing more than some form of throttle locking mechanism.

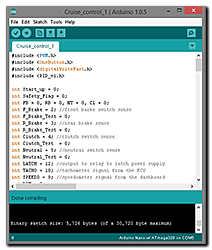
Arduino cruise control sketchThe system I’m thinking about will, when all parameters are met (speed, revs etc) lock onto the chosen speed when the ‘Set’ button is pressed. The microcontroller will then look at the error between the chosen speed and actual speed and adjust the throttle as neccessary to try and maintain the error at zero – this is done using PID (proportional-integral-derivative) in the controller. If cruise is stopped (operation of brake or clutch) or the PID error goes beyond a pre-determined maximum (high gear on a steep hill for example) the requested speed is stored and can be re-activated by pressing the ‘Res’ume button. And while in cruise, the speed can be adjusted in 1Kmh increments by using the same two buttons, now working as ‘Acc’elerate and ‘Dec’elerate. That’s the theory anyway!
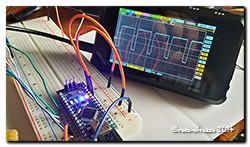
Aprilia Caponord ETV1000 Rally-Raid. Opto-isolated and cleaned Speedometer input signalInputs

  • Power – 12v on/off switch
  • ‘Set/Acc’ &Resume/Dec’ buttons – 12v
  • Front and rear brake light switches – 12v
  • Clutch lever switch – 12v
  • Speedometer signal from the dashboard (output on pin 14 of the 16-pin connector) -12v square wave 85% duty cycle frequency modulated
  • Tachometer signal -12v square wave 50% duty cycle frequency modulated.

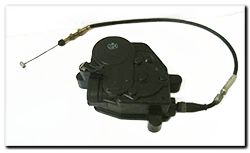
Honda GL1800 Cruise ServoOutputs

  • Two colour LED for power, cruise engaged & error codes – 5v
  • Motor drive signal – 5v PWM to motor control board.

To date the inputs and safety stuff has been written and from the tacho/speedo signals it’s calculating what gear the bike is in pretty quickly, but I’m sure it can be speeded up …… I just need to learn more programming! The operating parameters I’ve decided on are:

  • Cruise enabled between 50Kmh and 160Kmh (30mph – 100mph)
  • Cruise enabled between 2,750rpm and 6,000rpm but might change the lower limit to 3,250rpm in 6th gear
  • Cruise enabled in 4th, 5th and 6th gears only.

At the end of the day, I just want a system that will give my old worn out wrist a rest at motorway speeds on the run between Italy and the UK, taking into account the (very!) variable speed limits and ascents/decents especially through Switzerland. If it can do that I’ll be a very happy bunny indeed.

Of course this is all well and good, but I’ve got to get all the bits talking to each other first and make it robust enough for long-term and safe use on a motorbike ….. the problem is that in amongst all this enthusiasm my wrist still has a way of letting me know who’s really in control while swanning around on light duties!


Capopedia.net ……. the resurrection!

Capopedia.netWell another wet’n windy Sunday is upon us yet again and I find myself scouring the small-ads for a boat, a bloody big boat capable of taking animals and motorbikes 2 by 2 …. Because if we have much more rain folks, I think we’ll be washed clean off the hill-side! A month now with hardly a dribble of sunshine ……  🙁

But in fairness it has given me chance to take stock and work out where I want to go Capo-on-the-internet wise. A couple of years ago I registered Capopedia.net and started a Wiki with the idea of using it as a repository for ETV1000 knowledge that could be refined and added to by the Capo owners themselves.

All well and good …… but I didn’t really get stuck into it, so others that signed up probably looked around and felt just as daunted by a blank bit of web space and didn’t come back! Now that’s my fault entirely and as the months rolled by I did nothing to address the issue.

So …… time to reflect. Is it a good idea anyway, or should I just hit the button and nuke the whole thing? It was close I don’t mind admitting. Cost, responsibility and a not least time & effort, versus content deletion, cancelling the domain name and saving a few bob. But what are the alternatives?

The internet hosts various Caponord forums of course, in many languages. But in English we’re pretty much used to one site only …. AF1. Forums are fantastic places for the exchange of ideas and information, the problem however is that the details get buried in a never-ending procession of new posts and threads, yes they can be ‘stickied’ but it’s not perfect. This can make access to the information difficult if not almost impossible at times, depending on how obscure the search is. Add to this the fact that periodically the host may purge the pages to save on storage space (archive them) loosing images and links they contain as they’re reduced to raw text and you can see that maybe they’re not ideal for information storage.

And so after some thought  the Capopedia wiki is resurrected. The software has been updated, login and new user structure (hopefully) working and a bunch of extensions have been added to make the whole thing a better experience for admins and users. As of this week I’m going to make an effort to at least put aside an hour or two each day to chip away at it …. nose to the grindstone, shoulder to the …… well you get the drift.

So if anyone is interested in becoming a Sysop (administrator) to help run the thing, I’d be glad to hear from you ………. 🙂

Rear suspension linkage – excess play

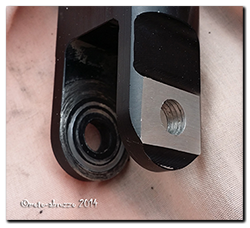
Aprilia Caponord ETV1000 Rally-Raid. Surface ground flat so a nut can be used to lock the bolt in placeLast year the Capo had an advisory on its MOT about play in the rear suspension – not much, just 4-5mm at the back wheel but enough to be picked up. The bearings, pins and seals had all been replaced only about 3-4K miles previously, so I doubted they were the problem and frankly I couldn’t feel anything when riding …. so the investigation was delayed until now.

With another 12K on top, the play hadn’t got any worse so I wasn’t too worried …. until I found the fault. The thread in the shock absorber lower mount was shot. Trying to remove the bolt simply unscrewed the thread the other way – bugger! The bolt is 10.9 high tensile into aluminium at a torque of 45nm which isn’t much, and I know I used a torque wrench to install it last time ……. hmmm.

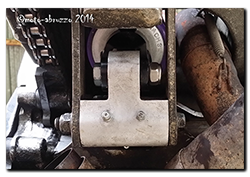
Aprilia Caponord ETV1000 Rally-Raid. Cleaned linkage and nut/bolt in placeIn the end I carefully ground the thread ‘hump’ down to a nice flat surface and used a Nyloc nut as a replacement. Luckily the bolt is 47mm long and has a reasonable amount of spare thread on which to use a nut and sufficient clearance behind the drag-link. In an ideal world the thread should protrude 1-3 turns past the end of the nut, but in this case it sits flush. I’ll probably see if I can find a 48-50mm bolt to replace the existing one just to be absolutely sure it’s right, a flanged Nyloc nut wouldn’t hurt either … hell I might even take up wire locking again, who knows!

So everything else was cleaned, checked and re-greased. I can now certainly say that the group-buy linkage kit is in perfect condition after a total of approx. 16-17K miles. The play is gone and I just hope the MOT man appreciates my scrapped knuckles!

Muppet and mobile in perfect harmony

The weather is a pleasant 23c and the sun is out …….. unfortunately so are some awfully unobservant drivers. Jumping a stop sign at speed onto a main road is probably one good way to ruin someone’s day – nearly mine.

PUT THE F’IN PHONE DOWN WHEN YOU’RE DRIVING!!!!!! 👿

Aprilia Caponord ETV1000 Rally-Raid - mobile phone - Blah, blah and more blah!Why do I feel that trying to get the message across is like trying to shovel water uphill?
Roll camera …….

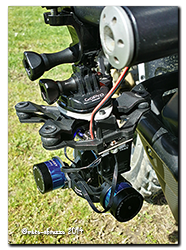
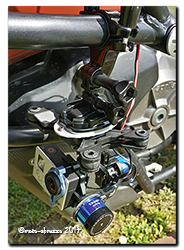
gimbalAprilia Caponord ETV1000 Rally-Raid Tarot 2D gimbal mounted to left-hand crash bar

Pronunciation: /ˈdʒɪmb(ə)l

Noun:    A device for keeping an instrument such as a compass or chronometer horizontal in a moving vessel or aircraft, typically consisting of rings pivoted at right angles.

Origin:   Late 16th century (used in the plural denoting connecting parts in machinery): variant of earlier gimmal, itself a variant of late Middle English gemel ‘twin, hinge, finger ring which can be divided into two rings’, from Old French gemel ‘twin’, from Latin gemellus, diminutive of geminus.

Aprilia Caponord ETV1000 Rally-Raid Tarot 2D gimbal & GoPro Hero 3+ BlackAh …. don’t ya just love a bit of ed-u-cation! Yes folks, the word of today is ‘gimbal’ and after a bit of thought yesterday morning, I got mine out and played with it. 😀

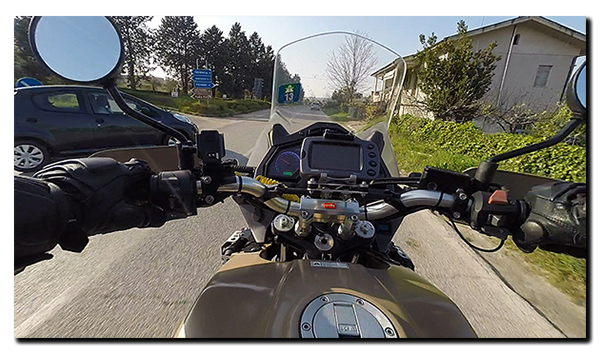
So what does this gimbal-thingy do then? Well, in a nutshell, it holds a GoPro camera perfectly steady in pitch and roll while the mounting point is moving around. These things are intended for use on drones, those multi-rotor helicopters that you see flying around, but one look and the old grey matter kicked in …… wouldn’t that be fun on a bike!

And that brings me to yesterday morning, a half-hour blitz in the barn had a mounting plate made and another half-hour had the whole thing fitted, wired up and tested on the left hand crash-bar – which isn’t too bad given that the gimbal has sat in its box since delivery two months ago.

At lunch time the start-up routine was well under way …… pat down the pockets ‘testicles, spectacles, wallet’n watch’check, key-on and wait for the dash to finish its self-test – check, fire up the motor and before the gloves go on – camera to record! And this m’dear Smurfletts is an edited video of ‘Tarot Gimbal Test 1’ – I like the sound the front disks make at the end of the video!

Now the keen eyed among you will notice that in bends – especially constant radius bends – the camera begins to roll in the same direction, and this had me stumped for a while. I thought it might just be settings in software, but not being sure I decided to sleep on it.

In the end I think it’s to do with the fact that ‘verticle’ changes when the bike is in equilibrium in a turn (the whole ‘leaning’ thing) and this tricks the sensor into believing that ‘up’ and ‘down’ have moved – so the camera begins to tilt into the turn. Anyway I hope you enjoyed watching some or all of the video as much as I did filming it!

On the right wavelength? (Part 2)

Waiting at the Post Office today were a couple of type-380 60 red LED tail/brake light bulbs to have a play with. I got these from Autobulbs.co.uk in preference to the 92 LED version that needs modifying to fit into the Caponord reflector/socket (thanks for the info Andy!).

To recap  on the conclusion of  ‘On the right wavelength? (Part 1)’ – In my opinion it would be unwise to fit WHITE LED tail/stop bulbs in the Capo UNLESS you first have definitive proof of the red light output and even then, there is the subject of the legality of fitting them in the first place!

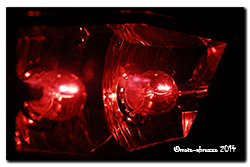
What follows then is a laymans point-of-view of the alternative red LED bulbs after a fun-filled afternoon tinkering in the barn …….Aprilia Caponord ETV1000 Rally-Raid - 5/21w incandescent & Type-380 60 red LED bulbSo ……. off with the lens cap, pop out a bulb and in with the new …. Easy to fit with no modification, they are certainly brighter than the standard 5w tail lights, while the brake lights are definitely on a par, if not a tad brighter than the standard 21w filament, most importantly the change in output when the brake is activated/deactivated is crisp and very obvious. Of course the one thing you notice electrically, is the wayyyyy lower drain on the battery when braking! Here’s a table comparing the power usage:-

Difference in power consumption

One additional point I noted in favour of the LED’s is actually based on their construction …. the filament bulb relies heavily on the reflector/lens diffusion to spread the light because it only has one fairly focused source of illumination, whereas the LED has 60 independent sources that reflect and refract far better giving the appearance of a much brighter output from ALL of the lens, a more uniform glow if you will!Aprilia Caponord ETV1000 Rally-Raid - Both bulb types with lens in place

Oh and one thing I almost forgot to mention about the LED bulb is that all 60 LED’s are illuminated at all times, the activation of the brake light simply intensifies their output, rather than switching on/off additional LED’s as I’ve seen in some bulbs. I think this maintains a much more even and balanced spread of light.

Conclusion …. yes the RED bulbs work as well if not better than the incandescent and of course the power saving is incredible. How they perform when hot and after several hundred hours of use has to be seen. In the end though I do have to wonder about two things; the logic of selling white LED bulbs for use at the rear of a vehicle and the woefully outdated UK/EU legislation in use – for example, using a bulbs power consumption as a measure of its output is unbelievably outdated. Technological change is here and seemingly faster with each passing year, legislators need to move out of the 20th century if they have any hope of keeping pace.

Me? …… I’ll leave them in for a while, just for evaluation off-road you understand. 😉

Caveat: Using LED tail/stop bulbs on the Caponord in the UK is illegal and as such karlb/moto-abruzzo cannot condone their use. They don’t carry an approval marking nor do they meet the brake light power requirements (15-36w) as set down in the The Road Vehicles Lighting Regulations 1989′ ….round in a circle we go …. the very thing we’re trying to save (power) it turns out we can’t!!

Dimmer and dimmer

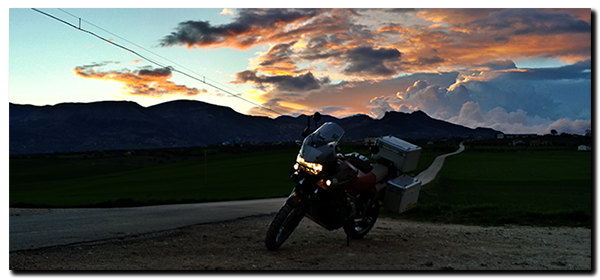
Aprilia Caponord ETV1000 Rally-Raid Evening over the Gran Sasso ....I switched on the fog-lights to better illuminate the mud and stone strewn road ahead; when it dawned on me that I hadn’t taken the Capo out in the dark for ages, months  probably. And here I was winding a path along our troubled road and hopefully onward for a nice little night-time ride all in the name of testing the auto-dimming backlighting!
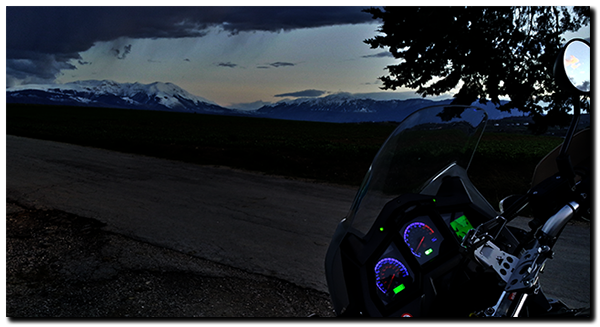
After getting the set-up working nicely with the old thumb-over-the-sensor routine, it was time to take the old girl out for a spin and see what the illumination was like both in unlit rural and street-lit urban riding. I took the netbook and cable along so that changes to the code could hopefully be done at the roadside.

Aprilia Caponord ETV1000 Rally-Raid .... and over the Maiella.In the end I was really pleased with how the lighting worked anyway, the only change I made was to the minimum brightness – dropping it slightly – so that it’s totally readable without putting stress on my tender night-time vision. Daytime backlighting is, as you would expect fully-on at 100% while the night-time drops to 30%, which with the higher output LED’s (blue & green) is just about spot on.

But ……

And there’s  always a ‘but’ …… the two LED’s in the binnacle (Autoswitch & Battery monitor) now stand out as being overly bright compared to the dashboard at night, so, time to work out how to take these signals and pass them through the Arduino and subject them to the auto-dimming code as well, then the whole cockpit area will be sorted at last!  😉

Saddle up and ride out …..

No hour of life is wasted
that is spent in the saddle.
                                     Winston Churchill
 

Bless him I never had old Winnie down as a biker, but hey if the cap fits …… 😀

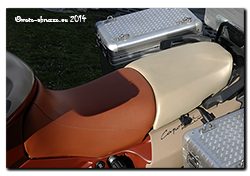
Yes the humble saddle, that piece of plastic/metal and foam that can feel like an armchair or a razor blade, or in fact morph from one to the other over the duration of a few hours or minutes depending on the bike! To be fair the Rally-Raid seat is pretty good, if anything just a bit soft for my weight and could probably benefit from a stiffer foam to stop me sinking into it and putting too much weight on the old coccyx.

After 11 years of wear and tear I was thinking about getting them recovered/padded but didn’t much fancy being without the bike for several weeks while the job was done – step into the limelight Stanleybobly, who just happened to pop-up on the AF1 radar with a near-new set of Raid saddles for a painfully decent price. It would have been plain rude not to have bought them!

Aprilia Caponord ETV1000 Rally-Raid. Doesn't she look splendid with new saddles!So now the Capo has a spanking new pair of saddles and I can work out where I want to send/take the old ones for refurb at my leisure – any advice about UK upholsterers always appreciated.

…… and thanks again to Stanley for selling them to me! 😉

On the right wavelength? (Part 1)

Aprilia Caponord ETV1000 Rally-Raid. Tail-lightsWhat colour is your tail/brake light? Red I’d hope…. or is it really? Take the Capo’s lens cover off and it’s just a pair of common old yellowish 5/21W incandescent bulbs, the red is of course provided by the light passing through the red lens. In fact since time immemorial the only way simple incandescent bulbs were coloured was either by a coloured cover or380 60 LED bulb being dipped in a coloured dye. Why? Simply that the humble incandescent bulb fires out light at all different wavelengths from infra-red to ultraviolet, so a simple filter is all that’s needed to allow the required wavelengths to pass through.

Now of course we have LED’s…. and these little puppies don’t work the same way. A red LED will generate light in the 610-760nm wavelength – red …… a blue LED in the 450-500nm wavelength, you’ve guessed it – blue! But what about white LED’s? Well they produce red, blue and green light BUT they are dominant in the blue wavelengths and actually very poor emitters in the red – the very colour we need for our taillight!

So here’s the next question….. Do you change out your ‘so yesterday’ incandescent tail/stop bulbs with ultra-trick, smack-up-to-date LED’s? And if so red or white? Well here are a couple of photographs that I hope will help with that dilemma.

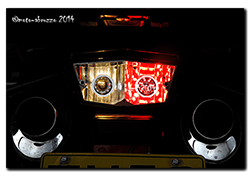
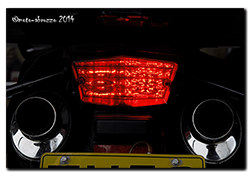
Using my old but trusty Nikon D200 I took the first picture with the Capo tail light and an LED torch for comparison. The second picture is exactly the same except this time I added an infra-red filter to the camera. Now the camera is only picking up light in the red wavelengths ……… look at the torch, I think you’ll agree that in the 2nd picture the torch is most certainly dimmer than the two puny 5w tail bulbs, yet overpowering in the 1st photo – quite a dramatic difference me thinks!

Now OK, this is just a torch not a pukka LED tail/stop bulb, and yes I concede that not all white LED’s will output the same amount of red light – but how do you KNOW what the output of that bulb you’re eyeing up on Fleabay really is?

Bottom line?

Don’t fit white LED tail bulbs into the Capo, stick with ordinary bulbs. Bummer on the power-drain, but better on the safety side – nobody likes a rear-end shunt……..

…….but what about the red LED version? Stay tuned for next weeks thrilling roller-coaster episode – ‘On the right wavelength (part 2)’.  😉

Caveat: Using LED tail/stop bulbs on the Caponord in the UK is illegal and as such karlb/moto-abruzzo cannot condone their use. They don’t carry an approval marking nor do they meet the brake light power requirements (15-36w) as set down in the The Road Vehicles Lighting Regulations 1989′ ….round in a circle we go …. the very thing we’re trying to save (power) it turns out we can’t!!