The Scottoiler is dead, long live the Scottoiler!

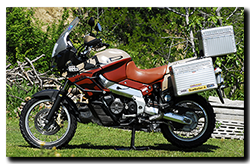
Aprilia Caponord ETV1000 Rally-Raid ScottoilerI posted about this thing in 2012 and planned for it’s replacement in 2013.

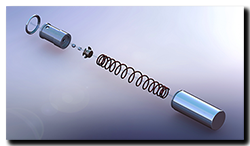
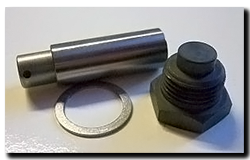
Like it or not though,  it is now a rather pants 2020 …. and  I have finally replaced the ageing and somewhat cantankerous Scottoiler VSystem and HCR (High Capacity Reservoir). With a total of 19 years, four bikes and somewhere in the region of  360,000 miles under its belt it was definitely time to replace it. To be fair, the last 5,000 or so of those miles it has only been along for the ride as I had finally turned it off sometime late last year due to it functioning in ‘all or nothing’ mode and ‘all’ really was quite a bit of oil to go sloshing around the back wheel! The RMV (Reservoir Metering Valve) had been refurbished back around 2013-14 and back then, the diaphragm was already getting a little stiff. I guess like my old joints, one day it just stopped flexing at all.
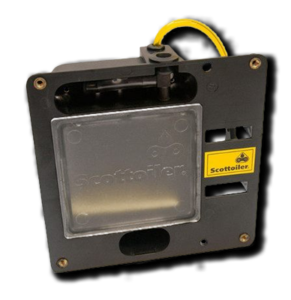
In the big scheme of things, this package has only cost a couple of pennies a day and given sterling trouble-free service for 99% of its days, so there is only one clear viable replacement in my books – another VSystem and HCR. I did look at the very 2020’s techie ESystem but frankly, I couldn’t justify the 2.5x price and having to fiddle with yet more wires and mount yet another ‘control box’ on the handlebars somewhere. No, the VSystem works well and will simply be a plug-in replacement and that suits me just fine. Total cost for both parts in the UK came to £127.96 and that is not a huge hike in price over almost 20 years.

Put it another way. A DID 525ZVMX chain costs £100-£110 ish to replace and by my rough calculation the Scottoiler has saved me the cost of at least three chains, probably more during its time on my bikes. So not only has it long since paid for itself, it has also saved me a tidy sum in sprockets and the time and effort to replace them. I can comfortably live with that.

I’ll end with a brief explanation of how I mounted the HCR to the Caponord. Firstly though a disclaimer – Scottoiler do not list the HCR as compatible with the ETV1000. If you do decide to install one, it is entirely at your own risk. Personally, I am more than happy that the installation I have is safe, secure and allows the system to function as it was designed to. This is how I did it.

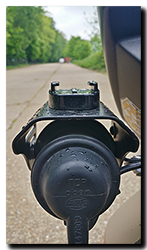
Using the template (download here) I have made a mounting bracket from 4mm thick aluminium plate. In the pictures below you will see the plate in perspex – this was the ‘sanity check’ test piece to confirm the drawing was correct before committing to cutting metal. This piece is mounted by two M6x20 countersunk screws, washers and nyloc nuts through the existing ‘number plate’ mounting holes in the mudguard. The HCR is mounted to this bracket by two M6x30 cap head screws, washers and nyloc nuts and a third M6x30 through the pannier frame/mudguard.

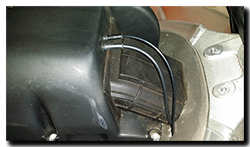
On the Rally-Raid or any Capo with the Givi pannier rack the rear brace attaches to the mudguard and provides the 4mm standoff for the HCR bottom mount to bolt through (M6x? cap head, washer and nyloc nut) – if you don’t have this bar, then you need to provide a spacer between the mudguard and HCR – a couple of M6 penny washers will work fine. You will need to fit the RMV to the HCR before fitting the whole assembly to the mudguard as there is not enough room once the HCR is fitted on its own. After that, just follow the instructions provided by Scottoiler regarding filling, mounting the feeder pipe and attaching the RMV to the vacuum system. The only additional thing I did, was drill the mudguard so I could feed the oil/vacuum pipes through to the subframe rails and hide them out of the way.
 

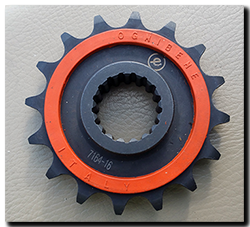
Ognibene sprockets

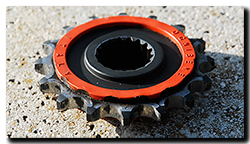
The first Ognibene (7164-16) 16 tooth front sprocket was fitted last April, since then its done over 18,000 miles and I’m happy to say, still has some life left in it. In comparison to the excellent Renthal sprockets that I’d used since the OEM one wore out, I have to say I’m very impressed. Yes they cost a couple of pounds more that the Renthal, but it has covered more miles. The Reynolds typically averaged (15,000 miles), making the Ognibene’s running cost slightly better pence-per-mile wise.

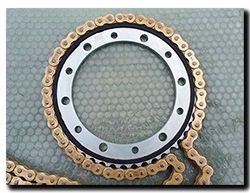
Now a matching set of front and rear (8098-45) sprockets are going on, along with a nice new gold/gold DID 525-112 ZVM-X chain. Aprilia Caponord ETV1000 Rally-Raid Ognibene front sprocket 7164-16The France Equipment rear sprocket (1683-45) I fitted last year is still looking pretty good, so it’ll go on the shelf as a part-worn spare.

One thing that’s maybe worth mentioning about Ognibene sprockets is to be aware that the ‘silent’ bands will bed-in over the first few miles. Initially the chain side-plates ride up on the hard plastic bands before sinking in – changing the effective diameter of the chain’s run around the sprocket ……. this means your chain adjustment has to be monitored more carefully at the beginning Aprilia Caponord ETV1000 Rally-Raid Ognibene 8098-45 rear sprocket and DID ZVM-X chainand will no doubt require a couple of tweaks. Once everything beds-in I guess it’s business-as-usual with regards to the long intervals between adjustments that I like about the DID chain.

New chain and rear Ognibene sprocket courtesy of Motrag at a very competative price. Unfortunately they could only supply the 17 tooth front, not the 16 tooth…… that may change in time.

Cam chain tensioner – Part 3 ….. Judgment Day!

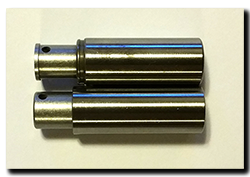
Aprilia Caponord ETV1000 Rally-Raid cam timing chain tensioner AP0236252 AP0236253A few days ago the two new cam (timing) chain tensioners (AP0236253) arrived ……. and as if she knew, the Capo started to rattle the rear cylinder for a second or two at almost every start-up! So as soon as we got home yesterday, it was off with the bike kit and into the workshop-wear and time to seriously twiddle some spanners.

Thankfully the rear tensioner is nice and easy. Fuel tank up, pop out a couple of spark plugs to make rotating the rear cylinder to top-dead-center nice and easy, then rummage under the wiring on the right hand side and find the cap requiring a 6mm hex-key.. Remove the cap and the copper washer underneath and then use something pointy to hook the tensioner out enough to get a grip with podgy fingers.

Aprilia Caponord ETV1000 Rally-Raid AP0236252 cam timing chain tensioner INA F-46807The tensioner shows definite signs of movement and rotation and the plunger could be pushed in about 1/2 its travel ….. I think FUBAR best describes it! The new tensioner was oiled up and before it was dropped into the motor I did a little experiment. Both old and new parts were flushed and filled with new 15w/50 and gently pinched in a vice. The new tensioner remained snug for a long time, only a small amount of oil could be seen coming out ….. next up the old one. This remained snug for no more than 1-2 minutes and oil could be seen leaking from it the second it was compressed. So all in all a major difference in performance between old and new.

Aprilia Caponord ETV1000 Rally-Raid cam timing chain tensioner AP0236252 AP0236253After a few more jobs were carried out, it was buttoned together and warmed up …. no rattles and in fact the idle was smoother than it has been in a while.

The tensioner that came out is an original Mk1 (AP0236252) that was superseded by the new version a good few years back. From what year they were fitted as standard I don’t know. Looking closely at the old one I found ‘INA F-46807’ printed around the edge. I can’t find much about it unfortunately. However ……..

……. I did find something that might be of interest. It looks like the tensioner fitted to the BMW 650 (late models) and F700/800 bikes could well be the same. Now this can only be corroborated by direct comparison, so I might tout the other new Aprilia one around a few BMW dealers to see if I can find out if they match. If they do fit, then they are available for substantialy less than the £68 each from Aprilia.
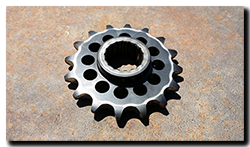
All teeth aren’t equal!

Aprilia Caponord ETV1000 Rally-Raid Sunstar 16T front sprocketA good few year back when I had a Triumph Trophy 1200, I had an issue of excessive noise from the chain/sprockets – especially on the over-run. They were almost new and as far as I could tell, it was correctly tensioned. It drove me mad for a week or so, until I decided to try changing out the front sprocket, why I can’t remember, but it worked.
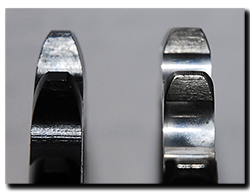
Now the same issue has raised its head on the Capo. The Sunstar front sprocket was fitted at the same time as the chain/rear sprocket, so about 3,500 miles ago give or take. Gradually I began to get a noise – mostly on the over-run that progressively got louder as the miles piled up. Once again, chain tension was fine, the slipper block in perfect condition – no obvious reason for the noise. What had changed?

Aprilia Caponord ETV1000 Rally-Raid front sprocket - Renthal & SunstarThe only difference I could think of is the make of sprocket. I’ve always used Renthal since I got the Capo, so the Sunstar was a step away from what I know and trust. Back to a Renthal 407-525-16P it is then.
And …….. all the noise has gone! Yes a good run around yesterday afternoon including annoying the hell out of an R1200GS rider desperate to give me the slip, proved once and for all that the Sunstar was the culprit. It certainly makes me think that the profile of the teeth may well have something to do with it, maybe that’s the reason Aprilia fitted a sprocket with cush-rubbers?

Just in the nick of time ……

20150524_131318Just when I’m done-and-dusted, the tools put away and the pannier-packing well underway with only 12hrs before leaving – Manuel’s (Motrag.com) parcel arrives with more goodies for the Capo! I really didn’t think it would be here in time, so I’d planned to fit the box-contents on my return …. but they’re here now so what the hell!

First off, a nice new left-hand lamp bracket and stronger angle-bracket with a funky new fastener – all to mount the GoPro tripod mount base. As usual, beautifully finished and perfect fit. Thanks very much for this Manuel, let’s see what the GoPro makes of it!

Next, one of Motrag’s new GPS mounts for the Rally-Raid. This one is for the Garmin 590LM and can be fitted directly to the supplied bracket or direct to the Accosoto cross-brace where the existing Touratech Garmin 2820 mount sits. Neat and unobtrusive (unlike an empty Touratech mount) it’s functional, yet simple. I’m really looking forward to trying this out (and the 590LM) in the coming weeks as the poor old 2820 has most definitely got a touch of dementia these days – it frequently forgets what day it is, or what country it’s in, bless it! More on this bracket in a later post.

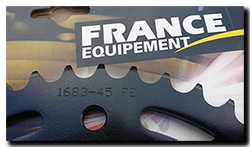
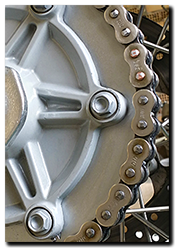
20150508_180804And lastly, the replacement rear sprocket and DID drive chain. A nice slotted-steel sprocket from ‘France Equipement’ in black. I must admit to having never heard of them before, but fit is fine and the finish seems solid enough, so we’ll see what the miles make of it. The ZVM-X (in Gold/Gold) chain is the replacement for the ZVM² that has been on for a staggering 53,400 miles ….. yes one chain, one rear sprocket and three front sprockets for over 53K miles, I’ve never had one last like this before. The only thing negative I can muster against it, is that all the Gold wore off years ago – nowadays it’s just a plain old silver chain!
That’s it for the new stuff but Manuel had one more nugget tucked away in the box for me – a very clean and crack-free pair of inlet rubbers! After reading my post from a few days ago he decided to slip a pair in the box to replenish the MA spares stock – cheers Manuel you are a start indeed!

I’ll end by saying that while some of these items are product testing or favours between friends, I have to make it clear that the chain and sprocket were purchased from Motrag just as anyone else can. The price is extremely competitive and shipping very quick – so next time you’re in need of bits for your bike (not just Caponords), consider having a look at Motrag.com or emailing Manuel to see if a fellow owner/rider/engineer can help you out, I know I’d rather put a few Euro’s his way than in the pocket of some faceless multi-corporation any day of the week.

Cam chain tensioner – part 1

Aprilia Caponord ETV1000 Rally Raid airboxYesterday I spent a lazy morning installing a couple of sensors inside the airbox (more in another post) and with the tank propped back in place, fired the Capo up to check the fuel lines…….
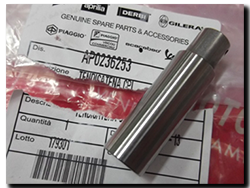
…… and just for a second or so after she fired up there was a distinct rattle from the rear cylinder and frankly it didn’t sound too special as the bike warmed up. To be honest, I’d heard it before on a couple of occasions but couldn’t pin down which cylinder it was. With the tank lifted and stood in just the right position, it was obviously the Aprilia Caponord ETV1000 Rally Raid cam chain tensioner AP0236253rear. As it was lunch time, I decided to have a look a bit later – and promptly forgot! Well I got back to it in the evening and pulled the cam chain tensioner out. Soggy as a knackered bed spring! 🙁
So it had a thorough flush out and re-charge with fresh 15/50w oil and firmed up nicely (phew!) …. it looked as though contamination had built up in/around the ball that seals the oil in, in this case letting it out just as easy. Buttoned it all back together, fired the motor into life and revelled in a quiet(ish) Capo motor – just in time for a cold beer and MotoGP on the box, bliss! As I sat watching the race I kept having a niggling thought … what if the front one is the same?

Tomorrow feels like a let’s-check-the-front-one day ……….. 😕 

Ruba-dub-dub …… one Capo to scrub!

Aprilia Caponord ETV1000 Rally-Raid. Twinkle twinkle little Capo ......As we fast approach the fun and games of ACIM, I figured it was time to reintroduce the Capo to two things frequently lacking in its life ……. washing and polishing. Yes, the hose pipe, chamois leather and Salvol autosol have been dragged out, dusted off and liberally applied to said Capo. My how she twinkles now, well as much as matt paint can ever twinkle that is!

Aprilia Caponord ETV1000 Rally-Raid. High mileage DID ZVM2 drive chainUnfortunately for the Capo, there has been one cleaning job on the list that I’ve been putting off, and I have to admit that the list was written several years ago – the rear wheel refurb! After a couple of cold ones, I finally mustered up the courage to tackle the gunked on grease, the lashings of welded road crud and the inevitable rusty nipples. It nearly had the better of me once or twice, but tenacity and sheer bloody-mindedness (plus a couple more cold ones!) saw the job through to the bitter end. And here’s the finished article, not too shabby if I do say so myself ….. and that chain/sprocket have now got a whopping 38,730 miles on them!!!

Before it all went back together, the Scottoiler dual-injector was checked over as were all the bearings, seals and cush-drive rubbers – and of course it would have been remiss of me to have not taken the front sprocket cover off and give it a Mk1 eyeball check – looks OK for now, but I’ll get one on order!  😉

Scottoiler – 12 years on

scottoilerYes it was 12 years ago I bought the Scottoiler ‘Touring’ package and a twin-feeder as an upgrade. It was all fitted to my lovely Kawasaki ZRX1200, then a year later swapped to a Triumph Trophy 1200 where it did several years sterling service. Later it spent a couple of years on the shelf before being dusted off and fitted to a Blackbird. Then in 2008 it went onto the Caponord where it worked faultlessly until earlier this year.

I noticed a steady decline in the amount of oil being fed to the chain and adjusting the RMV (Reservoir Metering Valve) made no difference. The fault turned out to be a clogged  twin-feed. I tried blowing it out and using vacuum to suck out the blockage, but nothing worked. In the end I bought a new one and cut the old one open to try and find the culprit. It turns out that inside lives a piece of foam that acts like a reservoir and this had broken down into mush and was blocking every passageway.

The new one only took a few minutes to replace and oil flow was restored. I’ve worked out that this kit has well over 220,000 miles under its belt and that equates to a purchase/running cost of about £1.65 per 1,000 miles. In truth though it is starting to show its age, the flow rate seems to be less adjustable that it once was which I’m putting down to the rubber diaphragm hardening with time. Before winter I’ll replace the RMV completely (about £42) and hope this one lasts another 12 years!