While the tank was off ……

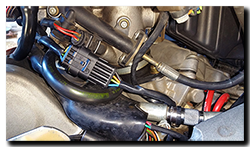
Aprilia Caponord ETV1000 Rally-Raid fuel pump harness (AP8124664) connector SupersealI finally got around to changing out the open-to-air 4-way connector that feeds the fuel pump and fuel level sensor. In went a nice 4-way Superseal (14A rated) with the connectors crimped, soldered and given a light coat of dielectric grease before sliding home into the waterproof housing.

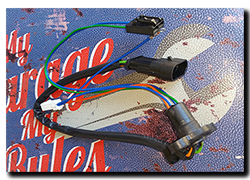
Hopefully no more erratic fuel level due to oxidation on the pins! While I was at it I pulled the spare fuel pump harness (AP8124664) out of its bag and changed its connector as well. I’d look mighty foolish if I’d pulled that out of my spares kit at the roadside and the connectors didn’t match!
Aprilia Caponord ETV1000 Rally-Raid fuel pump harness (AP8124664) connector SupersealWhile under the hood, I noticed that the outer coat of the fuel return line (marine-grade ISO 7840 A1) is showing signs of deterioration and kinking near the swaged end at the fuel tank. I’d noticed it back in September, but unfortunately it appears to be a little worse now. Time then to order a new cLCD 170-04 1/4″ barbed quick release connector from Tom Parker (UK) along with suitable Oetiker clamps – I’ll only use clamps that need to be crimped, never ones with screws that can work loose. I’ve no problem doing the return hoses myself, but when it comes to the high pressure side, I leave it to the professionals. Last time that was MF Hydraulics in Oxford and I’ll be happy to use them again come the day.
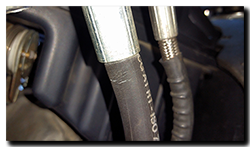
Aprilia Caponord ETV1000 Rally-Raid fuel pump return line hoseThe marine hose has lasted well (9 years) and that’s to be expected given that hose for marine applications has to meet very strict guidelines, however I think hose rated at SAEJ30R9 with its improved impermeability and tolerance to Ethanol is probably better suited on the Capo nowadays. Either way I wouldn’t lose any sleep over it! The high pressure line and main return line are holding up just fine with no sign of wear or deterioration.

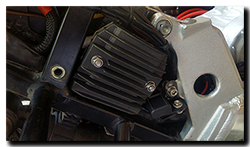
Replacing the regulator – FH012 to FH008

Aprilia Caponord ETV1000 Rally-Raid Shindengen FH008 FH012 rectifier regulatorWhen it comes to electrics/electronics, we are all oh-so familiar with the fact that for the most part, things either work or don’t. But occasionally we get the mighty frustrating intermittent fault that dances between the two, then we also get the rare as hens teeth, slow failure. The one that takes an absolute age to travel from 100% working to finally broken, the kind of behaviour more befitting a mechanical part than electrical. Well that’s what I’ve just had!

Back in August of 2010 I fitted the Shindengen FH012 rectifier / regulator and I think it’s fair to say that it began its slow decline within a couple of years. The once steady 14.2V at 4,000rpm slowly ebbed away, a few millivolts here, a few millivolts there, year on year. By last autumn the charging circuit was giving me about 13.6V (idle) and 13.9V at motorway speeds.

After the incident with the stuck starter solenoid a couple of weeks ago, it seemed to shave off another 0.1-0.2V. On the return leg of our trip the Sparkbright battery monitor would dip from green (OK) to amber (not OK!) when the fan cut in …… such that I was turning the headlights off when we hit slow traffic in order to keep the thing charging.

Each year I’d checked the alternator, wiring, connectors and battery and everything tested just fine …… so was it the regulator? Time would tell I figured! In January I bagged a brand new Shindengen FH008 but hadn’t got around (galloping laziness!) to trying it out. So before the main Aprilia Caponord ETV1000 Rally-Raid Shindengen FH012 rectifier regulatorpower/ground cables were replaced it seemed only fit and proper to test the new regulator, then decide what to do about sorting the charging system.
The quickest test was to simply crimp some spades on the FH008 leads and plug them directly into the Furukawa sockets on the charging loom and see what happened – 14.4V (idle) and 14.5V at 4,000rpm is what happened! Most definitely the regulator rather than the alternator or wiring then.

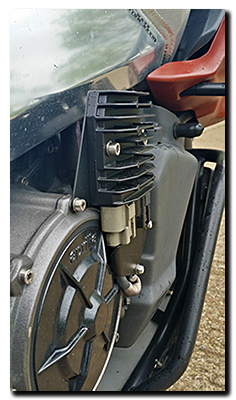
The old loom was removed and inspected – all still in excellent condition. Even so, new cables, connectors and sheathing were ordered from the original suppliers and in went the FH008, back in the original location. With the bike buttoned up and a healthy voltage at the battery, it just left a moment for my eye to linger on the right hand side of the bike. Somehow it looks odd, naked, empty without the old rec/reg in front of the clutch, I’ll get used to it I know, but for now I do miss it!

Measured voltage at battery:

Idle (lights / fan OFF)  – 14.4V  and at 4K – 14.5V

Idle (lights ON + fog lights ON) – 14.3V and at 4K – 14.4V

Idle (lights / fan ON) – 13.9V and at 4K – 14.2V

Idle(lights / fan / fog lights + everything else* ON) – 12.8V and at 4K – 13.6V

* GPS / Intercom / K1 Camera / Heated Grips (high) / Cruise Control / brake lights


The Artful Bodger

Aprilia Caponord ETV1000 Rally-Raid AMP TE Connectivity Superseal connectotsOK I’ll come clean. I’m a bit of a closet bodger – there I’ve said it. Let’s be fair though, the art of bodging is a skill in itself. A well carried out bodge, with novel and outlandish use of alternative materials to affect a successful repair or upgrade is a beauty to behold. But then again a bad bodge will bite you on the arse quicker than a rabid badger having a rather bad-badger day.

So what did I bodge? Well the LED’s in the Capo’s binnacle might be nice and bright but the wiring behind them certainly wasn’t! Of course a lifetime of working with electric/electronics gives one a certain feel for the bodge to be enacted – why use a decent connector when twisting the wires together and slapping on a bit of insulating tape works just as well …… right?

Aprilia Caponord ETV1000 Rally-Raid AS7, Sparkbright and dashboard autodimming LED's

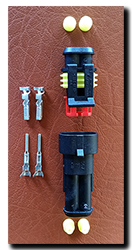
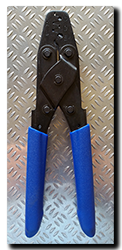
To be fair it was a temporary solution until I’d got hold of some connectors, except I kept forgetting and one thing led to another … And in the blink of an eye, a couple of years had gone by! Last week however, good old Motrag came to the rescue (again!) with a box full of 2 and 3 way Superseal connectors. I really do like these – 14A rated and waterproof (IP67) compared to the Molex items dotted around the Capo that are 5A and most certainly open to the elements. The only downside is that they are Aprilia Caponord ETV1000 Rally-Raid Motrag Superseal crimp toolmore bulky than the Molex so you can’t cram as many into a tight space!

Of course a cunning and artful bodger could fit these without the correct tool to crimp the connectors, but I yielded to common sense – besides Manuel had put a nifty set of crimping pliers in the box as well! Now all the panels are removable with a mere flick of a locking-tab, no longer do I wish for an extra appendage to assist in separating wires/tape while juggling with the panel. Sheer bliss! Here is a copy of the Superseal installation manual.

Wot’s that switch then eh?

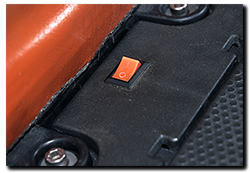
Aprilia Caponord ETV1000 Rally-Raid - 'Service Mode' switchA couple of keen-eyed readers have asked about the switch behind the riders saddle. Well, no mystery really ……. I got fed up with removing the saddles then rummaging around next to the battery to find both halves of the service connector – bloody inconvenient is what it is.

So I dropped a small waterproof switch into the bodywork behind the saddle. Now I just remove the rear saddle, flick the switch and I can reset the ‘service’ indicator and check out any error codes quickly and easily, no fuss, no scuffed knuckles.