V990 workshop engine mount

Aprilia Caponord ETV1000 Rally-Raid Clarke engine mountIt seems that over the years several Caponord and other bike/car related websites have ported themselves over to Facebook – such that I eventually capitulated and joined, albeit in a totally locked down way. And of course over those years I’ve been inundated with zillions of worthless adverts ….. until now. One has proved very worthwhile indeed!

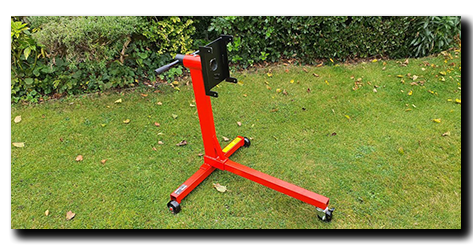
More specifically – JB Fabrications – who were advertising an engine mount adapter specifically for the V990 engine. At £48.45 including postage I was in. Working on a lump like the V990 on a workbench (or the floor!) is a real pain -literally! I’ve spent more time than I care to recollect having to drop tools mid-job simply because my back has tweaked up because of the awkward position I’m working in. This adapter will apparently work with Clarke and Sealy engine mount stands – I chose the Clarke CE340, which can handle engines up to 340Kg (V990 = 65Kg). This stand allows the engine to be rotated 360º and locked off at 45º increments.
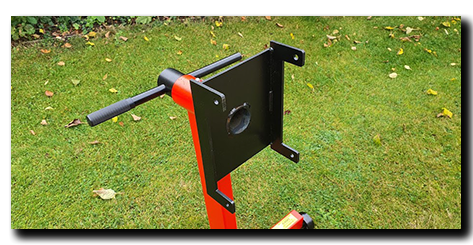
Aprilia Caponord ETV1000 Rally-Raid Clarke engine mountThe adapter only took a few days to arrive. It was well packaged and the paint finish and welding all appear to be decent quality. The engine stand took a few days longer to arrive, but to be fair it was ordered later! Assembly took about 30 minutes with a crafty tea-break thrown in. This of course, is all well and good …. however the engine has to be lifted about 1.5m into the air to get it into the adapter, and that’s no easy task at nearly 70Kg.

Thank goodness there is an electric workshop hoist to hand – rated at 150Kg/300Kg capacity. This is mounted to a cross-beam in the workshop and is more than capable of lifting the engine nicely into place, especially when using the 300Kg setting as this reduces the raise/lower speed by half – handy when trying to jiggle a bolt into position. Of course It also comes in rather useful for doing other bike related tasks as well!
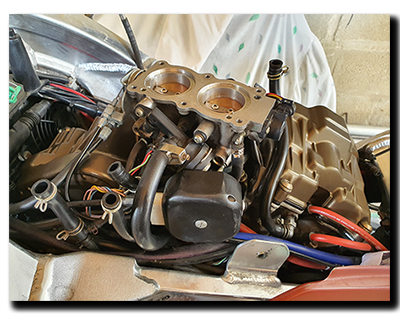
 

It had to be done ……… but

Aprilia Caponord ETV1000 Rally-Raid valve service and cam covers replacedAs I sit looking at the vast expanse of white in the WordPress editor window, fingers poised over the keys and acutely aware of the aches in my fingers and wrists and subtle waft of soap barely masking the hint of worn out engine oil clinging stubbornly to the creases  in my old hands, I think to myself ….. aaagggghhhh why did I bother!

Yes, another Caponord service is over – with a valve check. Don’t get me wrong, everything went well, couldn’t have gone better in fact. Air/Oil filters and engine oil, plugs, hoses, fuel tank drain lines etc … are just perfect … but this time I had to fight my way in to check the valves, last done sometime when Crackerjack was on black and white TV’s – or so it feels.

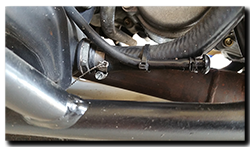
Don’t get me wrong it’s not a hard job, just a fiddly one, especially the front cam cover bolt beautifully obscured by the coolant thermostat, oh and the buggeroo of a screw at the front of the cam cover, behind the radiator and below the finger shredding plastic mount for the front coils … otherwise, all good.

It’s none of that that bothers me in reality. It’s the fact that when you get in and measure the valves after what seems like way too many miles since the last visit, they’re all bloody fine! Couldn’t just one be out, just one require a shim change just to make the whole visit worthwhile – please! Oh well, I guess I had to console myself with fitting the powder coated cam covers and savouring the moment in the golden hour at the end of a beautifully warm day. 

Tuono clutch cover – AP0610992

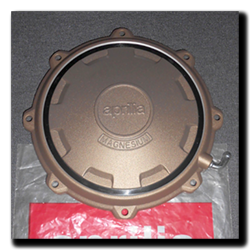
AP0610992 Aprilia Tuono ETV1000 Caponord clutch cover magnesium

Well it was a long time coming … I mean a looonnnggg time. Try several years in fact. But was it worth the wait? Well I think so, but hey, I’m biased! 

Here it is …. AP0610992, a gold(ish) Magnesium clutch cover from a Tuono (2006-2010). It seems they are harder to come by in an as-new state than the proverbial rocking-horse doo-dah. All the ones I’ve seen have either been mullered by over enthusiastic riding Gods (crashers) or are brand-new at silly Aprilia pricing. 

I know the standard cover does the job just fine, but ever since I saw one of these on a Capo motor I’ve wanted one as well – it just looks so much better. And besides, the weight saving alone must be worth at least 10 mph on the top end – right? 😉 

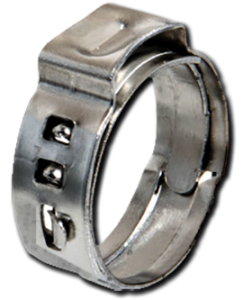
Aprilia Caponord ETV1000 Rally-Raid Zero Leak low profile clamp stainless steelSwapping over only takes a couple of minutes …. 8xM5 bolts and a click clamp to remove. I exchanged the old one for a nice new Zero-Leak low profile Stainless Steel 11.3mm version – very snug! In fact the old one wasn’t really squashing the pipe onto the siggot anymore and could be pulled/pushed/rotated very easily, which makes me think it was no longer vacuum tight ….hmm. Anyway, the new one crimped up lovely and everything is supper-sealed once again.
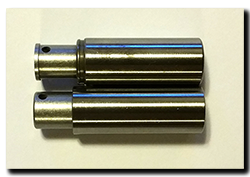
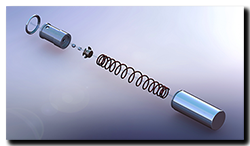
Cam chain tensioner – Part 3 ….. Judgment Day!

Aprilia Caponord ETV1000 Rally-Raid cam timing chain tensioner AP0236252 AP0236253A few days ago the two new cam (timing) chain tensioners (AP0236253) arrived ……. and as if she knew, the Capo started to rattle the rear cylinder for a second or two at almost every start-up! So as soon as we got home yesterday, it was off with the bike kit and into the workshop-wear and time to seriously twiddle some spanners.

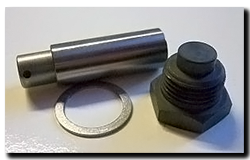
Thankfully the rear tensioner is nice and easy. Fuel tank up, pop out a couple of spark plugs to make rotating the rear cylinder to top-dead-center nice and easy, then rummage under the wiring on the right hand side and find the cap requiring a 6mm hex-key.. Remove the cap and the copper washer underneath and then use something pointy to hook the tensioner out enough to get a grip with podgy fingers.

Aprilia Caponord ETV1000 Rally-Raid AP0236252 cam timing chain tensioner INA F-46807The tensioner shows definite signs of movement and rotation and the plunger could be pushed in about 1/2 its travel ….. I think FUBAR best describes it! The new tensioner was oiled up and before it was dropped into the motor I did a little experiment. Both old and new parts were flushed and filled with new 15w/50 and gently pinched in a vice. The new tensioner remained snug for a long time, only a small amount of oil could be seen coming out ….. next up the old one. This remained snug for no more than 1-2 minutes and oil could be seen leaking from it the second it was compressed. So all in all a major difference in performance between old and new.

Aprilia Caponord ETV1000 Rally-Raid cam timing chain tensioner AP0236252 AP0236253After a few more jobs were carried out, it was buttoned together and warmed up …. no rattles and in fact the idle was smoother than it has been in a while.

The tensioner that came out is an original Mk1 (AP0236252) that was superseded by the new version a good few years back. From what year they were fitted as standard I don’t know. Looking closely at the old one I found ‘INA F-46807’ printed around the edge. I can’t find much about it unfortunately. However ……..

……. I did find something that might be of interest. It looks like the tensioner fitted to the BMW 650 (late models) and F700/800 bikes could well be the same. Now this can only be corroborated by direct comparison, so I might tout the other new Aprilia one around a few BMW dealers to see if I can find out if they match. If they do fit, then they are available for substantialy less than the £68 each from Aprilia.
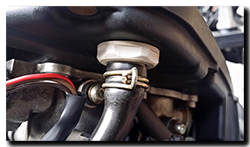
Airbox crankcase vent – Mk2

Aprilia Caponord ETV1000 Rally-Raid engine crankcase vent pipe to airbox and throttle body

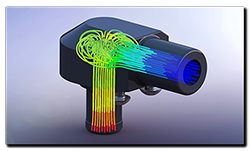
With the velocity stacks and snorkel measured up and squirreled away in CAD, it was time to rebuild the airbox …… except billy-butter-fingers here, went and knocked the airbox base off a chair onto the floor – not far – but enough for it to land awkward and break the spigot for the crankcase vent. Unfortunately the spare I’d made, I gave away to a friend last year! So there I am trying to remember where I’d bought the bits to make Aprilia Caponord ETV1000 Rally-Raid engine crankcase vent flow analysisanother one, when I had a “Stop the bus!” moment …… don’t waste time and fuel going into town, sit down, draw something in CAD and print that puppy! 😀 

Here’s the finished article …. it has a slightly larger inlet/outlet cross-section, although the previous one worked just fine and this time the fit for the grey pipe is better. internally there is a chamber to help reduce gas flow and (hopefully) convince some of the oil to condense and run back down into the crankcase, not out into the airbox. That’s the theory anyway, but it’ll probably turn out to be complete bollocks! Either way, it looks neater so that’s a positive step forward ……. now, what else can I break today! 😀

Aprilia Caponord ETV1000 Rallyb-Raid engine crankcase airbox vent 3D print

The MK1 vent did well and lasted almost  2 years (37K miles) and in that time I never had a moments issue with oil in the airbox going where it shouldn’t. Let’s hope this one does as well!


Hybrid velocity stacks

Aprilia Caponord ETV1000 Rally-Raid 47mm and hybrid 51mm velocity stacksIf all goes to plan, later this year the second Rally-Raid that’s currently being rebuilt, will finally get a motor installed. The plan is to use a big-bore motor …. an 1,103cc in place of the standard 998cc. The compression and valve timing will remain bog-standard Caponord (10.5/1  Inlet timing – 25°BTDC/37°ABDC and Exhaust timing – 57°BBDC/5°ATDC). However to accommodate the increase in air-flow, I’ve decided to use Futura 51mm throttle bodies instead of the Caponord 47mm items.

Meanwhile on top of this chunky aluminium marvel sits a pair of velocity stacks. These stacks vary in height (and diameter) depending on the intended tune of the engine. The RSV Mille of course is designed as a race-rep and as such wants high horsepower at high RPM – hence 57mm throttle bodies and very short velocity stacks. On the other hand the Caponord was tuned for improved low-end grunt and so has small throttle bodies (47mm) and tall velocity stacks to maintain good gas flow speed at low RPM. The Futura seems to sit firmly between the two!

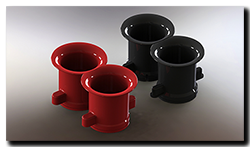
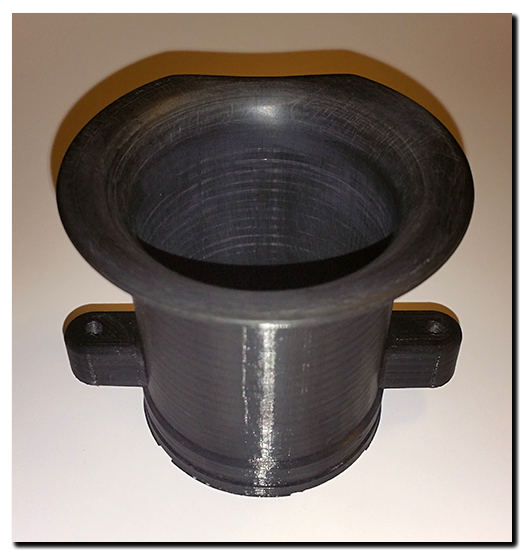
Now of course I could simply use the medium height velocity stacks straight off a Futura, but I decided to go a different route and print a new pair of hybrid stacks – Caponord height BUT 51mm diameter to fit the Futura throttle bodies. Unlike ABS, Colorfabb Ngen (Co-Polyester) can’t be vapour polished with Acetone, so I’ll have to sand the venturi down with a variety of grades of wet-and-dry up to 2,000 grit and maybe finish it off with something like Quixx plastic polish – if it works on this stuff! Here’s a couple of pics comparing the original and new version – straight out of the printer!

Unfortunately 3D parts (unless made on high-end machines) don’t typically have the same strength as injection molded or machined parts – but they do make great ‘proof-of-concept’ parts! If these stacks prove to be a positive step forward, but not durable enough for the working environment, I can at least get the drawings to the machine shop and have them made in aluminium … but that’ll be a tad more expensive than 85p each off the printer! 🙁 

UPDATE

Just had a spare half-hour to rub some 100/400 & 1200 grit paper down one of the stacks and all I can say is – WOW! This material rubs up lovely and probably a couple more sessions will see it through. All the print-ridges have gone and I can’t feel anything but a nice smooth surface that retains a print pattern that makes it look quite distinctive.  🙂

Aprilia Caponord ETV1000 RST1000 Futura Rally-Raid hybrid velocity stack


Feeling a little bunged up

The Capo now has 3D printed bungs in the swing arm pivot and the ends of the crash-bar mounts. They’re held in by 43-39-2, 14-10-2 and BS011 ‘O’-rings. And yes, the BS011 rings are the very same as those used on the fuel lines. So one day if the old girl springs a leak and needs a new fuel line ‘O’-ring by the roadside – no problem, whip out a crash-bar bung and pinch the ring!  Next ….. front and rear axles then the engine mounts above the swing-arm pivot .

Pucker up and suck or blow …. your choice!

Here’s todays little quiz ……

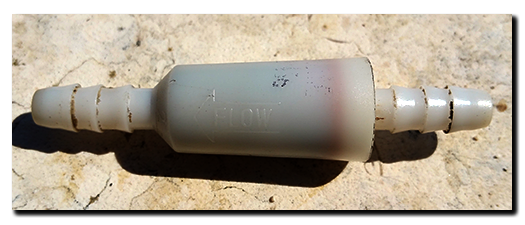
  1. What’s this?
  2. Where does it go?
  3. How many are on YOUR bike?

20150830_142552

Of course the smarty-pants among you will scream out the answers to 1 & 2 in double quick time – it’s a check-valve or none-return valve and it fits between the throttle body and clutch in the vacuum line. Excellent stuff, spot on …… but question 3 …… one valve or more than one? Hmmm.

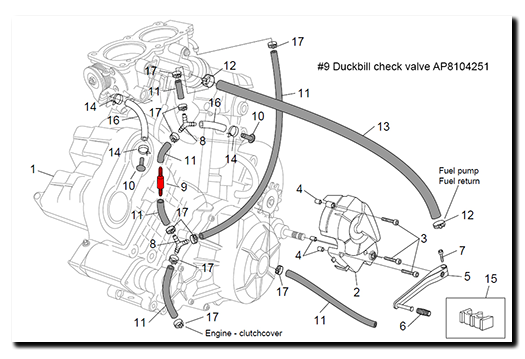
Here’s what Aprilia show in the parts manual (click for photo of matching engine) …..

Aprilia Caponord ETV1000 Rally-Raid pneumatic vacuum clutch and one way valve

The front cylinder throttle body port has nothing but a piece of clear hose and a bung – the manometer/VAC gauge test point. All the slipper-clutch hose/valve assembly is ONLY attached to the rear cylinder throttle body port and TPS port. This may well be fine and dandy for an 01-03 bike.

But if you have a Rally-Raid or an 04-onward bike, next time you’re under the fuel tank/airbox take a good look at the front hose …… my guess is you’ll have a ‘T’-piece and more black hose disappearing downward below the mire of cables and wires running alongside the frame. Now this might be no surprise to you, but it had me scratching my head for a while I can tell you! 😕

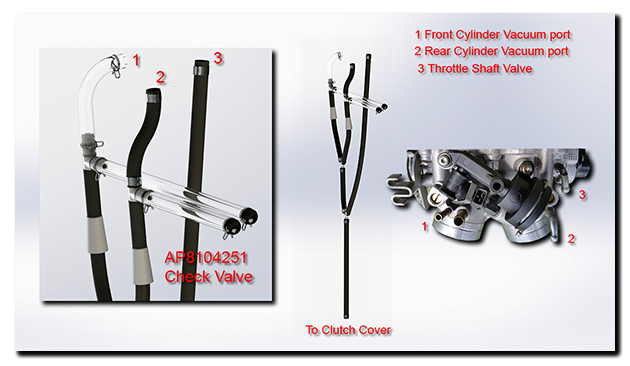
And this is what I’ve got on the Rally-Raid (click to enlarge)……

Aprilia Caponord ETV1000 Rally-Raid slipper clutch pneumatic vacuum lines and check valves

A second complete set of pipes AND a second check valve connecting to another ‘Y’-piece. Why do this? Well this is my hunch, guesstimation, call it what you will ….. the 01-03 Capo has I believe a clutch pack that is 43.6mm thick, the 04-08 is 44.9mm thick. A difference of 1.3mm – in other words the valve springs will be compressed an extra 1.3mm on later bikes and that means a little more spring preload for the vacuum system to overcome when getting the clutch to slip, hence the second set of connections to improve the vacuum – 2 cylinder are better than 1! Also, two sources of vacuum from cylinders running out of phase (60° remember) may well help smooth out the pulses you can sometimes feel through the clutch lever. It simply looks like Aprilia modified our blessed Caponords and just didn’t bother to update the parts manual.

So what’s all the hullabaloo, why rip this poor little thing from the Capo’s delicate innards? Well the long and short of it is that one of them is pooped, shot, completely knackered ….. where air should only flow one way, it flows happily in both. Looking at the defective duckbill valve reminds me of Daffy-Duck cartoons, the ones where Elmer Fudd rearranges his bill with a shotgun! No worries, simply order a replacement …….

……. Aprilia part no AP8104251   Just make sure you’re sitting down when you look at the price! 🙁

I’ll shortly open up a new page with some more 3D images to try to better illustrate how the system is operating at different stages and how to go about testing the valves and what to expect.

Oil in the Airbox …..fixed!

You may (or may not!) have read the post a couple of months ago – Fixing a few Capo niggles. That was where between Continental trips, the original air-box molded connection for the crank-case vent was drilled out and a new 90° bulkhead coupling and Aprilia Caponord ETV1000 Rally-Raid extended airbox drain tubepipe fitted to drain any oil into the front of the airbox, well away from the throttle body and IACV (Idle Air Control Valve).
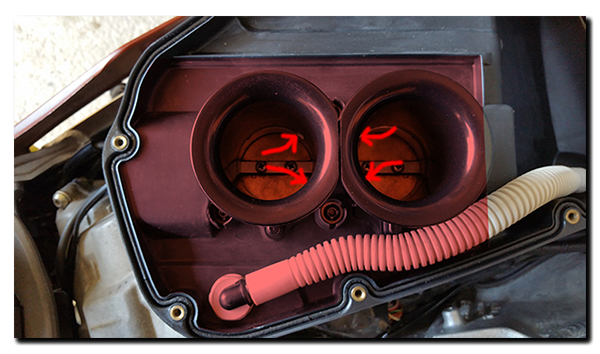
Now with the Caponord seriously (+1,000 miles) overdue a service, I got stuck in and removed the tank ready for plugs/air filter. I admit to being really pleased to see no oil what so ever in the upper part of the airbox and only a tell-tale smear in the front section. A syringe sucked what oil there was from the drain tube – approx. 5cc @ 3,000 miles WITH the oil tank filled to the HIGH mark.

Previously it didn’t seem to matter where the oil tank level was, oil kept getting thrown into the airbox and sucked down into the throttle body. Look closely at the design of the airbox and you see the ‘fenced’ in area (red) around the velocity stacks – and of course, the two slots in the stacks (arrows) for excess oil to drain through.

Aprilia Caponord ETV1000 Rally-Raid new crankcase drain inside the airbox

It’s pretty obvious then that Aprilia/Rotax EXPECTED regurgitated oil – and tried to ensure it was fed back to the engine and burnt. Unfortunately that isn’t always the case and when some bikes are left on the side-stand oil manages to get over the ‘fence’ and muck up places it shouldn’t!

Of course a little hot oil can spread a long way and look far worse than it really is ….. I guess it just niggled the hell out of me each time I lifted the airbox lid. In hindsight it’s one of those quick jobs I wish I’d done years ago.

Cool running Capo

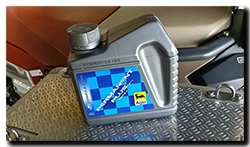
Aprilia Caponord ETV1000 Rally-Raid Agip Permanent Plus coolant (Antifreeze)After fiddling around with the cam chain tensioners, it was time to refill the coolant system – something Aprilia say to do every 2 years and MotoA has successfully neglected for almost double that! The handbook says to use either Agip Cool or IP Ecoblu. While Ecoblu is still available, the Agip coolant has apparently been superseded by Agip Permanent Plus and Agip Permanent Spezial ….. and wait for it ….. they’re about to be rebranded again as ENI Antifreeze Bike P and ENI Antifreeze Bike S. So which one do we need for the Capo? Well the ENI website says Bike S, while AF1 recommend Permanent Plus (Bike P), so I ordered Permanent Plus before the headache-of-confusion got any worse!

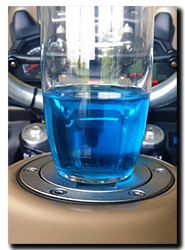
Aprilia Caponord ETV1000 Rally-Raid Agip Permanent Plus coolant (Antifreeze)What’s the difference? One is blue and one is red …….. but it goes a bit deeper than that! I must admit that the heady and scintillating world of antifreeze has past me by for most of my adult life, my knowledge pretty much stopped at – it’s green (mostly) and it stops my engine exploding into an ice block during winter-woolly-wearing time. Oh no, it seems that is most definitely NOT the end of it, our aqueous boffins have been brewing up a positive Smörgåsbord of antifreeze variants and as you can guess only some are suitable for our precious two-wheel companions. If you want to fry your brain with antifreeze techie stuff, have a read here. Otherwise it simply comes down to the difference between the two Agip products – Permanent Plus (Blue) is hybrid technology and good for 2 years while the Permanent Spezial (Red) is OAT (Organic Acid Technology) and good for 5 years – hence the ‘long-life’ tag.
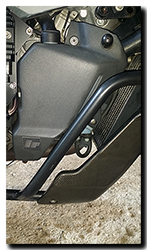
Aprilia Caponord ETV1000 Rally-Raid coolant expansion tankBut in the end, whatever you buy just make sure it’s good down to -40c and nitrate free and pre-mixed or mix it to a 50/50 solution. Remember that over time the corrosion inhibitors will be used up and the solution will slowly become acidic. Consider buying a PH tester for a couple of pounds/dollars to check the PH level in the radiator when doing a service, ideally it should be 8 or higher when new. If the PH is below 7 then the coolant definitely needs replacing before the acidity starts to eat away at the engine.

So now the Capo has had a nice flush and refill with Permanent Plus and the spreadsheet has been updated to give me a gentle nudge when it’s due to be changed again, rather than the fill-it-forget-it method I’ve used to date!