A little unhinged

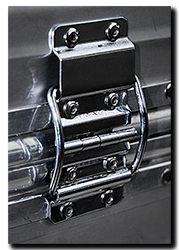
The day before the awful January weather hit, I managed to get a nice afternoon ride-out on the Capo. Stopping part way along for a coffee break, I paused for a moment to put helmet and gloves in the top-box – forgetting I had a bungee-cord still attached between the lid and side cases. With my mind wandering away on other things, I flicked the latches and began lifting with finger and thumb. In a heartbeat the cord snatched the lid out of my hand, slamming it hard against the hinge-stops bending the hinges and shearing two rivets. Oh well, after 10 years I guess it could do with a bit of TLC, now it definitely needs it!
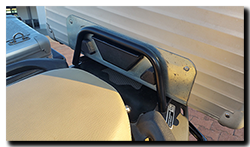
Aprilia Caponord ETV1000 Rally-Raid Hepco Becker top box 3D printed spacersA couple of weeks later, after the snow had finished having its wicked way, I managed to get around to doing a complete strip of the top-box in an uncomfortably cold and damp barn, first straightening the hinges then rebuilding it all with new 4mm stainless steel rivets instead of the feeble aluminium 3mm ones. While I had it stripped down I remembered that I’d had a little 3D printer idea regarding the top-box and now was the perfect time to do it.
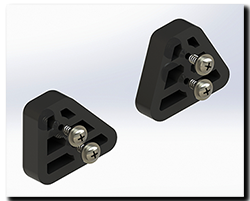
Aprilia Caponord ETV1000 Hepco Becker 45L top box alignment spacersSomething that’s always bugged me with the Hepco-Becker top-box is the lateral play in the mount which allows the box to be fitted off-center – around a half-inch or more (>12.5mm) either way. To take this slop out two plastic blocks modelled on the shape of the existing mount have been added using the same size self-tapping screws as on the main support. These blocks don’t take any load, that’s still handled 100% by the original support, their only job is to ensure the box lines up perfectly every time it’s refitted ….. no bumping, shuffling or tweaking it into place, and this most certainly pleases my mild OCD!
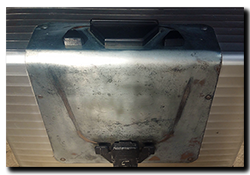
Aprilia Caponord ETV1000 Rally-Raid Hepco Becker top box support plateWhile doing all this, the bottom galvanised steel support plate was measured and a larger improved design drawn up. The original 1.5mm thick plate has too much flex for my liking (built to a budget) so the idea is to fit a slightly thicker 2mm stainless steel one for improved support, looks and weather resistance. After all this, the top-box should be good for another 10 years + …….as long as I don’t screw up the hinges again that is! 😀
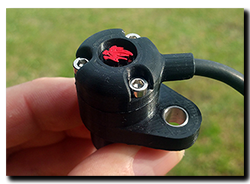
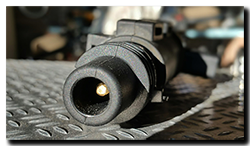
Aprilia Caponord ETV1000 Rally-Raid 3D printed speedo sensor Honeywell 1GP7001And finally, the January backlog of post and parcels are starting to trickle through and with the first batch came the 8mm OD stainless steel sleeves and a couple of Honeywell 1GP7001 speed sensors. So the sensor and case are now assembled and tested. Only the cable strain relief sleeve is missing before I can fit it permanently to the bike. Fingers crossed they’ll be in the next batch of post!

More bunged up …… or spoke too soon!

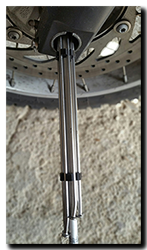
Aprilia Caponord ETV1000 Rally-Raid spare spokes in the front wheel spindle - AP8108784, AP8108787, AP8108805I’ve been carrying six spare spokes around in the front wheel spindle for years ….. however the whole thing was a bit of a mash-up and not worthy of a post on here unless I desperately wanted some serious ridicule. Until now that is! Out with the hand-cut foam and insulating tape and in with the nice new 3D printed parts – two spacers to hold the spokes all nice and even and two new symmetrical end caps. All this held together with a length of 8mm aluminium tube, two ‘O’ rings and two M6 stainless fasteners topped off with a pair of decorative washers I had left over from my old Honda Blackbird days. All works pretty well, even if I say so myself! 😀 

Feeling a little bunged up

The Capo now has 3D printed bungs in the swing arm pivot and the ends of the crash-bar mounts. They’re held in by 43-39-2, 14-10-2 and BS011 ‘O’-rings. And yes, the BS011 rings are the very same as those used on the fuel lines. So one day if the old girl springs a leak and needs a new fuel line ‘O’-ring by the roadside – no problem, whip out a crash-bar bung and pinch the ring!  Next ….. front and rear axles then the engine mounts above the swing-arm pivot .

Print me a Capo ……

Yesterday, on a rather cold and wet afternoon, moto-abruzzo took a step into the future ……. courtesy of a good friend that I’m doing a project for. A 3D printer arrived! And being the top man that he is, he’s cool about me printing off those odd little Caponord bits-n-bobs.
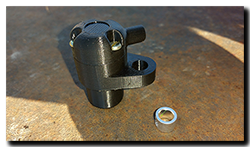
It was rapidly unpacked and Jan and I stood in awe at this little box of awesomeness, we oooo’d and aaaah’d in all the right places …. then it was time to fire the beast up. But first a good nights rest. Early the next morning I loaded up a model and hit the ‘MAKE!’ button. My heart pounded as it hummed, rumbled and whired into action. For an hour it beavered away – then stopped dead! In fact everything stopped – ANOTHER BLOODY POWER CUT! So on with the coat and off to buy a UPS (Uninterruptible Power Supply) to keep computers and printers running when we get these annoying micro/mini power cuts that last no more than a second or two but mess everything up. Once installed I was away like a whippet on speed ……. by the end of the evening we Aprilia Caponord ETV1000 Rally-Raid 3D printed speedometer sensor case AP8124985stood and marvelled at its first creation – A Mk1 speedo sensor case.

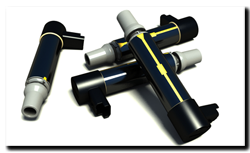
 Like any piece of kit it has a bit of a learning curve attached to it, but hey, that’s all part of the fun. Here’s a pic of the first printed Capo speedo sensor main case and cap. The holes print really well even at this resolution and tap to M3 no problem. The sensor is a nice snug fit and (thankfully!) it fits in the brake caliper carrier and even the bolt lines up which is nice! So overall – moving in the right direction. Now I just need to order a couple of sensors, some cable, rubber boots and Molex connectors and the jobs as good as done. Then I can change out the sensor on the bike, run it around for a while and see how the printed parts hold up to life on a motorcycle.

Why bother with all this?

Have a look at the cost of a replacement sensor from Aprilia (AP8124985) ….. currently £112 plus postage from Fowlers and Ultimateparts in the UK and €146 (approx. £127) from wendelmotorraeder in Germany. OK it’s much cheaper from AF1 at £65 but the postage is higher and you may well have customs duty to pay – all bumping up the cost.

So …….. IF (a big ‘IF’ mind you) it tests OK over a couple of months and possibly a small batch were to be made, would anyone be interested in an aftermarket Capo speedo sensor for half the price of an original?

Anyway, until then what’s next ……. hmmmm.

  • Hybrid velocity stacks – Caponord height with Futura diameter (51mm)
  • Hi-Flo airbox snorkel
  • Frame/axle/crash bar bungs (insects use the orifices as nesting sites!)
  •  ……. and maybe even a 1:5 scale model!! 😀 


Beasthonda (Andy) Fuse Block

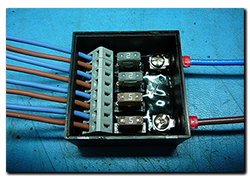
Aprilia Caponord ETV1000 Rally-Raid Beasthonda (Andy) fuse blockUnfortunately, due to circumstances I won’t elaborate on just yet, I found myself with a bunch of cut accessory cables sorely in need of a home! So step forward front-and-centre the fuse block made by Beasthonda (Andy) from the AF1 forum.

Truth is I’d had this pre-production block sat on my workbench for about three years! Andy kindly sent it to me without the PCB being potted in place so I could have a look at the circuit board. I never got around to potting it and so it sat all forlorn in the corner. Time then to dust it off and put it to good use.


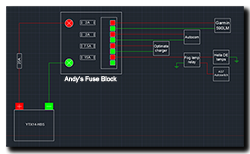
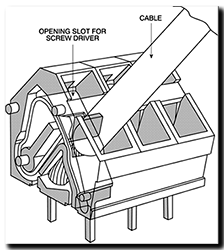
I decided to mount it to the underside of the pillion seat decking – Aprilia call it the luggage rack – so I made up a bracket that bolts in  place with two stainless M5 screws and M5 clips. Aprilia Caponord ETV1000 Rally-Raid Beasthonda fuse block wiring diagramThe fuse block is attached to the bracket by good old double-sided 3M adhesive pad. Wiring-up was straight forward and as I knew the overall current load it was going to feed, I used 14AWG and a 20A fuse to the input. The outputs are 2A (GPS), 7.5A (Optimate), 15A (fog lights) and another 2A (Autocom). The output wires connect to a Wago 236 terminal strip – no screws or crimps, just a strong spring to hold the cables in place. And they do hold them believe me! Each connection is rated at 16A and accept cables from 28-12AWG.

Wago 236 terminal connectorAnd that’s it …… one neat block and no more external fuses. 
In this location the battery strap retaining screw is obscured, however I only have to disconnect the ground, then the live, remove two screws and lift the fuse block out and drape it over the side of the subframe. Now the battery/screw are more accessible than they’ve been for years! I really wish I’d done this ages ago and I can only apologise to Andy for not putting his fuse block to good use before now. I owe you one matey!!

You can contact him via PM on the AF1 forum or at ‘a’ underscore ‘allott’ at hotmail dot com. Price is £25 UK £30 USA/EU and £35 Oz/Asia inc. P&P

Now if Mr Beast ever decides to do a Mk2 version (R U listening Andy? 😀 ) then I’d love to see a relay in the box and maybe another output …… then we could have some outputs powered continuously (like now) and some that are powered via the relay connected to the lighting circuit or a handlebar switch for example. That way I could bring the INNOVV K1 and cruise control power lines to the fuse block as well. Ahhhh …… what dreams may come true eh! 😀

Charge of the fright brigade

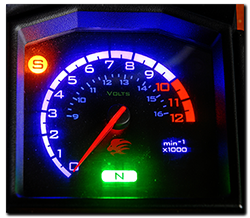
Aprilia Caponord ETV1000 Rally-Raid tachometer voltmeter dashboardI had a bit of a stress-monster moment last night. After finishing off a bit of work on the Capo, I fired it up and stuffed the multimeter probes across the battery terminals – 16.1V with the lights on! My heart skipped a beat and thoughts of a toasted rectifier rumbled across my mind. However the Sparkbright battery monitor LED showed steady green and should have been flashing red/green at this voltage. A prod of the ‘mode’ button activated the tacho/voltmeter in the dashboard and it said just over 14V. What gives? Then another glance of the multimeter channelled my thoughts in a whole new direction – an itsy-bitsy low battery icon was showing. A fresh PP3 and a calming cup of tea later and the Capo was in fact charging at a healthy 14.2V all along ……. So with the stress-monster firmly back its box, I made a note to check/change batteries in all the other tools in the workshop ASAP!
INNOVV Power Hub 1 arrives

A huge thank-you to those that have donated toward the upkeep of this website, it is much appreciated!

Aprilia Caponord ETV1000 Rally-Raid INNOVV K1 camera cable support

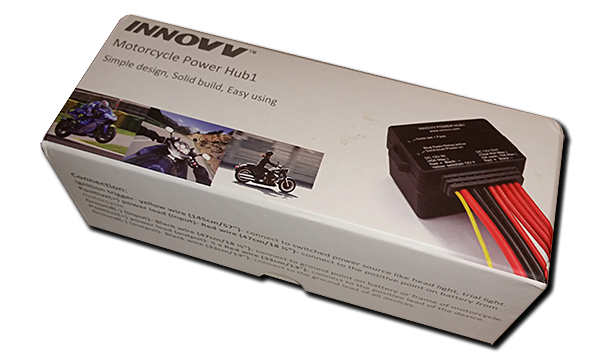
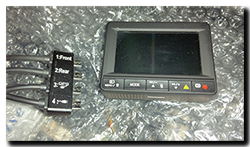
A couple of parts finally arrived yesterday, having had an extended holiday in Milan courtesy of customs. These have been kindly provided for review by Rock Liu at INNOVV. The first is the Power Hub 1 and the second is a bracket to help support the four cables that go into the K1 camera system.  The delivery is well-timed actually ….. we’re about to get a good old dose of crap weather, so it’ll be an ideal time to fit the hub and write a review of it and the K1 camera system.

Aprilia Caponord ETV1000 Rally-Raid INNOVV Power Hub 1

Meanwhile I’m off to the 51° FIERA DEL RADIOAMATORE DI PESCARA (Amateur Radio 2 day event) sporting my nice new Italian callsign – IU6HXL – lets hope I can bag a bargain or two!

Coils, cruise, camera – action!

Aprilia Caponord ETV1000 Rally-Raid Renault V6 HASS ignition coil - 413745171After waiting a week for the delivery from carparts4less, the Capo is happily running on four coils again! 😀 I bought the Renault V6 coil (413745171) made by HAAS. While plug’n play at the LT connector, it does need some excess plastic removing and the HT end requires a modification. I’ve seen this coil modified in a couple of ways – one simple and one requiring a bit of soldering skill. I chose the latter because I think it gives a more positive connection. New page here.

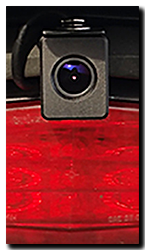
Aprilia Caponord ETV1000 Rally-Raid INNOVV K1 rear HD camera 1920x1080With the bike buttoned up, I ran the INNOVV K1 cameras again – no sign of RF issues anymore, so that’s a step in the right direction. It was about 6pm and dark inside as well as outside the barn as I stood tweeking the throttle and glancing at the INNOVV DV recorder while it captured the rear K1 camera. I watched the vapour from the exhausts to the left and right of the camera as it swirled in the red glow of the tail light. Then it all went blank and the INNOVV rebooted again – WTF!!! 👿 

However …… in that moment I saw something that was a revelation. A real game changer as they say. The fact is, I started to suffer an intermittent fault a few months ago and as any engineer knows, you’ll go bald fast if you waste time chasing an intermittent fault – wait for it to come to you. I think of these sorts of faults a little like the TV serial killers on any number of cop shows – they always want to get caught. At some point an intermittent fault will give itself away, that one clue that unlocks the puzzle. In this case, when the INNOVV rebooted, I saw a momentary flicker of the red glow from the tail light out of the corner of my eye. If I hadn’t been doing this in the dark I would never have spotted it!

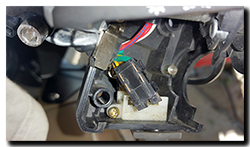
This fault goes back quite a while, back to a hot summer, a long day on French motorways and a cruise control that would occasionally stop working. Sometimes it would engage for the whole 1½-2hr ride, the next it would drop out after a few minutes or maybe after a ½hr – it was completely random. However …… I did find that by turning the headlights off, the cruise could be re-engaged and would work just fine! At that point I was suspecting a fault with the headlight loom, the 6-way connector is known to burn if the Aprilia Caponord ETV1000 Rally-Raid light switchEarth (Ground) connection is bad. Unfortunately all tests and checks came up with nothing. So I sat back and waited for the fault to give me the one clue I needed to bring the bugger to justice!

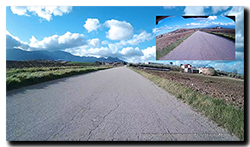
In that momentary tail light flicker, all the parts came crashing together. It was the light switch all along! You see the switch isn’t just one switch but two-in-one. One for the headlight and one for the sidelight …… and this is the circuit that the MCCruise control AND the INNOV are powered from! The switch was stripped, the hard dirt-filled goo that had once been grease that was stopping the springs working was cleaned out and the contacts treated to a splash of contact cleaner and fresh lubricant. Now it looks better, works smoother and above all, delivers a constant voltage to where it’s required. 😀 Aprilia Caponord ETV1000 Rally-Raid Innovv K1 camera screenshot

And afterwards? Well a couple of days eating up the miles and clocking up the hours have been rewarding (and fun!) to say the least. Both cruise and cameras have worked perfectly and the Capo is pulling like a little train again thanks to its refreshed ignition!

Murphy’s law working as well as ever!

Aprilia Caponord ETV1000 Rally-Raid and RST Futura Sagem or JCI Ignition coilsYes I put my hand up …… it was all my own fault! I just had to go and mention the Sagem coils in the last post. A real tweak on the nose of Murphy’s Law if ever there was one!

The other day I had to pop along to the shops and being a lovely warm sunny day it was definitely a job for the Capo, besides I had the Innovv K1 camera system fitted and this would be an ideal time to try it out. The first sign that something was amiss with the Capo was a slight hesitation, a stumble just off idle. That and a slight misfire occasionally – more a sensation through the seat than anything else.

arcOnce back in the barn I had a look at the Innovv DV recorder – No stored video, nothing! What the hell? Then the penny dropped ….. The Innovv worked fine with the engine off, but fire it up and it had a complete meltdown and either turned off or froze. It looks like some serious interference at work. With the seats off, I realised there was a faint intermittent ‘tick, tick, tick’ to be heard over the exhausts from the battery/coil area but I couldn’t see anything. So I waited until dusk and tried again – bingo! – A nice intermittent flash of HT from a rear coil to the subframe. That’ll most certainly mess things up quite nicely.

With one Sagem definitely now duff I decided to retire both remaining ones. After all, 111,000 miles isn’t too shabby! To keep all coils the same I thought I’d order three TechAutos – two as replacements to match the two already installed and one as a spare, just in case. So back indoors, fire up Flea-Bay and almost fall off my chair when I see what TechAutos are up to! Here’s a screenshot of their latest pricing for 3x coils. Hmmm……

techauto-1

…… So I fired off an email asking about availability and real-world prices – and after four days, never heard back from them. I decided that with outstanding customers service such as that, I would go elsewhere and buy Renault V6 coils! In fact for the last realistic price I recall seeing for three TechAutos coils I can buy six Renault coils. Now the old girl will get a nice new full set of coils and HT leads plus a new set of Iridium plugs ….. hopefully that’ll keep her happy for a few thousand miles!

One last long run before winter …….

Aprilia Caponord ETV1000 Rally-Raid Metz StrasbourgAfter 22 days away on the Capo I returned with a little more than I bargained for, not least a crick in the neck and a stinking cold! On the way up I met Gianluigi at the Italian/Swiss border and talked some serious Capo bling for an hour. Then rode through sunshine, drizzle, rain and freezing fog before reaching Oxford. On the way back we were treated to high winds a stunning moon-rise and some amazing early morning scenes with low-lying mist. All in all, a real slice of what Europe/UK has to offer bikers this late in the season!
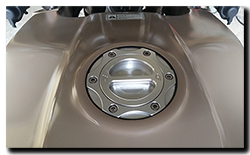
Aprilia Caponord ETV1000 Rally-Raid Oberon keyless fuel capThe original fuel cap was replaced with the Oberon keyless unit a few days after reaching Oxford …. it took about 10 minutes in all. It looks good, works fine and I’m no longer worrying about getting into the tank! That’s the only work done on the Capo for the whole trip – 3,000 miles – key-in, ride off. No drama, no breakdowns. In fact the last two original Sagem coils are still sparking just fine after 110,503 miles!

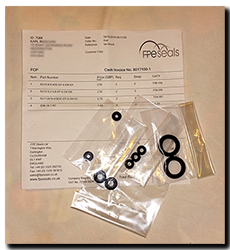
Aprilia Caponord ETV1000 Rally-Raid FPE Seals clutch master cylinderWith the panniers emptied, it was a great opportunity to restock on spares for the workshop – front wheel bearings and seals (used the last set 9 years ago!) a clutch pushrod bearing (16004), clutch diaphragm and  a couple of sets of clutch master cylinder seal kits from FPE Seals Ltd. Service parts stock is now replenished with extra oil/air filters, a spare pack of DPR9EIX-9 Iridium spark plugs, red rubber grease and more Scottoil as I seem to be going through a couple of litres a year! A HUGE bag of stainless screws, nuts and washers from Jason helped balance out the panniers (cheers matey!) and last but not least, the remaining electronic parts to finish off the BMW Brake Light System (clone!) that was started in spring.

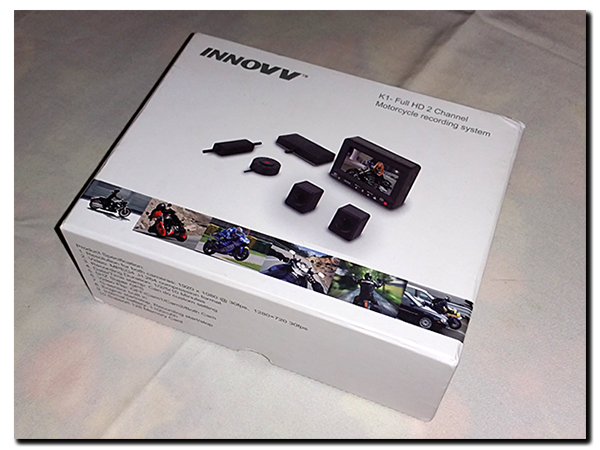
But undoubtedly the highlight of the pannier contents is the Innovv K1 dual channel Full HD camera kit. This has been loaned for review by Jim smith at AMI (Abbey Motorcycle Instructors) who should be fitting a second kit to one of his Instructor bikes over winter. I’m really looking forward to fitting this kit and putting it through its paces. In fact I’ve already been running the system on the workbench and making a comparison of video quality compared to the GoPro Hero 3+ and power draw etc ……. full review coming soon, watch this space!

Aprilia Caponord ETV1000 Rally-Raid INNOVV K1 full HD dual channel camera kit