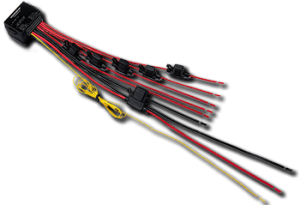
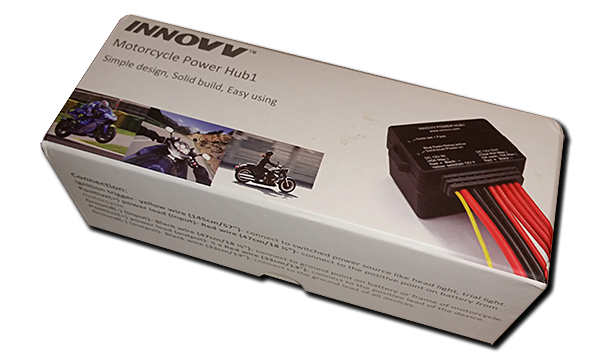
 The INNOVV Power Hub 1 is a 40A rated relay unit with five outputs each fused at 5A out of the box. The battery wiring is 12 AWG so good to 41A and the output wiring is 16 AWG and good to 22A each, however INNOVV specify 15A max per line to a total of 40A. Lastly there is a yellow sensing wire that needs to be connected to a switched 12V source. All cables are of a decent length, especially the yellow wire which is 1.45m long. At key-on this line will trigger a 10 second delay timer in the unit, after which it turns on. At key-off, there is another 10 second delay before it powers down.
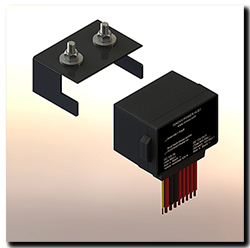 In the box is the Power Hub, a couple of brass crimp/solder tags to connect positive/negative to the battery and a bag of ‘posi-lock’ connectors and a ‘posi-tap’ connector to join the sensing wire to a switched line on the bike.
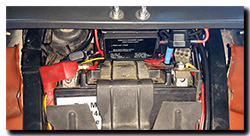
Installation was easy if a little thought-provoking due to the very limited space on the Capo. In the end I decided to put it above/behind the battery and made a 1.5mm aluminium plate to mount it onto and that worked out just fine. I used the ‘Posi-Locks’ to attach the circuits with a sleeve of adhesive shrink-wrap over the top to add a little weather resistance to the connection. I hooked the yellow sense wire into the injection relay, so the Power Hub 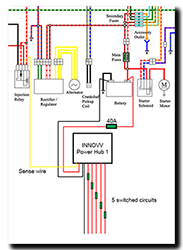 would detect key on/off, this was a soldered joint so I didn’t use the ‘Posi-Tap’ connector.
Next up I swapped out fuses where necessary for higher or lower values to best suit the attached accessory ….. then key-on! The blue LED flashes and 10 seconds later the relay activates and all the attached circuits power-up including the INNOVV K1 camera system. Thank goodness I hadn’t got any wires crossed! 😀 Key-off and the same happens in reverse – blue LED flashes for 10 seconds then the relay drops out.
Five months later …..
Sometimes its old age, wear and tear, faulty parts or manufacturing, but in the end technology fails. Of course we’d much prefer the former rather than the latter option, because that is when we have to invoke a warranty claim or get it repaired by the manufacturer. And that my friends can be unbelievably frustrating and seriously tarnish how you feel about the company in general.
 So when the INNOVV Power Hub 1 developed a fault shortly after fitting it, I was intrigued to see how INNOVV would react. A quick email, no fuss, no argument, just another unit in the post straight away – good customer service, that’s what I like! Now the eagle-eyed among you will know that a few months ago I fitted the ‘Beasthonda’ fuse box to the Capo …… that was because of the Power Hub 1 issue. So when the new one arrived I wasn’t about to undo/redo all the work again, so this time the Power hub was installed behind the windshield for a few months testing, then removed and installed in my old Range Rover engine bay.
To be fair the Power Hub didn’t stop working or fail to do its job, it just forgot how to count to 10! In the end it was switching on/off almost immediately or definitely within 10 seconds. To date the replacement has worked faultlessly enduring sub-zero winter temperatures and the heat of a V8 engine bay, throw in a good dose of rain and snow and I think it’s fair to say it is an all-weather unit!
Conclusion
It is a well packaged device that does the job required – no fuss. The wiring is good quality and ample for the rated current although I personally wouldn’t push it beyond 20A total just to allow a safety factor and extend the working life of the relay.
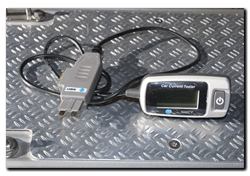
In operation I measured a current draw (at 13.8V) of 190ma ON and 6ma OFF. Now 6ma may not be much but it is worth bearing in mind if your bike sits off a battery tender for long periods of time.
So – final thoughts ….. firstly, it would be nice if a mount was provided. Secondly, looking at a nest of new red wires and fuse holders and thinking back to the nest of black wires and fuse holders I had before, I realised tha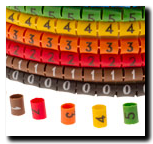 t one fundamental flaw remained. In a day, a week or next month, I’m not going to remember which red wire feeds which circuit. To this end I think INNOVV could make a couple of simple changes which would help immensely. First, add a numbered/coloured sleeve marker on each line, either side of the fuse holder to identify each circuit 1,2,3,4,5. Second, pop a sticker in the box, so that the owner can write down the details of what’s connected to each of the numbered cables and stick it somewhere near to the Power Hub. That way you can look up the appropriate circuit/cable number on the sticker, then rummage around for the matching numbered fuse holder – easy!

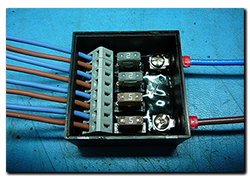 Unfortunately, due to circumstances I won’t elaborate on just yet, I found myself with a bunch of cut accessory cables sorely in need of a home! So step forward front-and-centre the fuse block made by Beasthonda (Andy) from the


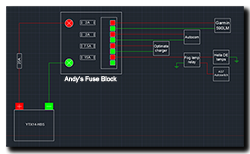
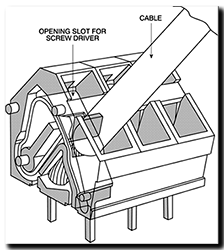 And that’s it …… one neat block and no more external fuses.