 I’ve known Manuel Hitz, owner of Motrag for over 18 months although we’ve only met once, at ACIM VI in July. At that fun filled weekend we looked around many bikes and discussed the pros and cons of many upgrades – as well as our own. Manuel was keen to show me some of the items that Motrag make and sell, he then asked if I would try a set of his fog/spot light brackets* and compare them to the Touratech ones currently fitted on the RR. ‘Why not’ I said, ‘It would be jolly rude not to!’. And so a parcel arrived last week. 😀
Off with the Touratech brackets ……
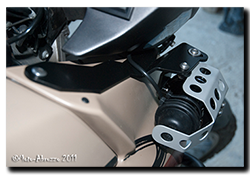 Let’s start with the outgoing Touratech brackets – each has 4 parts, 8 fasteners and weighing approx. 300g. They are actually made for the Mk1 Caponord and not the Mk2, although the modification to fit them is simply a matter of bending the front mounting tab and drilling a fitting point in the fairing. However having to drill out the rear mounting point was something I hadn’t anticipated. The hole was probably a perfect fit for the screw – before they added the powder coating, certainly not after! Overall the fit/finish is average, (presumably) laser cut 4mm aluminium plate bent to shape and slapped with a coat of satin black – sharp edges, cutting marks and even a ding in one plate left for all to see. The lamps sit very close to the fairing making cleaning a real headache unless you remove the brackets each time, on a plus side however; they are well protected in the case of a fall. 4 years on, the finish is peeling away and they have started to look shabby, so I’m glad to have the opportunity to remove them.
Bottom line – Expensive and build quality/finish is average at best.
….. And so on with the Motrag brackets.
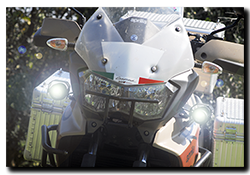 The Motrag brackets each have 3 parts, 6 fasteners (plus a plastic pin) and weigh in at approx. 360g**.
Opening the box was a pleasure. Each bracket wrapped securely, fasteners (all stainless steel and just like the OEM Aprila fasteners in appearance) were bagged and labelled for their intended location and last but not least a set of clear instructions and a parts list.
Fitting the brackets involved no drilling or cutting at all and they were on and aligned in less than 30 minutes – ok, the lamps were already wired in of course! In comparison to the Touratech brackets, the lamps sit slightly wider apart (approx. 25%) and slightly higher with adequate clearance for me to get behind them when cleaning the bike. The flat top of the lamp bracket lends itself very nicely to being used as a mount for my GoPro camera, something Manuel is keen for me to try out – so keen if fact, he sent three lamp brackets – a spare for me to drill for the camera mount!
OK so far … a bracket’s a bracket, heck as long as it fits and doesn’t look naff what else can I say? Well let’s save the best for last, the finish, THIS is Motrag’s ace-in-the-hole! Each bracket is exquisite, no sharp edges, no machine or cutting marks in sight. This kind of attention to detail is something we’re just not used to seeing nowadays and it pays dividends …..As the old saying goes:
Don’t spoil the ship for a ha’p’orth of tar
Proverb: Don’t risk the failure of a large project by trying to economize on trivial things.
Says it all really! And so to the bottom line – Excellent fit and finish, well documented instructions and nice attention to detail with the fasteners adding that OEM look. But you know I’ve been thinking, wouldn’t it be nice to either tweak the design, or offer a seperate bracket so that a pair of discreet DRL – Daytime Running Lights could be fitted in the space below the lamp … over to you Manuel! 😉
Anyway, that’s about if for the initial impressions, I’ll add a new post in 2015 when I’ve had chance to bounce the brackets up and down our road and put them through winter weather to see how the finish holds up – my guess is they’ll do fine. That just leaves me to thank Manuel for kindly sending the brackets for review, we agreed it was to be fair and without bias, if I didn’t like something – say it! All good so far …….
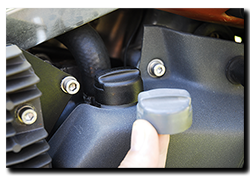
I almost forgot – Manuel also dropped another little present in the box for me, a sexy new cap for the coolant bottle in blackest black, not sun-bleached grey. That little baby has got to be worth an extra 5mph! 😉 AP8104124 if you want to do this speed enhancing upgrade.
Notes
*Both the Touratech and Motrag brackets are designed to take the Hella DE spot(Xenon) or fog(Halogen) lamps. Motrag supply the lamps/brackets as individual sets for the left or right, so you can mix fog/spot combinations as you want.
**These are a prototype set in 2.5mm steel and not the production 3mm aluminium, so they are slightly heavier.
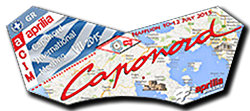 A double post today ….. the details have just been posted for 2015 – 7th ACIM (Aprilia Caponord International Meeting) and it’s to be held this year in Nafplio, Greece on the 10,11 & 12th July. A lovely bit of news that brings a touch of warmth to a cold and snowy day!


 So is it worthwhile following this up do you think, or should I resign it to – nice idea but ……?




 One thing’s for sure, irrespective of how many miles you’ve travelled or how many years you’ve had that dog-eared licence in your pocket, you never stop learning. Sometimes the lesson hurts, sometimes it’s so subtle it’s easy to miss and sometimes the lesson leaves your blood-stream swimming in the hormonal avalanche from the
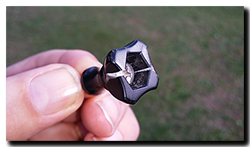
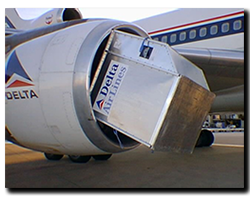 as an ex-RAF engineer I should know better than most the catastrophic implications of our old arch-enemy FOD (Foreign Object Damage). Complacency is no excuse ……. From now on ALL GoPro thumbscrews will be tethered!
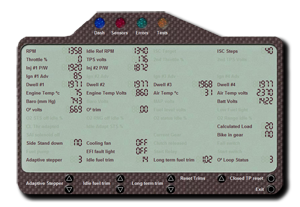
 When I checked my phone this morning I noticed that the TuneECU app had updated to v1.2 overnight ……. somehow I guess I’d missed it update to v1.1! Anyway, with a few minutes to spare I hooked up to the Capo (cable & Bluetooth) and noticed that the
 I had one of those emails the other day, you know the sort – trying to sell you a domain name at a grossly over inflated price. I hovered over it just long enough to catch the domain name before launching it into the trash. But then the bells started ringing somewhere in the dusty recesses of my mind …… I know that domain, ETV1000.net – home of the French Caponord forum!


 The Motrag brackets each have 3 parts, 6 fasteners (plus a plastic pin) and weigh in at approx. 360g**.


 A week ago I downloaded the TuneECU Android App, spent a few minutes scrolling through the screens, then sat back and waited for Mr Postman to deliver a USB3 OTG cable for the Samsung Note 3 and a Bluetooth module from Ebay.


