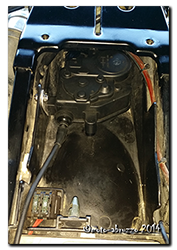
 Crikey time flies. It seems an age since ACIM and all the stuff that happened before and after that great weekend, so I’ll start off the week before ACIM – the great cruise control saga. On the 3rd July TNT delivered the package to customs in Ciampino (Rome) Airport – a full week before ACIM, unfortunately it was from here on I became embroiled in a constant round of emails and phone calls in an effort to get the kit cleared to complete its journey. On the Thursday 10th (day before) ACIM it looked like I might be able to collect it from the local TNT depot on the way up …. ‘call us after 9am’ I did ….. Customs still had issues, call again on Monday. So that was that, no kit fitted or available to show. Frankly I was fed up to the back teeth with the whole thing and looked forward to a stress free weekend to unwind!
ACIM 2014 San Marino 11th-13th July
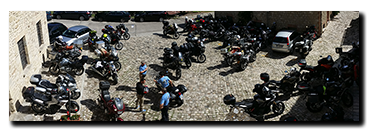 What a great weekend, new faces, names to faces and names who’s threads/posts I’ve read for years – a bit of hero worship going on here! A 560 mile round trip that shook the Capo down nicely for the big trip a few days later – with a very enjoyable spirited ride back to the hotel on Saturday evening with two Capo riders across some stunning scenery……we had a blast, thanks guys!
Other than that, I’ll let Jan fill you in with more details and pics from her website – Janet’s Edublog and end by saying a big thanks to the organisers for a fantastic weekend and we look forward to meeting up with you all again soon.
MCCruise control
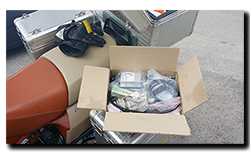 After ACIM, with the Capo tucked up in the barn on Sunday night, I could focus back on the cruise control and my impending trip. Time was short … too short. Either the cruise control had to be cleared by customs on Monday/Tuesday or sent back to Australia – it was that simple. If the window of opportunity was missed, then frankly the cruise control was a waste of time, effort and money as I’d have to travel and hope my wrist held out. Not only that but I’d be away for the next 14 days!
 In the end, at 10am on Tuesday, I stood at the TNT depot (Chieti Scallo) and marvelled as the sun glinted off the packing tape of a big brown box full of goodies! We whizzed home in double-time and the spannering started in earnest ……
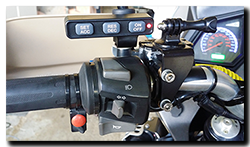
….. by Wednesday afternoon the kit was fitted, calibrated and given its first brief test – and worked like a charm! Now I was out of time, bags were packed, Capo loaded and refuelled and at midnight I dropped onto the A14 North and the cruise was engaged for the first mile of many – and it performed faultlessly throughout.
Transcontinental run
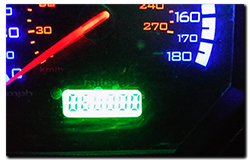 The next 25hrs took me door-to-door and the Capo gained another 1,350 miles under its belt. The cruise had been engaged for well over a 1,000 of those miles (night-time motorways) and the odometer slid over to 60,000 miles on the M25/M40 slip road, a half hour short of Oxford. The next 13 days were a blur of activity with the Capo grabbing an MOT somewhere along the way ….. And before I knew it, the Capo and I were heading back to Dover again with panniers groaning with tea-bags, cheddar cheese and bacon!
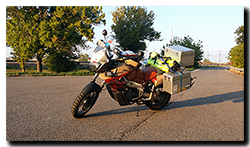
The return run was a real mix of (summer?) weather, dense fog in France, rain and sleet in 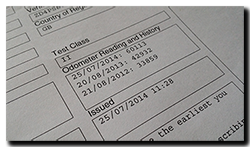 Switzerland and 36C sunshine in Italy! Once again the Capo did what it does best, kept on running faultlessly mile after mile and so finally, at 1am on Monday 4th August we rolled into the barn with the odometer now at 61,860 – just 277 miles short of the magic 62,137 ………. Or 100,000Km to be precise!
As the sidestand took the weight from my aching knees and I eventually convinced my right leg to ease its way over the saddle for the last time, I saw Jan in the red glow of the tail-light all warm smile and a cold beer! Now that’s a way to be welcomed home …….. 😀
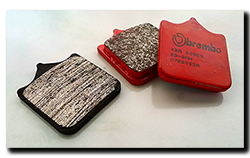 Yes, I put my hand up; I screwed up on this one! I’m normally pretty good at keeping on top of the Capo maintenance, but this time I let the brake pad checks slip by while doing a full service a few weeks ago. So the other day I decided to drop the front calipers (Brembo P4/34 triple-bridge), took one look at the pads, swallowed … and squeaked a silent ‘bugger!’ Thankfully I could engage smug-mode as I already had a new set of pads (front & rear) hidden away in the parts-pantry after stocking up on all sorts of Capo-consumables at the back end of last year. The new pads are 7.5mm thick; with approx. 4.5mm of material ……. the best of the old ones was about 1mm on its tippy-toes. 😯 Way too close for comfort, so I took myself around the back of the barn and gave myself a jolly good talking too! 😳

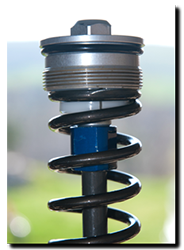 The dodgy wrist and Dog awful weather here in Italy at the moment have both contrived to keep the Capo tucked up in the barn, a hairs breadth from the magic 100,000Km. So while the rain poured its heart out, I decided to have a look through the Excel spreadsheet of service/repairs/upgrades for the Capo ……… and realised that the front
 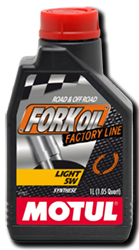 forks hadn’t had an oil change for over two years!


 The next 25hrs took me door-to-door and the Capo gained another 1,350 miles under its belt. The cruise had been engaged for well over a 1,000 of those miles (night-time motorways) and the odometer slid over to 60,000 miles on the M25/M40 slip road, a half hour short of Oxford. The next 13 days were a blur of activity with the Capo grabbing an MOT somewhere along the way ….. And before I knew it, the Capo and I were heading back to Dover again with panniers groaning with tea-bags, cheddar cheese and bacon!




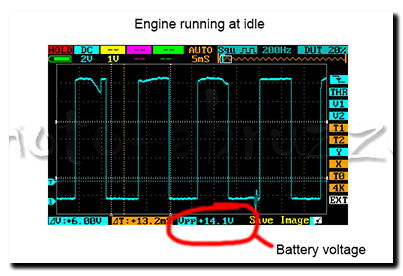
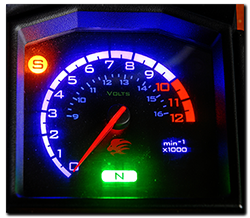 A few days ago while doing a bit of investigating for an AF1 forum member regarding the tachometer signal from the ECU, more specifically what would he observe on a multimeter instead of an oscilloscope, I momentarily shorted the tacho line against the chassis with the bike running. The tacho shut down and the bike just kept chugging along quite happily – no EFI light, no tacho. Recycling the ignition bought the tacho back to life and it’s been fine ever since ……… but two points came out of this that may be of use to other owners.