Just updated the heated grips and helmet graphics on the display, much nicer I think. 👍 Sorry about the stripes in picture, it’s a camera v display thing!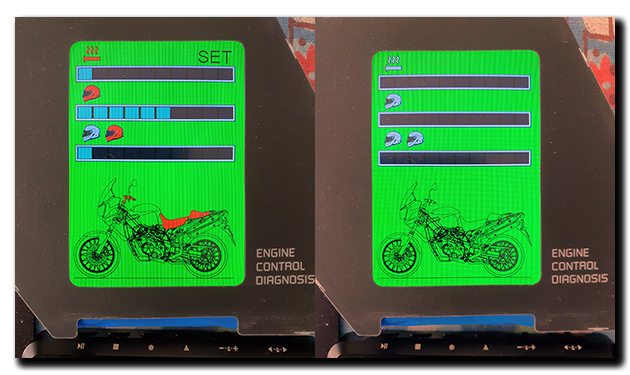
Time on my hands …..

It’s fair to say that these strange and worrying times will touch all of us in some way or other, so may I firstly send each and everyone of you all my best wishes as we each deal with the Covid-19 pandemic. That said, life still moves on and this site is about the beloved Caponord ETV1000 we are lucky enough to enjoy, so it’s content will stay focused to that end.
Recently the fantastic company I work for has taken the difficult decision to furlough us until the end of May, but the flip side of this particular coin is that I’ll now have a lot more time to add new material to the website and spend some well needed hours spinning spanners and generally giving the Capo the TLC it so richly deserves. So please, stay safe, and pop back once in a while and see what’s been added!
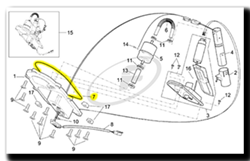
First on the list ……. the front mudguard. I’d only had the Capo a year or so, when one fateful day a rather inquisitive chicken decided the front mudguard was a smashing place to perch, but not very grippy. So after lots of slipping around and trying to dig its claws in, it gave up and flapped away in a huff leaving nice scratches in the surface of the mudguard. Since then, a coat of black bumper polish every now and then has gone some way to masking the marks, but it needs applying every few weeks to maintain the effect. Later that fateful day, the chicken mysteriously decided to perch inside a hot oven with some lovely roast spuds ….. and close the door. Who knows what goes through a chickens mind eh!
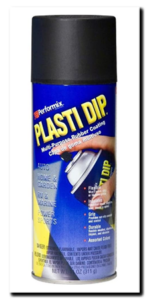
Last year … yes, last year (the shame of waiting so long!), I got hold of a rattle-can of ‘Plasti Dip’ satin black. This stuff is quite interesting, it sprays like a paint but can be peeled off later like a vinyl wrap. Just do a search, there are loads of YouTube videos about this stuff. So the plan is, off with the guard, a good wash and degrease then when thoroughly dry, a few coats of Plasti Dip – if I don’t like it, simply peel off re-polish and put it back on the bike – nothing lost. That’s the cunning plan anyway …
 Next on the list …. another little update to the 4D Systems screen software! An extra page has been added that now allows control of heated grips and seats. Here’s a little video of it in action … again, it’s a work in progress and will have a couple of graphic tweaks and an extra function added into the software, but for now it’s a working prototype with three PWM (Pulse Wave Modulation) outputs (one per heater set) that will drive a high power circuit controlling the heater elements. These circuits are capable of handling 12A each, so more than tough enough for grips/saddle heaters.
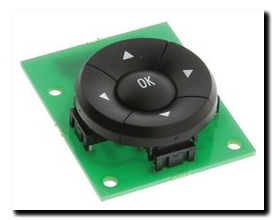
It uses the 5-button switch assembly so that the grips can be adjusted on the fly, rather than have to use the smartphone app like the other info pages. The basic functions are:
- Press and hold OK to access the screen or return to main screen
- Use the UP and DOWN buttons to select the heater you want to adjust
- Use the LEFT and RIGHT buttons to adjust the heat settings – a single press adds/removes 1 block (10%) while press and hold a button ramps up or down until released
- Double click the LEFT or RIGHT button to set all heaters to 0% or 100% instantly. When set to 100% there is a five minute timer, then the grips return to preset values – this is ideal as a pre-heater on wintry mornings!
- Finally, Double click the OK button to return all heaters to preset values
- In-built safety cuts all heaters when the ignition is turned off
Updates in the pipeline …… addition of a settings page in the smartphone app to allow some flexibility. For example – a timer when the ignition is turned off, so the grips can remain live for a few minutes (like the Oxford grips do) … and the ability to inhibit the pillion heater completely if you never carry a pillion or feel the need to heat luggage you have strapped on!
New places, new tyres
I’ve just done a quick search of the website and realised that I haven’t mentioned tyres in three whole years. That’s probably because for the past three years I’ve been very happy thank you very much running around on the Michelin Anakee 3’s. But now I have a need once again for something a bit more 50:50-ish to tackle some seriously dilapidated roads, more like tracks across ploughed fields really!
Of course I could just opt for the venerable old TKC 80 or Karoo 3 but I wanted to give another manufacturer a try. I’ve read pretty good things over the years about Mitas tyres, a budget tyre made in the Czech Republic, so I opted for the Mitas e07+ based on reviews for our wheel size and bike style and ordered a set from Pneus Online – £146 the pair, delivered.
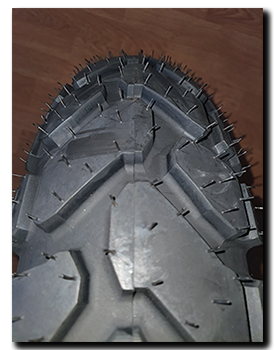
Well they arrived by two different couriers from two different warehouses on two different days – but they arrived! Both were manufactured within the last few months, so no old stock which is nice. I unwrapped both of them and stood back in amazement ……. I guess we’re all used to the hairs/bobbles (vent spews) on new tyres, but Mitas has REALLY gone to town. I don’t think I’ve ever seen such hairy tyres before! These things have never bothered me in the past, but this amount gives me a real urge to reach for a craft knife!
Dashboard – Multi function display screen – 4
First off ….. a bit of code change to the website should mean that all other pages, not just the front page will now display at a greater width than previously. I hope you find the general readability and layout better.
Secondly, I’ve now swapped from an Arduino Uno to an Arduino Mega 2560 to drive the 4DSystems display. This was due to the Uno only having one hardware serial interface, while the 2560 has three. Now I’m driving the display off one and a HC-05 Bluetooth module off another. After a frustrating few evenings playing with the MIT App Inventor, I managed to get a working app on my Note 10 that drives the display. It flicks between screens, resets the two MPG indicators and allows me to change the time of the Real Time Clock.
Dashboard – Multi function display screen – 3
 Here we go then …. the plastic inlay carrier was treated to a real good bash around and the display popped into place. Looks nice with the inlay on top, but believe me, there’s plenty to do underneath to make the mount safe for thrashing around on a motorbike!
The good and the bad so far ….. the good – fits (ish) and should be straight forward to finish off, it’s as good as the original in bright light and looks kind of nice as in black as opposed to grey when it’s turned off. The bad … we’ll the eagle eyes among you may have noticed that the plastic pegs for the ‘Mode’ and ‘Set’ buttons are missing. The display is just that bit to long for everything to stay. So I’ve decided to not only move them, but replace them with a 5-way switch that will allow better interaction with the new screen. The old buttons will stay simply to look retro!
Dashboard – Multi function display screen
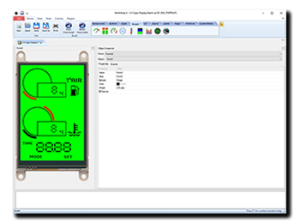 More years ago that I care to remember, fellow Caponord owner (Beasthonda) and I discussed the idea of replacing the dashboard LCD panel with an LCD screen that could be made to display just about anything we wanted. At the time, we looked at 4D Systems and made a few notes on feasibility, but in the end the idea fizzled out – primarily because at that time the panels were expensive!
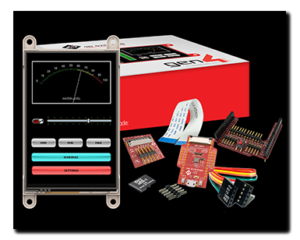 Well here we are, a toe-dip into 2020 and the idea has been resurrected. This in part is due to the panels being better and cheaper now as well as the Arduino boards being much more powerful and faster than the old generation. So as I write, winging it’s way from Australia is an SK-ULCD-35D-AR kit …. basically a 3.5″ non-touch sensitive screen with all the cables and bits to program and connect it to an Arduino device.
The idea is to emulate the existing panel layout for day-to-day riding. However the device will have alternative screens available. The first will be the real-time display of sensor data from the ECU, the second will be a detailed trip computer, displaying continually updated fuel consumption and fuel tank range among other things. The next will display GPS position using a fusion of on-board GPS and Bluetooth mobile link for map downloads.
The display turned up a few days ago. Early the next morning, while the world shivered outside, I managed to program it with a couple of basic screens and power it up for the first time. The displays need to be scaled to fit the aperture in the dash overlay, but other than that it’s pretty much ready to hook up to some data. Role on the weekend!
Powder coated cam covers
** I intended to post this back in October!**
Let me start by saying they were cheap and I was curious ….. They were cheap for a reason though. They were most definitely NOT the magnesium cam covers in the EBay advert photographs! Oh well, they were physically fine, just scratched and one had a little surface corrosion under the paint.
So I had a brainwave, take these and the spare pair of Caponord cam covers to be powder coated. Use them as test pieces before letting someone loose on more important bits of the Capo. A lovely idea in principle, but around here powder coaters are thin on the ground, so Google was my best friend for a few minutes. Initially I looked at the ones with websites and they were either too industrial or too far away. Then I looked at one about 20 minutes from where I work. No website, but good reviews from other social media and some examples of his work – so I made contact.
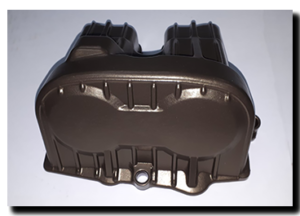
And here is the outcome of that meeting …. One of four cam covers in ‘Anodic Bronze’, with a one week turnaround for £60 inclusive. I’m happy with that. I think it’s fair to say that Sam is a man of few words, who’s happy squirrelled away in a modern workshop out in the sticks, doing what he enjoys. Communications were excellent and he did a great job in the time frame quoted, at a reasonable price. Next then a Caponord oil tank, passenger footpeg hangers and some crash-bars and various brackets – In RAL9011 Graphite Black.
Tuono clutch cover – AP0610992
Well it was a long time coming … I mean a looonnnggg time. Try several years in fact. But was it worth the wait? Well I think so, but hey, I’m biased!
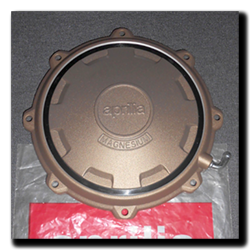
Here it is …. AP0610992, a gold(ish) Magnesium clutch cover from a Tuono (2006-2010). It seems they are harder to come by in an as-new state than the proverbial rocking-horse doo-dah. All the ones I’ve seen have either been mullered by over enthusiastic riding Gods (crashers) or are brand-new at silly Aprilia pricing.
I know the standard cover does the job just fine, but ever since I saw one of these on a Capo motor I’ve wanted one as well – it just looks so much better. And besides, the weight saving alone must be worth at least 10 mph on the top end – right? 😉
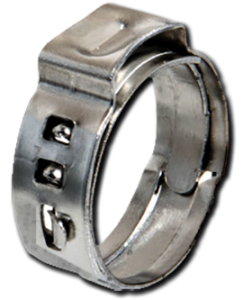 Swapping over only takes a couple of minutes …. 8xM5 bolts and a click clamp to remove. I exchanged the old one for a nice new Zero-Leak low profile Stainless Steel 11.3mm version – very snug! In fact the old one wasn’t really squashing the pipe onto the siggot anymore and could be pulled/pushed/rotated very easily, which makes me think it was no longer vacuum tight ….hmm. Anyway, the new one crimped up lovely and everything is supper-sealed once again.
Capo memorabilia
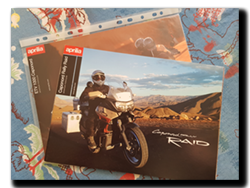 Many years ago I asked someone who owned a Rally-Raid dealer brochure for a scanned copy. That scan is still available in the ‘downloads’ section of this website to this day. Today however, after all these years, I finally OWN that exact brochure! Luckily I happened to have a quick look on Ebay last week and there it was, the same brochure up for sale. Thankfully I was the only bidder.
It arrived yesterday in excellent condition and what a delight it was to finally hold the genuine article in my hand. Given the short production run of the Raid, it makes me wonder how many of these brochures still exist. Any left in the dealers probably went to landfill and those that made it home probably went the same way over time. The odd one may be hiding in a stack of magazines or hidden at the back of a dusty cupboard no doubt, but it won’t be many.
Now I have an original, I realise that the scanned copy isn’t quite telling the whole story …… some pages are missing and unlike the standard Capo brochure, it has several fold-out pages as well. Hopefully I can update the scanned copy in a week or two.
In the end I’m just really excited to add this to the growing list of Capo related items I have squirrelled away, somehow though this one item adds the finishing touch to owning a Rally-Raid. It only took 11 years to get it!
Seal of disapproval
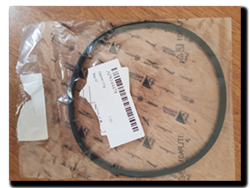 Fair to say, things have REALLY dragged on this year. The fuel tank overhaul I mentioned in May and planned to do in July is still firmly on the to-do list -why?
I had 90% of the parts on the shelf in June and only had a couple of ‘O’-rings to order. The parts lists don’t give a size for these particular seals, so I needed new ones from Aprilia to measure for future reference – no problem really, they’ll only take a week or so to arrive I thought. Yeah right.
So I put together a list of parts and punched them into the Fowlers online ordering form. All items were available – except one. The dreaded ‘back order’ item. The deal was, wait for the back-order part and we’ll ship them all together, or we’ll send the in-stock items and charge you £3.95 to post the one remaining tiny back-order item. I decided to wait.
 And wait they made me do alright ….. almost two months in fact!
In the end the parts arrived of course, but by then the warm and dry summer weather had given way to almost daily rain and nights drawing in earlier and earlier. But on a positive note, I have now measured the main O-ring I was interested in and can finally post up the size and alternative (UK) that you can have delivered within a day or two, not months! Far quicker and quite a saving on the £30.30 plus delivery for the genuine part.
AP8144478 Equivalent: 142.88mm ID 5.33mm cross section – Viton
