Bargain Futura motor

Aprilia Futura RST1000 engine V990Just bagged a nice little Aprilia spare off eBay ….. an RST1000 Futura motor! Not the lowest mileage, but complete and still sporting the starter motor. Overall in nice condition with only age related external wear and no corrosion at all, but of course it’s the condition of the internals that count! Either way, use it or break it for spares, I think it’s well worth what I paid for it – can’t wait to pick it up later this week.  😀 

I’ve noticed that engine prices seem to be on the increase in the UK …. Capo/Futura motors seemed to go for £350-£500 a year or two ago – now they seem to be commanding £450 – £700 plus!

Dashboard update

Just a reminder for those that have asked for dashboard repairs and those that are thinking about it …. I’ll be back in the hot-seat, all set up and ready to receive boards after the 8th January. As some of you know, life has been rather hectic with one thing and another over the past weeks, but soon the dust will settle. The bright side of this little waiting game is that the cost of return postage and transit time should be much improved …… especially for those in the UK! 😉

No1 component that fails on a dashboard…..

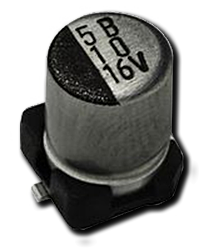
Yes, today I’m dishing the dirt on the number one bad-boy component on the Caponord and Futura dashboard. Or more to the point, why this sad little part earns this unwanted reputation! What is it? Well it’s a rather innocuous SMD radial electrolytic capacitor rated at 16V 47µF.

Over the past couple of years, I’d say that 70% of contacts via the website have involved this component in one way or another …. and that percentage is steadily increasing! Why? Simply because of the constant and unstoppable tick-tock passage of time. Unlike most electronic components, electrolytic capacitors have a given life span based firmly on operating temperature and duration. What does it do? In a nutshell, it smooths out the 5V DC power rail … without it the rail contains a nasty AC component and that really upsets the microcontroller!

First I want to look at the symptoms this little guy causes when it begins to shuffle off to the electronic afterlife:

  • Dashboard dead except for Oil, Neutral and Side-Stand LED’s – Especially when cold.
  • After sitting in the sun or being heated during a ride-out, it may spring into life, or flicker on and off rapidly. This is the clincher!

Of course, to be 100% sure, we have to get down to the circuit board and identify the component first:
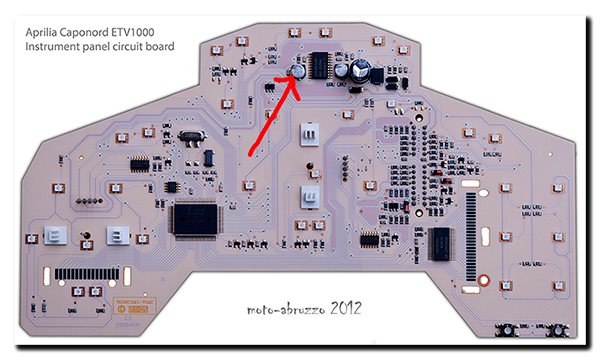
Aprilia Caponord ETV1000 & Futura RST1000 dashboard capacitorSo there it is, just to the left of the voltage regulator chip. Now I’m sure the eagle-eyed amongst you will have noticed that there is a similar (in fact identical) component to the right of the regulator …… why is only the one on the left a problem then?

Well the dashboard has two regulators in the one package, supplying two independent 5V power rails. One is powered permanently from the minute a battery is installed in the bike, the other only operates when the ignition is switched on. And there lies the answer to the question …… lets punch in some numbers. For the sake of argument, we’ve got a Capo that has done 5,000 miles in a year and averaged 50mph.

  • 5,000 miles / 50mph = 100 operating  hours for the right hand (switched) capacitor.
  • 365 days * 24hrs a day = 8,760 operating hours for the left hand (permanent) capacitor.
  • Now lets assume 10 years have passed …. now we have 1,000 / 87,600 operating hours respectively!

And there is the bottom line. After 10 – 16 years on the bike, the left hand capacitor is simply reaching the end of its working life long before its companion on the other power rail, and with each passing year more are failing …. It’s not a case of ‘if’ folks, it’s a simple matter of when!

Replacement is straight forward and has been done by quite a few owners over the years, but like most things, it requires a certain level of skill and experience along with the right tools for the job ….. without these, there is a very real possibility of damaging the tracks or adjacent components and making the board worse than when you started. You have been warned!

Hybrid velocity stacks

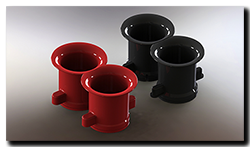
Aprilia Caponord ETV1000 Rally-Raid 47mm and hybrid 51mm velocity stacksIf all goes to plan, later this year the second Rally-Raid that’s currently being rebuilt, will finally get a motor installed. The plan is to use a big-bore motor …. an 1,103cc in place of the standard 998cc. The compression and valve timing will remain bog-standard Caponord (10.5/1  Inlet timing – 25°BTDC/37°ABDC and Exhaust timing – 57°BBDC/5°ATDC). However to accommodate the increase in air-flow, I’ve decided to use Futura 51mm throttle bodies instead of the Caponord 47mm items.

Meanwhile on top of this chunky aluminium marvel sits a pair of velocity stacks. These stacks vary in height (and diameter) depending on the intended tune of the engine. The RSV Mille of course is designed as a race-rep and as such wants high horsepower at high RPM – hence 57mm throttle bodies and very short velocity stacks. On the other hand the Caponord was tuned for improved low-end grunt and so has small throttle bodies (47mm) and tall velocity stacks to maintain good gas flow speed at low RPM. The Futura seems to sit firmly between the two!

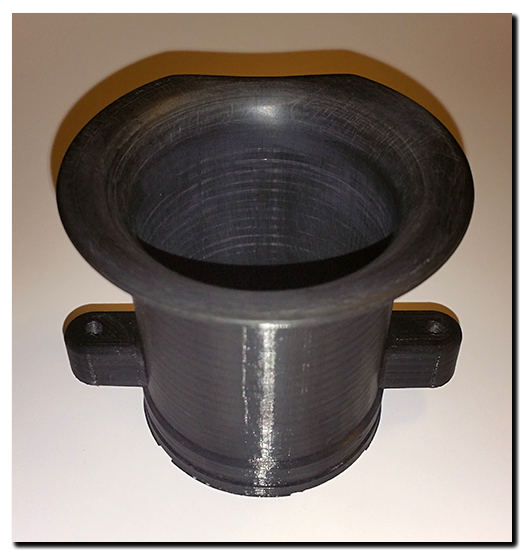
Now of course I could simply use the medium height velocity stacks straight off a Futura, but I decided to go a different route and print a new pair of hybrid stacks – Caponord height BUT 51mm diameter to fit the Futura throttle bodies. Unlike ABS, Colorfabb Ngen (Co-Polyester) can’t be vapour polished with Acetone, so I’ll have to sand the venturi down with a variety of grades of wet-and-dry up to 2,000 grit and maybe finish it off with something like Quixx plastic polish – if it works on this stuff! Here’s a couple of pics comparing the original and new version – straight out of the printer!

Unfortunately 3D parts (unless made on high-end machines) don’t typically have the same strength as injection molded or machined parts – but they do make great ‘proof-of-concept’ parts! If these stacks prove to be a positive step forward, but not durable enough for the working environment, I can at least get the drawings to the machine shop and have them made in aluminium … but that’ll be a tad more expensive than 85p each off the printer! 🙁 

UPDATE

Just had a spare half-hour to rub some 100/400 & 1200 grit paper down one of the stacks and all I can say is – WOW! This material rubs up lovely and probably a couple more sessions will see it through. All the print-ridges have gone and I can’t feel anything but a nice smooth surface that retains a print pattern that makes it look quite distinctive.  🙂

Aprilia Caponord ETV1000 RST1000 Futura Rally-Raid hybrid velocity stack


CGI dashboard – 2

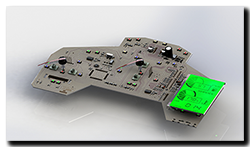
Saturdays lovely sunny weather gave way to thick fog and a definite chill in the air – time then to hunker down on the PC and finish the CGI dashboard and add a couple of extra bits to make it a touch more interesting on the eye.

Dashboard repairs

Risto's Christmas cardYes I admit it here and now, I’m doing a U-turn – a full 180° – and NOT stopping dashboard repairs at the end of January 2015. Jeez …. You’re thinking, I wish this chap would make his mind up!!
Why the change of heart?

A couple of reasons actually …. Firstly, a few emails over the past couple of weeks that have made me reflect on the initial decision, secondly a Christmas card. Yep – a lowly piece of card with a simple season’s greetings from a Capo owner in Finland.

Risto sent his board over almost 18 months ago and by all accounts is happy with the work done and each Christmas he has sent a card. That connection across the continent would never have Aprilia Caponord ETV1000 & Rally-Raid dashboard repairs and upgrades, backlighting and voltmeterhappened without the dashboard repair service. This year I opened the card and felt a twinge of regret, uneasiness, a sense that a decision I was making was the wrong one. The bottom line is that I would miss the emails/calls and involvement if I stopped something that I’ve been involved with since the beginning of unravelling the dashboard circuits.
Jan and I sat down and worked out some ways to free up a little more time and I’ve decided to put other projects on the back-burner for now. So I will not stop doing what I’ve done for almost two years ….. Give folks a grain of hope that a piece of their pride and joy can be repaired or upgraded. Sorry for the wobble, but hey, I’m only human.

And Risto ….. If you read this, just remember that opening your Christmas card changed the course of moto-abruzzo as he staggers into 2015. That’s pretty awesome when you think about it! 😀

New ‘Lockwood’ inlay fitted at last

Right indicator repeaterOn 4th February Jan came back home with a suitcase fair groaning with all manner of goodies. The most eagerly awaited though, was the pair of new inlays from Lockwood International Ltd. So first impressions?

Excellent! From the textured material to the bleed-free printing, from the fit to the light-transmission …. everything was exactly as I’d hoped. The first thing I did was pop one onto a waiting chassis/board and turn on the lighting – did the text and colour match the light channels? Again, perfectly. Now I could relax, prepare the new chassis and get ready to fit one permanently to the dashboard. To fix it in place I decided to use a general-purpose spray adhesive and did a trial run on an old chassis/inlay to make sure it would be suitable. Everything seemed fine and it was certainly good experience to do a dummy run.

Making sure the chassis was grease and dust free was essential, then masking off the light-channels, mounting pegs and anywhere else I didn’t want spray glue to go! A couple of thin coats of adhesive were applied and the inlay fitted 10 minutes later to allow time for the solvents to evaporate. Perfect! It was now ready to be fitted to the circuit board, but first a couple of modifications to the board/processor circuits.

First the eeprom file needed to be updated for the Futura speedo/tacho, then the code in the microcontroller needed updating for the different (voltmeter) needle calibration. At the same time a couple of modifications were made to the circuits based on insights I’d picked up about Arduino boards from the Internet, also the auto-dimming circuit was finally added for the variable back-lighting, a bit of tweaking with the code – and it was all ready to be refitted to the Capo.

So there I was …. on a wind-swept but warm Sunday morning, dashboard in hand and about to see the fruits of a few months work finally come together on the bike. No doubt the code for the auto-dimming will need fine-tuning, but that can be done without removing the dashboard again – and that’s the line in the sand, right there. Once fitted, I shouldn’t have to remove them again anytime soon …. and that’s a great feeling!

I think that about now would be a great time to pause and say thanks to a few folks who have helped me keep the momentum in this little project. Firstly Jan for her patience and for lugging stuff across the continent for me, to Andy (beasthonda) for bouncing ideas around with me and his interest in the project, to Arvdee in the USA without who’s generous donation of a Futura inlay I wouldn’t have had a template.  Last but not least, Clive from Lockwood International for putting the proverbial icing on the cake – thank you all!!!! 😀

Moving along nicely

Just got this photo from Clive over at Lockwood International in the UK, the nice folks who have made my new inlays for the Caponord dashboard. I’ll write more when they arrive …… I can’t wait!!

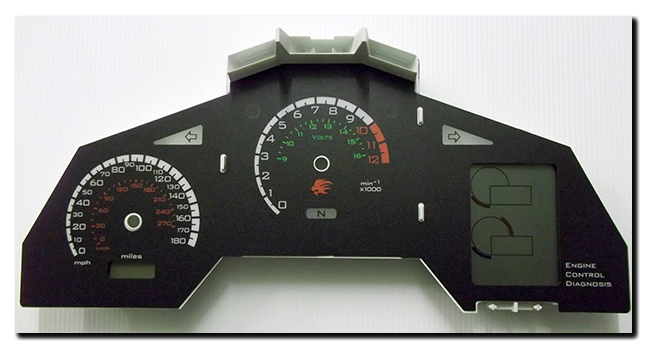
RST Futura based inlay with voltmeter and left/right indicator repeaters

  • Back-lit voltmeter within the tachometer
  • Left & Right indicator repeaters
  • Red-line raised to 10,000rpm to match ECU setting
  • Side-stand lamp is now where the unused ABS lamp was
  • Funky Aprilia lion instead of boring old ‘aprilia’ text
  • ‘magneti marelli’ logo removed …. well they didn’t design this one!

Get yer motor running ……..

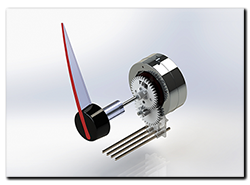
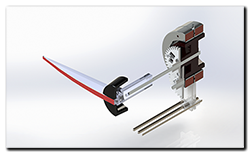
Aprilia Caponord ETV1000 Rally-Raid dashboard stepper-motorNo, not the mighty V990 Rotax, more the tidily-tiny stepper motor that runs the speedometer and tachometer. An unobtrusive little thing with a hefty replacement price tag of between £30-£50 each.

The B-0410-116-530 stepper motor is also used in a variety of cars from Audi, Fiat, Renault and Citroen. Anyway, I had a duff one on a board and decided to remove it and poke/prod/measure its internals for digital posterity. Here’s a couple of Aprilia Caponord ETV1000 Rally-Raid dashboard stepper motor -sectionimages of the little darling. I’ll be adding a Dashboard page shortly with lots more info on the motor and the circuit board along with plenty of ‘how to’ tips to hopefully save you a few bob on repairs by doing it yourself and avoiding the pitfalls that leave you with an expensive paper-weight!

An extraordinary board meeting

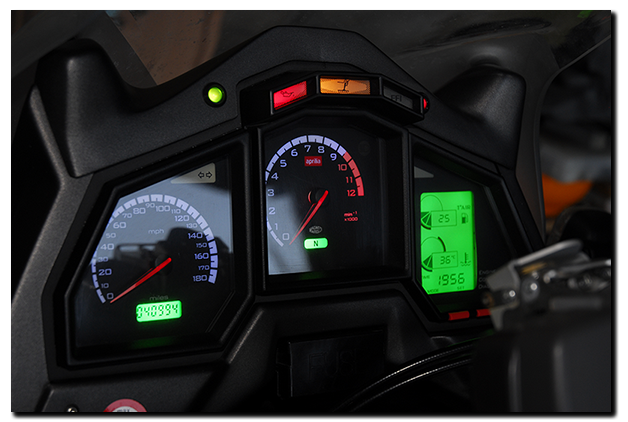
Hot on the previous post and the delivery of the Futura dashboard from Arv, here’s a photo of the hybrid (Franken-Capo) dashboard in the Rally-Raid.

The calibration of the needles was compared to TuneECU (Tacho) and the trusty Garmin GPS (Speedo) and everything is absolutely fine. I’m pleased to say it’s been a complete success and something I can tick off the RR’s wish list. It’s not a very big list, just has some awkward or expensive items on it!