 OK I’ll come clean. I’m a bit of a closet bodger – there I’ve said it. Let’s be fair though, the art of bodging is a skill in itself. A well carried out bodge, with novel and outlandish use of alternative materials to affect a successful repair or upgrade is a beauty to behold. But then again a bad bodge will bite you on the arse quicker than a rabid badger having a rather bad-badger day.
So what did I bodge? Well the LED’s in the Capo’s binnacle might be nice and bright but the wiring behind them certainly wasn’t! Of course a lifetime of working with electric/electronics gives one a certain feel for the bodge to be enacted – why use a decent connector when twisting the wires together and slapping on a bit of insulating tape works just as well …… right?

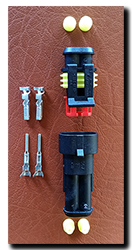
To be fair it was a temporary solution until I’d got hold of some connectors, except I kept forgetting and one thing led to another … And in the blink of an eye, a couple of years had gone by! Last week however, good old Motrag came to the rescue (again!) with a box full of 2 and 3 way Superseal connectors. I really do like these – 14A rated and waterproof (IP67) compared to the Molex items dotted around the Capo that are 5A and most certainly open to the elements. The only downside is that they are  more bulky than the Molex so you can’t cram as many into a tight space!
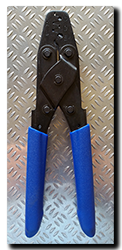
Of course a cunning and artful bodger could fit these without the correct tool to crimp the connectors, but I yielded to common sense – besides Manuel had put a nifty set of crimping pliers in the box as well! Now all the panels are removable with a mere flick of a locking-tab, no longer do I wish for an extra appendage to assist in separating wires/tape while juggling with the panel. Sheer bliss! Here is a copy of the Superseal installation manual.
