Accuracy is everything …..

Aprilia Caponord ETV1000 Rally-Raid calibrated voltmeterWay back when I started playing with the idea of using the dashboard tachometer as a voltmeter, I was aware I had one stumbling block …. I didn’t have a decent workbench power supply to calibrate the software/voltmeter against. In the end just using a battery and resistors the ball-park calibration wasn’t too bad, reading within a needles width of the correct voltage from 13 – 14v but it drifted terribly above and below this range.

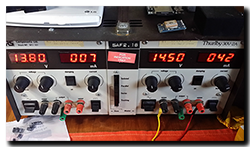
Aprilia Caponord ETV1000 Rally-Raid Thurlby 30v-2A dual power supplyThen in summer along came a gift from ABSL via Andy (Beasthonda) …. A very nice Thurlby 30V-2A dual power supply, which unfortunately had to languish in Oxford as it was too heavy to transport back by Capo! But patience is rewarded and it finally sits on the workbench, performing brilliantly and its first job has just been to calibrate the dashboard voltmeter once and for all. In the end it required a little code revision to get it just so, but it was worth it – now the voltmeter is accurate to a needles width over the full range of 9 – 16V. Happy Days! One more job to tick off the must-finish list. 😀

I really can’t say how much I appreciate Andy for thinking of me and ABSL for letting this power supply go to a complete stranger, I look forward to putting it to good use and hope that some of the tinkering on the workbench can make its way into other Caponords.

Review – Motrag Garmin 590LM GPS mount

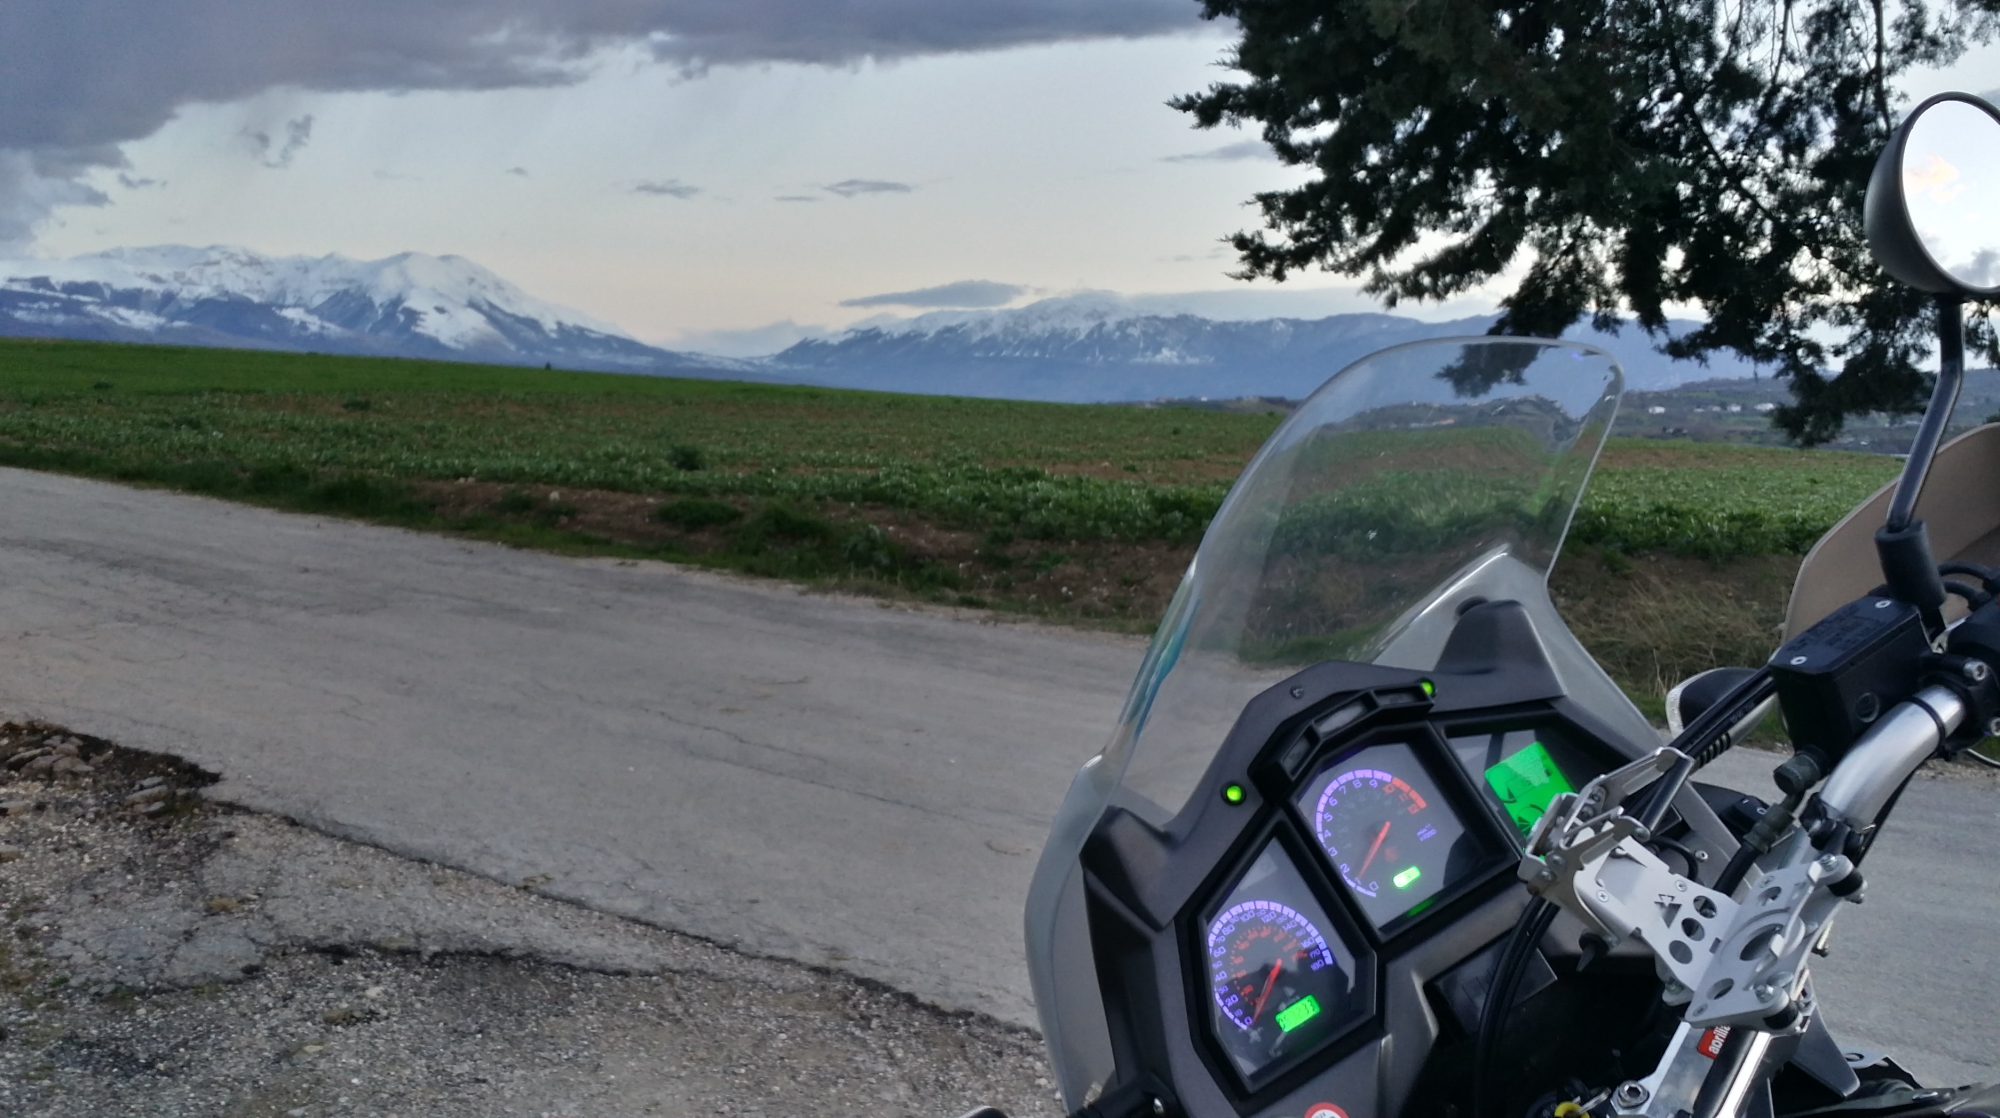
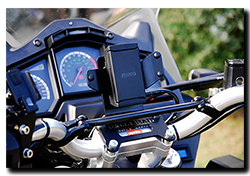
Aprilia Caponord ETV1000 Rally-Raid with Motrag.com base & micro mount for Garmin GPSFor the past six months the eight year old Garmin 2820 has steadily slid its digital cheese off its cracker, forgetting the date and time and generally making a meal of locating satellites. Add to that an annoying habit of swapping screens at random and it’s easy to see why it’s not my best-buddy it once was! Nope …. time for a change.

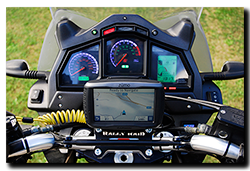
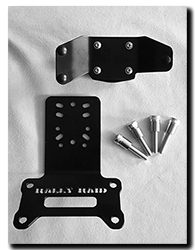
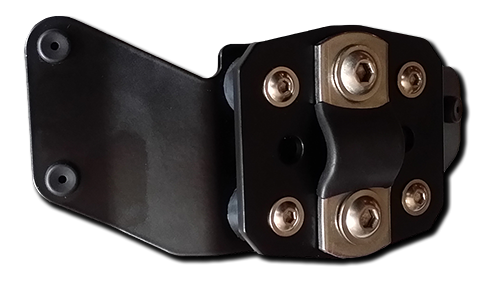
Which ties in very nicely with Manuel at Motrag.com loaning me a Capo-specific mount for the Garmin 590LM to try out. Unlike the Mad-Maxesque contraptions that Aprilia Caponord ETV1000 Rally-Raid with Motrag.com base & micro mount for Garmin GPSTouratech supply, the Motrag unit is clean and simple …. and pretty uncomplicated. The mount consists of two parts, the ‘Base Mount‘ that bolts to the handlebar clamp (all bolts and spacers supplied) and the ‘Micro Mount’ of choice based on the GPS unit to be fitted. This is attached to the Base Mount via four rubber anti-vibration mounts, again with stainless steel screws supplied.

The 590LM comes with its own bracket for powering the unit and locking it in place, this simply bolts to the Micro Mount which provides the extra support for use in rougher terrain. When the GPS is tucked away in a bag and the ‘Zumo’ cover fitted, the mount is much less in-your-face unlike the Touratech one ……. plus a lot less angular, aggressive and sharp-edged, which is no bad thing.

Aprilia Caponord ETV1000 Rally-Raid with Motrag.com base & micro mount for Garmin GPSFirst impressions are excellent, it holds the GPS perfectly and vibration is virtually none existent, the whole thing is unobtrusive and the powder coating looks like it’ll outlive the Capo. The laser cut ‘Rally-Raid’ is a nice touch and just so no-one feels left out – the mount is available with ‘Caponord’ as well! As always, where possible Manuel supplies stainless steel fasteners that match the look of the OEM Aprilia fasteners – a nice touch. Currently Motrag have Micro Mounts for the Garmin 340/350/390 and 590LM with one in development for the TomTom Rider. Base Mounts are also available for the Multistrada (2012-14) and Hypermotard (2014 on). The cost is €38.95 for the Base Mount and €63.95 for the Micro Mount. The Micro mount in supplied with a plate and clamp so it can also be fitted to a cross-bar or a Ram Mount, in which case you don’t need to buy the Base Mount.GPS-bar-clampAt the time of writing, I’ve done about 450 miles with the mount fitted, some on VERY poor mountain roads and everything is fine. The dashboard is still clearly visible (rider 182cm / 5ft 11inch) and the mount angle goes a long way to limiting screen-glare. I look forward to reviewing the mount along with the Motrag fog-lamp brackets in six months time when the Capo has a good few more miles and a winter under its belt.

Stuff …. 6 months and 12 months on

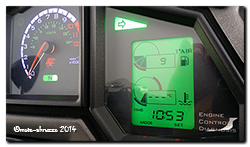
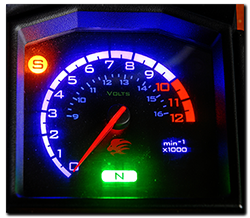
Aprilia Caponord ETV1000 Rally-Raid dashboard - new right-hand indicator repeater!A couple of anniversaries this week ….. firstly the dashboard. Yes a full 12 months since it was finished and put back into the Capo for the last time, resplendent with its new inlay to complement the electronic changes. The auto-dimming back lighting and split indicator repeaters have been absolute winners – I couldn’t go back to a standard board again without missing them. Moving the side-stand and low-fuel lights toAprilia Caponord ETV1000 & Rally-Raid Voltmeter and re-located side-stand light on dashboard accommodate the twin indicator repeaters has had no impact, positive or negative. The voltmeter has been a different kettle of fish …. generally unused as the Sparkbight battery monitor handles voltage feedback when riding around – however it has proved a real benefit during start-up when the dashboard goes through its self-test phase. Now it’s become second nature to eye-ball the tacho needle to see what the battery voltage is pre-start. >12.6v and I know I should get a good kick from the battery!

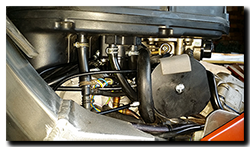
Aprilia Caponord ETV1000 & Rally-Raid MCCruise controlThe second anniversary, although shorter at 6 months and a tad over 11K miles, is the MCCruise cruise control. After a rushed install (not clever) I knew I had a heavier throttle than pre-installation ….. this was purely down to throttle cable routing and nothing to do with the cruise control itself. It simply didn’t like being re-routed behind the radiator, so I gave up and relocated the CIU (cable interface unit) to a new location by the throttle bodies. Now everything works fine – a light throttle and a happy cruise control. It’s been 100% Aprilia Caponord ETV1000 & Rally-Raid New MCCruise CIU locationreliable and functional. As a demonstration of its finesse I ran the bike in 1st gear at 25mph and let the cruise control take over the (100 horsepower!) throttle – all I can say is WOW! I would never have believed that the system could have the sensitivity to operate the throttle with such precision, but it did – up hill, down dale – never an ounce of jerkiness. Ok I admit no one wants to ride around in 1st gear …. but as an experiment, it proved to me that MCCruise have indeed developed an absolutely fantastic piece of kit.

Speedo sensor thoughts

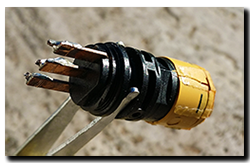
Aprilia Caponord ETV1000 Rally-Raid - Speedometer sensor Honeywell 1GP7001Having chipped away through almost 1/3 of the parts I got last week, I started on the speedo sensor …… unfortunately t’was deader than a Dodo. That presented the perfect opportunity not only to measure it for posterity – but to strip it apart and see exactly how it was constructed. In this case as you can see from the photograph, the sensor (Honeywell 1GP7001) is completely buggered and split at the sensor head …. marks in the body suggest it may have been water damage.

All this leads to the idea of a re-usable speedo sensor, that could be re-orientated for use not only on the Capo, but also the RSV and Tuono. Here’s a MK1 idea using the same Honeywell sensor (about £15/€20) and a few nice stainless screws for that macho-Meccanno look! The idea is that if the sensor subsequently fails, you simply unscrew the case top and solder in a new sensor – bingo! Back in business in 10 minutes flat. 🙂

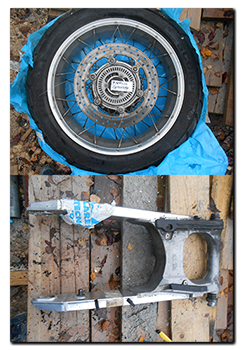
Aprilia Caponord ETV1000 Rally-Raid - 2005 rear wheel & swing armSo is it worthwhile following this up do you think, or should I resign it to – nice idea but ……?

And lastly, the chap in l’Aquila got back to me this week and offered me this pair of little beauties for €50 plus postage. 😀

Apparently the tyre is original and will require removal with dynamite or a thermic lance and the rim has a little scuff damage along the edge (about 5 o’clock in the pic), but I’m sure that can be taken out by someone more competent than I. I’ll have a nosey around the UK over winter and take the wheel back over with me in spring.

When the wheel arrives I’ll model it up, then look at various colour schemes that might (or might not!) complement the fudge/biscuit paint of the Raid. – not that I’ll ever get them done, more just a ‘what if I had dosh’ excercise unfortunately.

Review – Motrag Hella DE fog/spot lamp brackets

Aprilia Caponord ETV1000 Rally-Raid - www.motrag.proI’ve known Manuel Hitz, owner of Motrag for over 18 months although we’ve only met once, at ACIM VI in July. At that fun filled weekend we looked around many bikes and discussed the pros and cons of many upgrades – as well as our own. Manuel was keen to show me some of the items that Motrag make and sell, he then asked if I would try a set of his fog/spot light brackets* and compare them to the Touratech ones currently fitted on the RR. ‘Why not’ I said, ‘It would be jolly rude not to!’. And so a parcel arrived last week. 😀

Off with the Touratech brackets ……
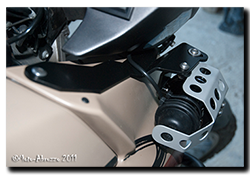
Aprilia Caponord ETV1000 Rally-Raid Touratech Fog LampLet’s start with the outgoing Touratech brackets – each has 4 parts, 8 fasteners and weighing approx. 300g. They are actually made for the Mk1 Caponord and not the Mk2, although the modification to fit them is simply a matter of bending the front mounting tab and drilling a fitting point in the fairing. However having to drill out the rear mounting point was something I hadn’t anticipated. The hole was probably a perfect fit for the screw – before they added the powder coating, certainly not after! Overall the fit/finish is average, (presumably) laser cut 4mm aluminium plate bent to shape and slapped with a coat of satin black – sharp edges, cutting marks and even a ding in one plate left for all to see. The lamps sit very close to the fairing making cleaning a real headache unless you remove the brackets each time, on a plus side however; they are well protected in the case of a fall. 4 years on, the finish is peeling away and they have started to look shabby, so I’m glad to have the opportunity to remove them.

Bottom line – Expensive and build quality/finish is average at best.

….. And so on with the Motrag brackets.
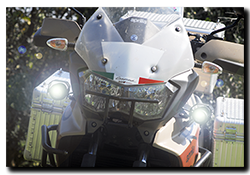
Aprilia Caponord ETV1000 Rally-Raid Motrag fog light brackets with Hella DE lampsThe Motrag brackets each have 3 parts, 6 fasteners (plus a plastic pin) and weigh in at approx. 360g**.
Opening the box was a pleasure. Each bracket wrapped securely, fasteners (all stainless steel and just like the OEM Aprila fasteners in appearance) were bagged and labelled for their intended location and last but not least a set of clear instructions and a parts list.

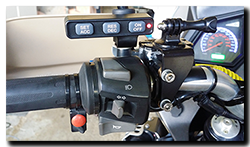
Fitting the brackets involved no drilling or cutting at all and they were on and aligned in less than 30 minutes – ok, the lamps were already wired in of course! In comparison to the Touratech brackets, the lamps sit slightly wider apart (approx. 25%) and slightly higher with adequate clearance for me to get behind them when cleaning the bike. The flat top of the lamp bracket lends itself very nicely to being used as a mount for my GoPro camera, something Manuel is keen for me to try out – so keen if fact, he sent three lamp brackets – a spare for me to drill for the camera mount!

OK so far … a bracket’s a bracket, heck as long as it fits and doesn’t look naff what else can I say? Well let’s save the best for last, the finish, THIS is Motrag’s ace-in-the-hole! Each bracket is exquisite, no sharp edges, no machine or cutting marks in sight. This kind of attention to detail is something we’re just not used to seeing nowadays and it pays dividends …..As the old saying goes:

Don’t spoil the ship for a ha’p’orth of tar

Proverb: Don’t risk the failure of a large project by trying to economize on trivial things.

Says it all really! And so to the bottom line – Excellent fit and finish, well documented instructions and nice attention to detail with the fasteners adding that OEM look. But you know I’ve been thinking, wouldn’t it be nice to either tweak the design, or offer a seperate bracket so that a pair of discreet DRL – Daytime Running Lights could be fitted in the space below the lamp … over to you Manuel! 😉 

Anyway, that’s about if for the initial impressions, I’ll add a new post in 2015 when I’ve had chance to bounce the brackets up and down our road and put them through winter weather to see how the finish holds up – my guess is they’ll do fine. That just leaves me to thank Manuel for kindly sending the brackets for review, we agreed it was to be fair and without bias, if I didn’t like something – say it! All good so far …….

I almost forgot – Manuel also dropped another little present in the box for me, a sexy new cap for the coolant bottle in blackest black, not sun-bleached grey. That little baby has got to be worth an extra 5mph! 😉 AP8104124 if you want to do this speed enhancing upgrade.
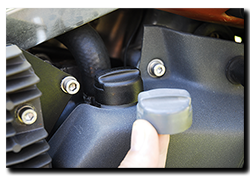
Aprilia Caponord ETV1000 Rally-Raid. New coolant cap!


Notes

*Both the Touratech and Motrag brackets are designed to take the Hella DE spot(Xenon) or fog(Halogen) lamps. Motrag supply the lamps/brackets as individual sets for the left or right, so you can mix fog/spot combinations as you want.

**These are a prototype set in 2.5mm steel and not the production 3mm aluminium, so they are slightly heavier.
Oil pressure switch

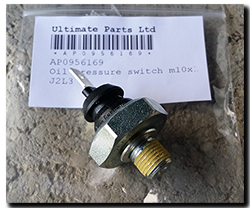
Aprilia Caponord ETV1000 Rally-Raid AP0956169 Oil Pressure SwitchOver the past few months I’ve noticed the oil pressure LED getting dimmer after the initial dashboard power-on-self-test has finished. Then a couple of weeks ago, no oil light at all. If I pulled the electrical connector off the switch and shorted it to the crankcase, the lamp worked fine, so the oil pressure switch was u/s, fubar, stuffed ……….

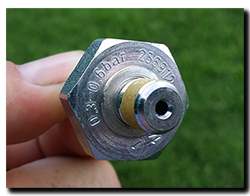
I bought a new one from Ultimate Parts in the UK that came in a plain zip bag, not an Aprilia one and isn’t the same as the original – requiring a 24mm socket instead of the Aprilia Caponord ETV1000 Rally-Raid 0.3-0.6bar M10x1 thread oil pressure switchoriginal 21mm. As such I have a sneaking feeling this is an aftermarket part and not genuine – but sold at a genuine price! Either way, both new and old are marked as 0.3-0.6bar (4.35-8.7psi).

Swapping it out on the Rally-Raid was a simple 5 minute job – remove the aluminium sump plate, disconnect the electrical connector and use a deep 21mm socket on a short extension to clear the sump guard frame and unscrew the old unit. You’ll lose a couple of tea-spoons of oil but that’s all. Simply swap to the 24mm socket to fit the new one, reattach the connector and refit the sump plate – job done. The job’s made all the easier if you do it on the side-stand rather that the main stand as the switch is mounted on the right hand side of the engine!

mccruise ……. active electronic motorcycle cruise control Pt1.

MCCruise cruise controlLet me start by saying that as of now, the cruise control project I’ve been working on has been put on hold indefinitely ………. why?

A couple of weeks ago I contacted MCCruise in Australia about buying a couple of parts to make my own cruise control install go a little easier – off the shelf stuff, not impossible to do myself, but just easier to purchase rather than make. After a lengthy phone call with Tony Guymer, I was convinced to take an in-depth look at the new electric servo kit* with the view to fitting it to the Capo. Unfortunately, of the current 120+ kits they make, none are for Aprilia. I’d have to start with a universal kit.

Now I’ll say loud and clear, here and now …… I’m not keen on the word ‘universal’. So the idea of a universal kit just doesn’t do it for me at all and that goes for a cruise control. Maybe it’s just me, but I hate the one-size-fits-all approach to anything, they never quite look right, not factory-fit enough for me I guess. No, it has to be a bespoke kit to fit the Capo and this is where Tony eventually sold me on the idea.

Aprilia Caponord ETV1000 Rally-Raid. Mock parts and mounts tested for fit, in this case the 'CIU' that connects the throttles.Tony suggested that if I were to get some data from the Capo – measurements, connector types and locations, wiring routes and mounting places for the main units, then between us we could map out a bespoke fitment kit, a kit as close to plug’n play as is possible. Now I like that idea and being able to get involved is the icing on the techie cake for me!

So last week the Capo was stripped …… dozens of photographs, pages of notes and CAD plans for mounting brackets were compiled and sent to the MCCruise in-tray. After a few quick techie emails back and forth, Tony gave the green light on the kit and as you read this it should be working its way across the planet to little old me!  😀

I just hope that after all this time, effort and expense my wobbly-wrist appreciates it! 😉

At the end of the day, they need to sell 10+ kits for it to be viable for them, so to offer a helping hand I’m hoping to have something to show at ACIM in a few weeks time and I’ll also stick a few flyers on the bike when its parked up to nudge a bit of interest.

*Tech details in Pt2. / **Fitment details in Pt2. as well, kind of a Pt2+ I suppose! 

TuneECU Andoid app in the pipeline!

TuneECUI just popped over to the TuneECU website and saw a ‘NEW’ one-liner tucked away below the latest TuneLibrary.dll download link on the front page ……. I almost missed it, did a double take and followed the link in a flash ….. and I’m glad I did!  It certainly looks like those clever folks have been busy, three nice screenshots of an Android TuneECU app. Shown below courtesy of Tom.

So I fired off an email asking for permission to use the screenshots and to enquire if the software would work with the Caponord and although not 100% sure at the moment, Tom’s pretty sure it will …. he just needs more information back from the programmer. So bookmark tuneecu.com and keep watching!

New fault code

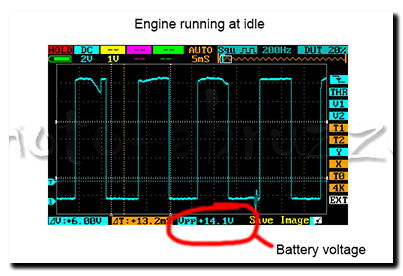
Aprilia Caponord ETV1000 Rally-Raid. A tacho .... but not just any old tacho, oh no. In fact if Carlsberg and M&S made tacho's......A few days ago while doing a bit of investigating for an AF1 forum member regarding the tachometer signal from the ECU, more specifically what would he observe on a multimeter instead of an oscilloscope, I momentarily shorted the tacho line against the chassis with the bike running. The tacho shut down and the bike just kept chugging along quite happily – no EFI light, no tacho. Recycling the ignition bought the tacho back to life and it’s been fine ever since ……… but two points came out of this that may be of use to other owners.

  • Check for a fault code with TuneECU – ‘P1386 Tachometer, open circuit or short to ground’ 
  • When the ignition switch is first turned on the Tacho line should show a solid DC battery voltage – if you don’t see this the ECU may well have shut down the output to protect it. Only once the engine starts will you see this signal:-

Aprilia Caponord ETV1000 Rally-Raid tachometer signal

Anyway, just a quick observation, a new (to me) fault code …. one to file away in the compendium of Capo facts. It certainly proves that the tacho signal isn’t just a ‘dumb’ signal, it’s one the ECU monitors and protects as neccessary by shutting it down.

That’ll teach me!

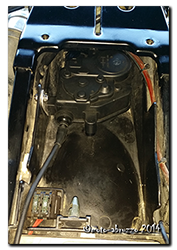
Cruise servo in place at the back of the tool trayHi all ….. a quick post about the cruise control and a word of caution!

I finally got the cruise control servo unit mounted into the tool-tray of the Capo today. A relatively straight forward job, requiring only a minor rework of one of the mounting lugs, a new bracket fabricating and a couple of holes drilled in the under-tray.

The old throttle cable was removed from the unit and a new 6mm Teflon lined sheath fitted ready to run forward to the throttle bodies. It fits a treat down the side of the two 30A fuses and there’s already a cut-out in the undertray for it to run through, talk about made for the job! I’ll refit the old in-line adjuster and look at routing it along the engine/throttle bodies next week. So far so good!!! 😀

And so everything had gone beautifully, with a final firm slap the rear seat was locked in place …………. Only to realise that the key would no longer release it! Yes the dreaded can’t-remove-the-rear-seat syndrome. My fault entirely, as I should have checked the cable-outer was secure at the latch when I put the luggage rack/deck back in place. So here for your info is how to sort out what seems a very daunting situation to be in. Others may have a different technique, but this one worked for me.

Firstly stop twisting the key harder and harder, while bashing the seat in a vein hope it will pop off ….. it won’t ….. The noise you can hear when you turn the key is simply the cable outer and spring moving – NOT the latch.

Secondly, remove the rear deck bolts (x4). Of course you may have to remove a topbox and associated mounting plate first – no one said it was going to be easy! Now grip the deck just above the rear light and lift, at the same time slide something like a ½” drive 12” extension into the gap to hold the deck up. You’ll need to get the extension right the way in, enough to expose the latch mechanism. With the mechanism visible, slide a flat bar or long screwdriver in and gently push on the tab where the cable end is visible – from the rear of the bike, push to the left. And you should hear a satisfying click as the seat pops up. Reseat the cable-outer, reassemble the bike and sink a cold beer, you’ve earned it!

What a muppet …. anyway, I hope you’ve learned a little something from my foolishness and don’t make the same mistake!

……. now to connect the servo unit to the throttles.